A Jig for Drawing or Cutting Ellipses
This clever but simple jig can be used with a pencil to draw an ellipse, or with a router to cut one. April 18, 2006
Question
I have seen jigs used to cut ovals. These are great when you are the one responsible for dimensions. But I need to replace existing ovals. To be more specific, I need to frame some lattice with 1x3 material. I will be joining several pieces together, but the frame must fit into an existing niche, which has oval sections in the corners. What kind of jig can I use that is adjustable? The tops of the ovals have a 9.25" radius, and the sides have a 13.5" r. It is 22" wide (top), and 25" tall (sides). I would like to use a router to make these templates.
Forum Responses
(Cabinetmaking Forum)
From contributor L:
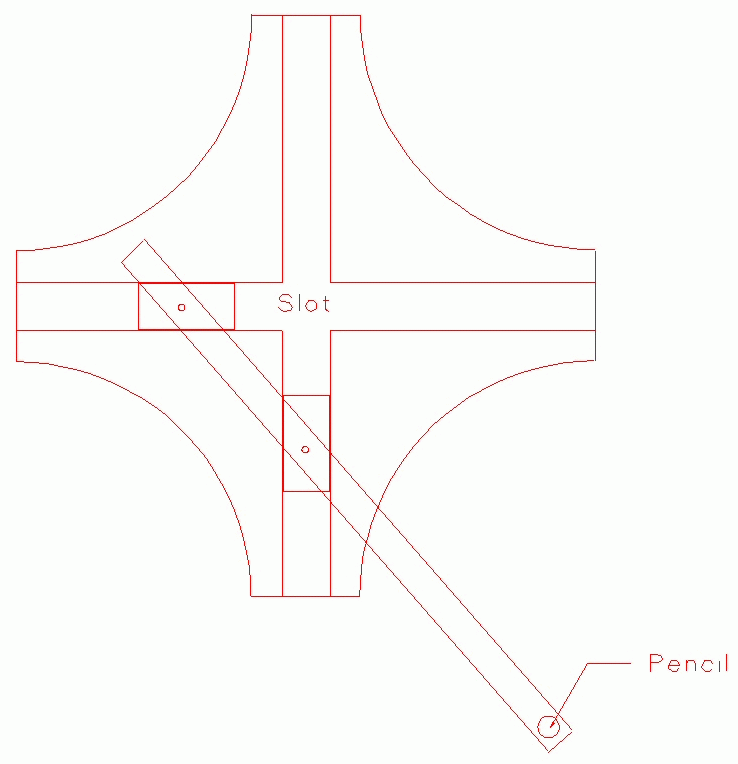
Here is a drawing of the jig I use to make ellipses. To use it with a router, just replace the small stick with a pencil in it with a 1/4" thick piece of ply and attach your router to it. Varying the distances of the nails on the stick/ply will make the ellipse taller and/or fatter. This is a precision way to make repeatable ellipses of the same size. You can make this jig as small or as large as you need it. The best way to make the slots is with a dovetail bit or similar. That way, the moving blocks can't escape the jig. For simplicity, I usually just make them with a dado blade. By the way, start off with a square block, cut the grooves, then cut out the semi circles. This keeps the jig from getting in the way when you are making smaller ellipses. This also makes a great toy for a small child. Instead of a pencil, put on a handle - I call this a do nothing machine.
Click here for full size image
From the original questioner:
Thanks. This is the jig that I am familiar with. Any idea how to set this up for these radii? The combinations are infinitely possible.
From contributor R:
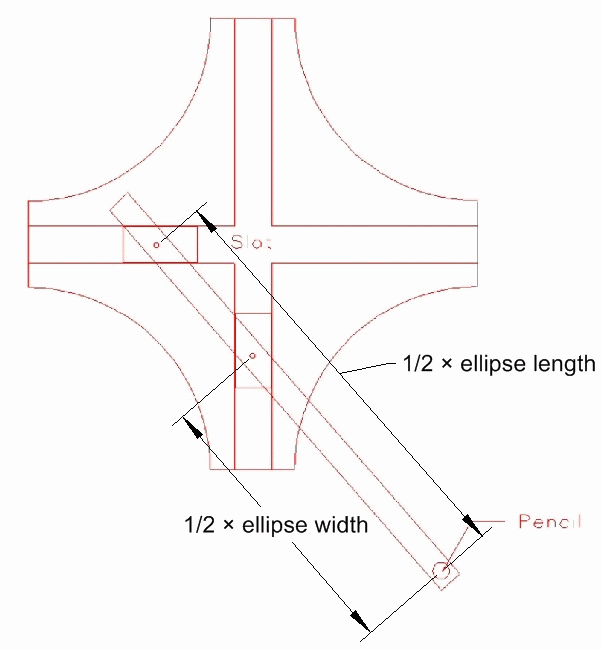
The short distance is half the width of the ellipse, and the long distance is half the length.
Click here for full size image
From contributor R:
I actually made the shape of my jig elliptical, and just a bit smaller than the ellipse I was cutting. That gives you better support for the router as it travels around. There's a bit of weight there, and you don't want too much clear span for the 1/4" ply. Also, as I understand it, that jig cuts a "true" ellipse. This may or may not be a good thing depending on how "true" the existing opening is. You may want to try to make a template of the opening, or cut a sample before you commit yourself.
From contributor L:
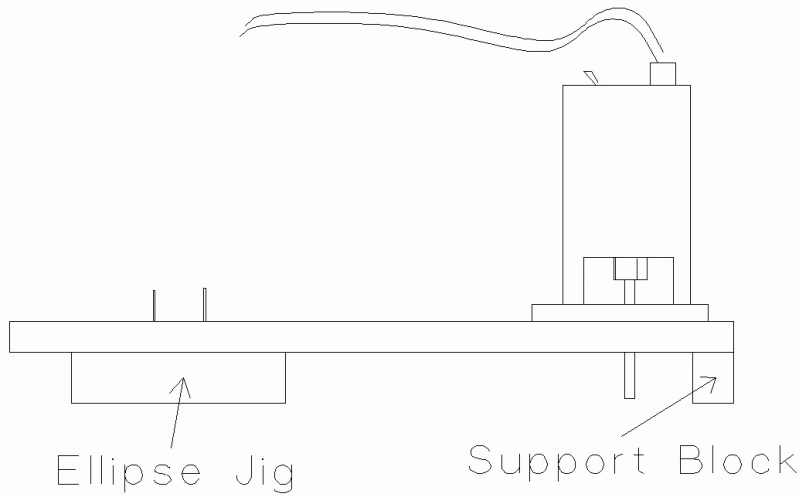
When using the jig with a router, you can use any thickness of ply you wish, as long as your router bit is long enough to accomplish what you need. Also, if you put a block of wood on the end of the ply on the underside of the router end, the thickness of the jig, you won't have to worry about the strength of the ply, because it will be supported. I do this also to keep the bit cutting a 90�. Thanks for the refresher course. I had forgotten how to get the dimensions off the paper and onto the jig. As soon as I saw it, it was just a big "duh" moment for me.
Click here for full size image
From contributor R:
Good idea. Not to be picky, but doesn't the support block have to be between the router and the jig? If you pre-cut your ellipse (as I do), so that the router only has to trim, then your block is riding on air. If you don't precut, the block is riding on the offcut, which depending on how you have the piece fastened, may fall away, or at least move.
From contributor L:
I usually don't precut my ellipses and I don't cut through all the way. I leave about 1/16" to 1/8" and stop. Then I'll take a jigsaw and cut it out, then I run a flush cutter around the piece to clean it up. Sometimes I put two support blocks under the router, one in front and one in back for more support where 90� is critical.