Question
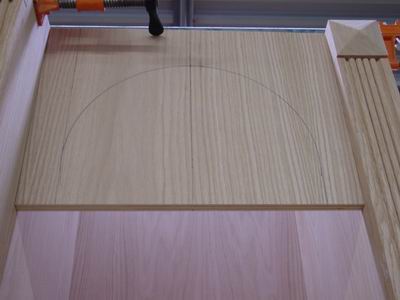
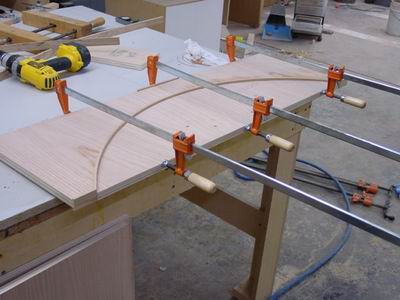
If I soak a piece of 3/16" solid wood, will it wrap around this radius? Is there a better way to do this? I will have a piece that is 1" wide and 3/16" thick and I will plow out a dado in it so it caps the plywood in the radius.

Forum Responses
(Solid Wood Machining Forum)
From contributor R:
What is the actual radius and species of wood? Will the curved piece fit on the inside of the curve? I would prefer to glue bend a couple of thinner strips myself.
Instead of bandsawing the curve out, have you given any thought to using a trammel base on the router to cut the curve? And as I am writing this, it occurs to me that you may not need to soak the 3/16" strip. If you use a trammel with a 3/16" router bit, you can use the cutout to simply glue and clamp back together with the strip of wood in between the two routed pieces. I actually do this type of glue bending often.
I probably could get away with edge banding it, which is about what I'm going to do, because I'm getting really frustrated.
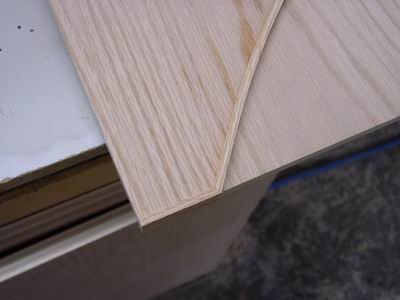
I did do the 3/4" x 3/32" dado.

Here is a closer view.

Wetting solid wood does not really make it easier to bend. Green wood bends more easily than dry. Steamed wood bends much more easily. I would tend to glue a few pieces together to make the curve. It takes three pieces to hold a curve, by the way. Two will not do it. My foreman is a boatbuilder and he steams 1 1/2" oak. He would say I'm nuts, but I would say I don't have to guess at springback like he does.
By the way, species is important when you are bending. It looks like you are working in red oak, which is a good bending wood.
If you are looking to make a precision cut, make a template with a router trammel, then saw the straight parts with a carefully stopped table saw, then fettle it in by hand. Use a follow bearing or a template follower to transfer the cut. If you make a mistake that way, you don't screw up your grain match. It's also good if you are making multiples.
If you go the solid wood route, bend a longer piece than you need, and use a form with more curve to it than your part actually has. You will find that the ends do not bend as well as the middle does, so you need to make more middle and cut off the ends.
I use a "steam tube" fabricated using a 8" x 72" metal tube resting (fixed to) on a 5 gallon metal can lid then placed atop the can with enough H20 in it to produce steam for 15 to 30 minutes. The tube and water can are placed carefully over a propane heater (the type used by spacklers and the like to warm a house, although any safe and suitable heat source will work). The heater causes the water to boil, at which time steam is released through holes drilled in the metal can's top. I sometimes put a loose fitting cap on top of the tube (also with holes) to regulate to some degree the water loss. Sometimes it is necessary to flip the banding to steam the piece more uniformly. I will do this after about ten minutes. This can be used in a production environment as well (with the correct safety measures and proper supervision). The eight inch tube will hold a generous amount of banding stock in this length. I use Titebond 1 or 2 as adhesive.
Another note: Producing steam in a sealed container can be extremely dangerous and caution should be exercised at all times if instructing employees to fabricate steam tubes. Failure to properly vent the tube and container can have disastrous results. There is little room in most woodworking shops for creating banding cannons. Always steam in an open area where ventilation is plentiful. Additionally, adding humidity to a controlled environment can have other consequences, such as short term additional electrical consumption (A/C units will run longer), moisture spotting of sensitive veneers (close proximity) and machine rust.
Well, the process is done. I don't even want to begin to explain how I made the tight radius pieces work. I had a few words to shout out as it took forever and a few pieces with little success.
Next time, I'll certainly do things differently and charge a hell of a lot more.
The sad thing is that even though it overhangs the face 1/8", you can hardly see it. At this point, I should have just edge banded it and called it a day. All I can say is that it was quite a learning experience.
What really sucks the most is that when the customer looked at the job, he didn't even take note of the solid wood being bent. He looked at it as if they're just arches. Sometimes I wonder why I take extra steps making sure something looks really nice. I could have cut the arch out with a jigsaw, left that edge raw plywood, stained and finished it and he would never have known the difference. On a different note, you never know if one of his neighbors is an ex-cabinetmaker or carpenter who would be able to tell whether or not a good job was done.