Question
I am starting a new kitchen cabinet business and have just completed building a 2000 sq ft. shop on my property. I have worked for others making custom cabinets, not kitchen cabinets, but libraries, wall units, etc. I’m still making boxes as we say.
I need to know about a couple of aspects kitchen cab construction in order to make an informed decision regarding what is best for me. First, I will be making all framed cabinetry with 3/4" veneer ply and solid FF's/Doors and am wondering if dadoing is something that is advantageous with FF's or not?
Is the 1/8" overhang I see on FF stiles in box stores an asset when installing (scribing) the cabinets? Is it not too time consuming to do this? How does one dado the stiles so they would also fit over the tops/bottoms etc? I need a simple explanation of how it is done.
Secondly, if I use 1/2" ply for backs, would I be able to not use hangers and rely on the thicker material for strength? How much should one rabbet out the sides for the backs? Is it best to have an inch for scribing the back of cabinets, or would I be tearing the backs off if I used them to hang the cabinets with such a deep rabbet (deep recess behind backs?)
I like the idea of a detached toe kick but it would not allow me to dado my bottoms and would take away a lot of strength in my opinion. Any thoughts about that would be appreciated as well.
Forum Responses
(Cabinetmaking Forum)
From contributor J:
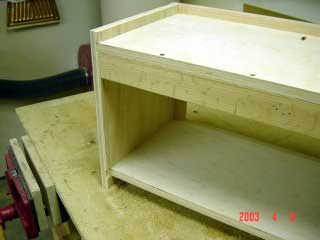
1. Take the time to dado your face frames and cabinet sides. This will save you tons of time and headaches with alignment issues. Your cabinet bottom will fit into the dado and your top can as well or you can drop your sides down the thickness of your top and set it on top of the sides.
2. I leave a 1/4" scribe on the sides of every non exposed edge. (This works well with 1/2" sides). Cut a 1/2" groove in the frames. On a 3/4" exposed end, cut a 1/4" rabbet out of the side and it fits nice and flush.
3. 1/2" backs are strong enough alone to hold up a cabinet if constructed correctly. Either screw and glue them onto the backs of the cabinets or groove your sides to accept them. If you groove them into the sides, you will have a built in scribe.
4. Separate toe kicks give many advantages mainly in material savings. Most of your off-cuts can be used to construct ladders to go under the cabinets. You will also never run into the cabinet not fitting through the doors or not being able to stand them up once you get them through the doors. In my opinion, it takes more time to build this way, so you have to weigh your options.
5. I don't think that the dado strength is an issue in a base cabinet situation, as all the weight is transferred directly to the ladders. I've built both ways, and at the moment I am not building my bases separately. I don't know why for sure - I guess it's just one more thing to build and store and handle and deliver.
I build with 1/4" backs and a nailer at the top. I like to dado my sides in.

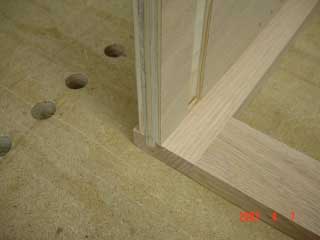
Here is a dado.

If you're going to dado something, I would choose to dado a back before anything else. You can dado something using a router, table saw, or radial arm saw. If you're going to be serious about this, look into purchasing a table saw that runs off of 220, vs. 115/110 - plug into a regular outlet. I have two Powermatic 3hp saws and have never had any issues with them. Expect to spend a hair over 2 grand for one. The only thing I don't like about the new design is the white polymer that they're using for a fence now, because it creates shadows, but it works just as well as the Biesmeyer from Delta.
Just a personal opinion, it seems as though you've put the cart before the horse, if you're asking how to construct cabinets and you've already built a building on your property for this. I hope you put enough juice into your panel to withstand a good amount of machinery that requires 220 and you've insulated it well.
In regard to finishing, the way you're going to heat your shop can be another issue too, because of the flammable chemicals. There is so much to consider before building a shop, so I do hope you've taken this and other things into consideration before you did this.
We do need this sometimes during installs and can also apply the finished 1/4" skins behind this scribe. We put a couple biscuits in the joint were the bottom meets the ff on uppers to keep a clean look below and pocket-screw on bases. We use detached toe kicks. As stated - strength is not an issue if the floor of the cabinet rests directly on the kick frame. Our lower face frame rails are only 3/4" wide to make this possible.
The next kitchen I will modify my design to dado the back (.25 pre-finished) and still have room for a .75 nailer top and bottom. I also modified the inside width to match the opening of the face frame. The inside box functions like a frameless and mounting the slides have been simplified. I loose some space between cabinets but not much. I think the cabinets look much cleaner with the frameless look when the doors are open.