Creating Wavy Surface Patterns in Plywood with CNC Equipment
Tips on how tooling and programming to get that desert-sand-dune look on a sheet of plywood. September 8, 2007
Question
How can you make a router pass through the face of the wood so that at each pass, it cuts to form a radius within the face? I need to make a profile on the face of the wood that looks like waves.
Forum Responses
(CNC Forum)
From contributor T:
If I understand your post, the easiest way would be to generate a 3D surface and machine the surface. If you have to do it manually, it would be tough, but you could use a series of XZ and YZ arcs to do this also.
From contributor R:
Archsystems.com has a couple choices that might be useful to you, if your product is paint grade. I know that there are several companies here in the US producing these types of products. Maybe it will help... maybe not.
From contributor O:
I don't know if this is what you're looking to do. I did it using ArtCAM, but any V-carve software should be able to do it. I just connected a string of ovals together and cut it with a 1.00 ball mill.
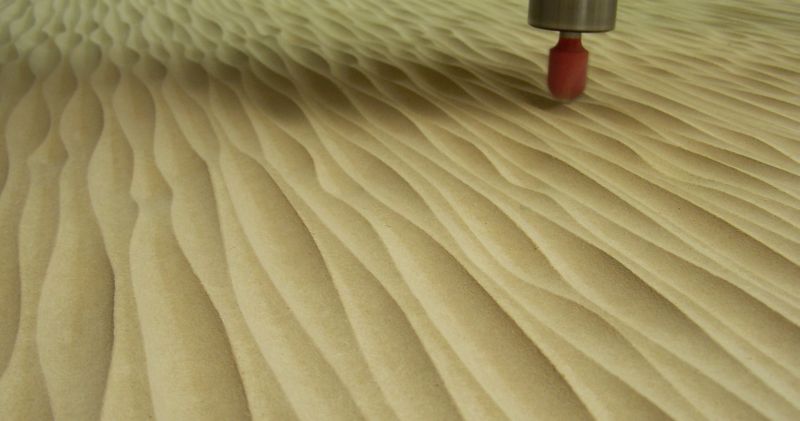
Click here for higher quality, full size image
From contributor B:
A newer company called Vectric offers software called Vcarve Pro. It's gaining popularity in the sign industry. I've seen people create texturing toolpaths with the software and Vectric offers tutorials and pictures of how it's done with a ballnose cutter.
From contributor E:
Contributor O, I�m new to ArtCam, just installed it this week. I know ArtCam has its own forum where I might find something similar, but could I be audacious and ask you to share the file where you did these cutting radiuses?
From contributor O:
If I could, I would. I designed and manufactured it for a customer who markets the panel as a product. To have a file out there exactly the same would violate our business relationship.
To achieve the same look, you need to:
1) Make a bunch of ovals of varying heights and close to the same width.
2) String the vectors together in a row length-wise so that they are overlapping each other.
3) Clip the vectors with those little scissors on your "assistant" page.
4) "Join" and "close" the vectors so you have a single row.
5) Use V-carve toolpath to cut. The wider the vector, the deeper the cutter will go.
For the 4x8 panel pictured, there are 15 different rows. The same 15 rows were also rotated 180 to make 30 different forms which were somewhat randomly laid out. Make sure to overlap in a way as to not leave any uncut area. It takes some time to get it dialed in, but worth the effort. The trick is making the edges match for a continuous look when the panels are butted together.
From contributor E:
With some trial and error, I have a feeling I�ll get there with those valuable tips and techniques you shared. Thanks for your time!