Crown Moulding for Frameless Cabinets
Installers explain various ways to apply crown moulding to the tops of frameless cabs. November 10, 2006
Question
I usually build arts and crafts style furniture but soon I will be building a built-in entertainment wall unit. I am thinking of using frameless construction, but I was wondering what the best method to attach the crown moulding would be. The moulding is 3 1/4" wide with a 25 degree bevel angle.
Forum Responses
(Cabinet and Millwork Installation Forum)
From contributor K:
What I do is make an L shaped strip that is 2" H x 2" D and has a 3/8" radius at the bottom. I mount this to the top of the cabinet pulled out 5/8" - 3/4" so that the crown gets attached to that and starts at the fronts of the doors. This way there is a 1/8" space between the 2" filler and the doors that gives a nice reveal and also keeps the dust off of the tops of the top doors.
From contributor H:
I run the sides of my frameless cabinets up say 64 mm to 96 mm creating an "ear" on top. To this I fasten a flat trim piece that is edge detailed on the bottom (saves making the "L" shaped piece). The edge detail would cause this piece to not be flush with the doors at the joint which will make door line-up easier. I hold my applied finished ends even with the doors and return the top piece around the end. Apply crown in the normal fashion. There is also a top mounted crown if it doesn't go to the ceiling. This is way easy as it eliminates the "ears" and sub part, and fits are not as critical. The trick is to keep it simple.
From the original questioner:
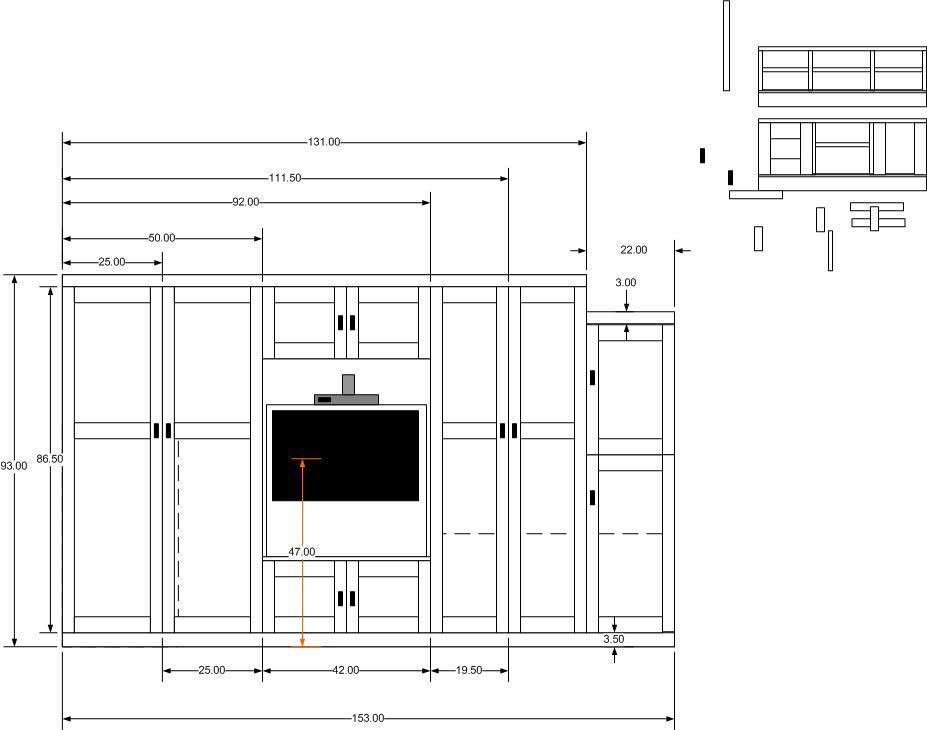
Here is the unit I am planning to make. The left hand door is just to cover the hot water tank. I was planning to have the top and bottom center cabinets about 3 or 4" deeper than the rest and the right hand cabinet 3" shallower. The right one has to be shorter to fit under the cold air return. I was thinking that frameless would be quicker, but will there be more issues for fitting the cabinets and the crown moulding?
Click here for full size image
From contributor B:
We build a lot of these and add a double sub crown to the top. That is a 2" high strip run across the top of the cabinets. We usually have columns on the ends that stick out 3/4" further than the cabinets, so we add a second strip to the aforementioned one to even things up. Attach crown to the second strip and wrap around the ends.
From contributor E:
Another method I have used in the past is to make your box taller (1/2'' from ceiling) and leave the top down the desired amount. Then add a front nailer between the sides. You can then add as many layer of moulding as you wish. If you leave your doors down a little from the top you can get a reveal and have the edgetape finished and not the nailer.
From contributor S:
Here�s what we do � it�s really strong.
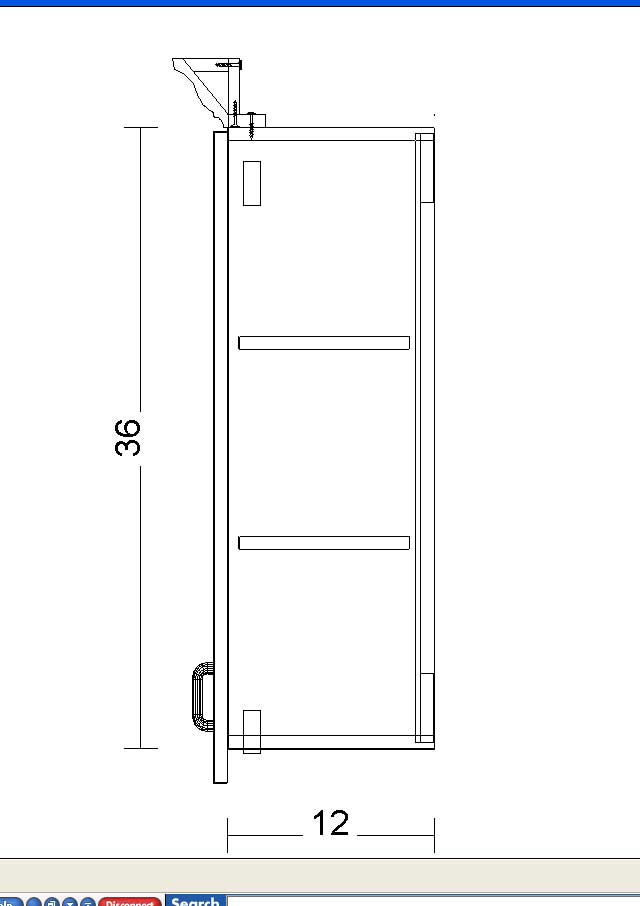
Click here for full size image
From contributor F:
Although we rarely do residential jobs, when we run 42's up to the ceiling we put what we call "crown rail" inside each cabinet, about 4", and run our crown off of it. We then hold our doors down about 3 7/8" leaving a nice reveal and a good finished look.