Dealing with Rough Edges in Table Top Glue-Ups
Advice and suggestions for gluing up table top when the outside boards have "live edge" irregularities or bark. January 8, 2010
Question
I need to start gluing up some dining table tops. I have no experience with this. The kicker here seems to be that the outside two boards have natural edges (bark has been removed). I made a little wall clamp system with 3/4" pipe last week. Kind of did a dry run just with a couple of boards. The angled edges of the natural edges are giving me fits. I'm not really able to clamp properly and can't get the faces flat.
The table tops are 4' x 8', species is walnut, planed thickness 6/4, typical board width 7", planned adhesive Titebond II, considering purchase of a Festool Domino. Any suggestions?
Forum Responses
(Furniture Making Forum)
From contributor T:
You don't need Domino, splines, biscuits, or any other method of reinforcement on a simple glued edge joint as described. Run the boards over the jointer, or plane them by hand, until they fit as close to perfect as your patience and ability will get you. Your problem is clamp pressure against the irregular natural edge. One thing I use when clamping irregular stuff is homosote pads (homosote is 1/2" thick grey tackboard material that a panel supplier is likely to carry). It's firm enough to clamp hard against but soft enough to compress somewhat. Sometimes I'll cut a little V-notch across the homosote pads so the notch grabs part of the irregular shape. It even bends somewhat. You might also try U-channel pads. Glue or nail up a length of U-channel that will slip comfortably over the 6/4 material. Cut short lengths for each clamp, and counter-clamp them down to the outside boards. Now you have a square edge to clamp against. You can also apply two sets of cauls or battens across the assembly to keep everything flat under clamp pressure. This is all edge gluing 101. Preparing good jointed edges will minimize the clamping pressure needed, so don't skimp there.
From contributor S:
I have to agree with contributor T. 6/4 is more than enough glue surface. If the rough ends are what's creating static, you could glue up everything else and attach the two ends after the fact. Maybe easier to deal with the irregularities.
From contributor J:
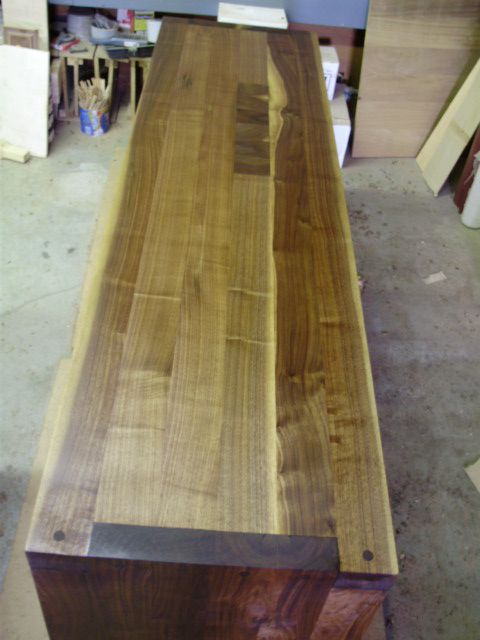
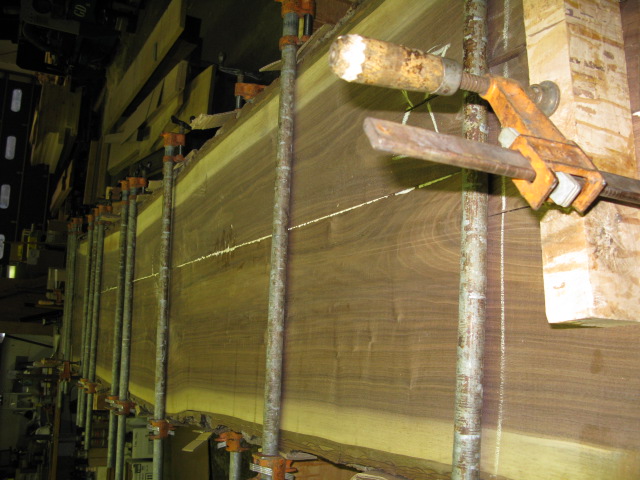
The top shown in the picture is a two-piece glue-up with live edges. Simply stated, thickness plane top oversize, gang rip edges to be glued, choose your glue, clamps every four inches with cardboard or wedge-shaped protectors on live edge side, secure clamps, let dry, thickness plane and/or thickness sand to finish size.
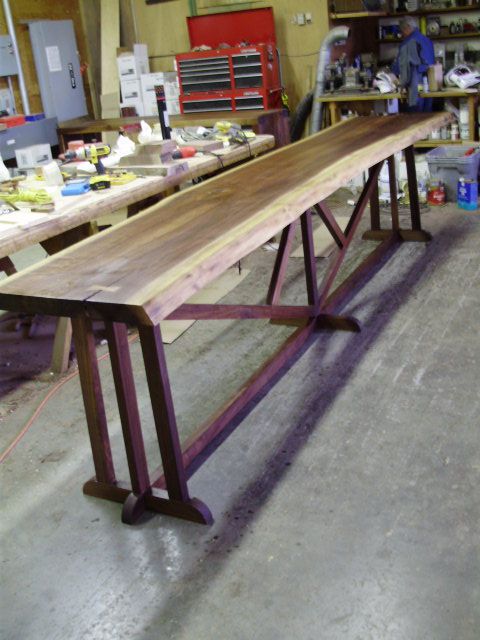
Click here for higher quality, full size image
Another picture of glued up tops and leg structure.
Click here for higher quality, full size image
Click here for higher quality, full size image
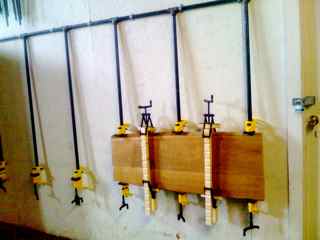
Froom the original questioner:
Thanks for the prompt replies and good info (beautiful work, contributor J). Here are a couple of pics of my first dry run set up. I think this will shed some light on multiple problems. In this pic you can see my first attempt at the natural edge clamping issue. I'm eager to learn as many details as you'd like to share (and pics of the clamping process would be great as well).
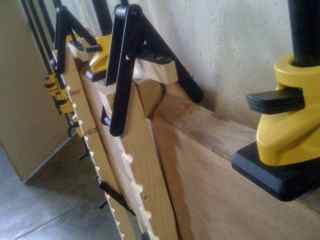
Here's a picture of the wall clamp I put together last week, with the little test dry run attached.
From contributor B:
That's an interesting wall clamp system. How do you check if the joints have come together on the back side of the clamps? The easiest way would be the U-shaped clamp pads with sandpaper glued to the inside faces. Clamp them to the edge of your boards wherever there is a clamp and you should be fine.
From contributor R:
Could you use pocket hole joints for the outer two live edge boards? I know some clients would find this aesthetically unacceptable, but most would be perfectly fine with it, particularly if you plug them.
From contributor K:
I have used band clamps/ratchet straps with great success on live edge glue ups. Be sure to put scraps of cardboard between the straps and live edge to prevent dents and use cauls to keep everything flat.
From the original questioner:
Unfortunately no pocket holes here. I'll give ratchet straps a shot. I think maybe a big part of my problem is the two
Rockler clamps. They just aren't handling the natural edge angles very well. I'll make some cauls to use instead.
From contributor W:
You could always screw on a couple of clamping rails or blocks, on the bottom side of the top, and remove them later. Even if you do this, I would recommend that you still clamp the top side of the table to equalize the pressure (for every clamp you use on the rail under, put one alternately on top, to stop the whole top from bowing).
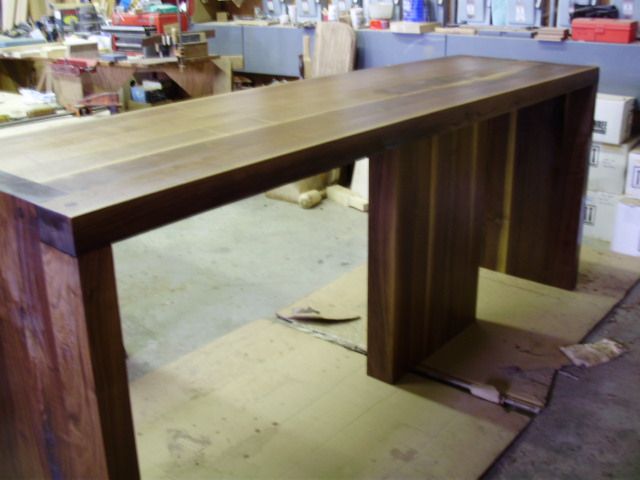
From contributor J:
Here's an image that might help.
Click here for higher quality, full size image
From contributor M:
I agree with contributor T. There is no substitute for strong fundamentals! Assuming that the edges are properly joined, i.e. square and straight, the thing should build itself. I've had good results using inner tubes as a bladder bag system
From contributor A:
One thing that I noticed is that in your photo, your wall clamping setup only allows the bar clamps to be applied to one side of the panel - is that correct? Note that in contributor J's photos and with my own glue-ups, the clamps alternate sides, thus giving a balanced compression from either side. Clamping from one side tends to really give you some bad cupping. Also, if you are using a table saw or joiner to surface your edges, be sure to alternate faces to fences. That way you cancel out rather than compound any issues with having the knives/blade parallel to the fences.
From contributor J:
I have a different point of view. In my shop we do between 3 and 5 of these a month and our system as pictured works fine. The wood will move whatever you do and you have to devise a system, depending on the base, that allows for the changes. Orthodoxy, and one way of doing things, doesn't always work.
From contributor A:
I wasn't being critical of your system, I was just pointing out that you alternate clamps. I agree, different situations require different methods. However, you always have a basis for fundamental joinery to build on and go from there.
From contributor O:
Why not just clamp a batten on either side of the wavy edge and then clamp to that? Joint the edges to be joined ever so slightly hollow and that will also reduce the amount of clamping at the end of the board.