Question
I have been designing a large crown buildup for a 19' ceiling. I have settled on an 8" Boulder crown (45 deg spring), 3 7/16" Santa Fe base ceiling extension and 4 1/2" Howe casing wall extension (all Kelleher MDF).
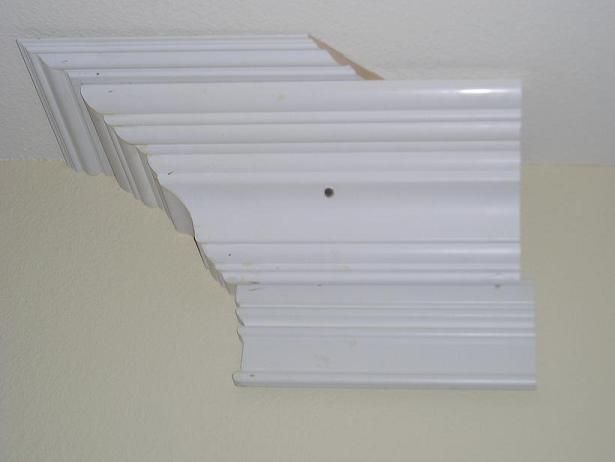
Customer is happy with the ceiling extension as shown here, but does not like the wall extension and I agree. So I modified the casing on the wall extension as shown in the following pictures.
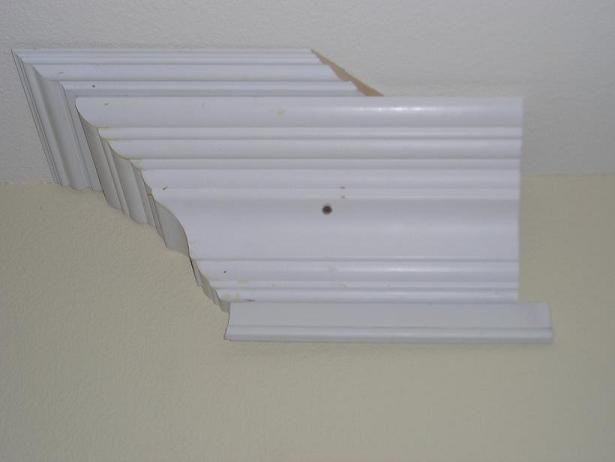
Customer says that last mockup is starting to look better but not quite there. I'm no expert on crown buildups and molding design theory, but I made this based loosely on some examples. I think the top extension looks good because it mirrors the beads in the crown almost exactly. I chose the wall extension because I noticed that many classic wall extensions have simple single or dual bead profiles. Note that in the second picture there is a bead right next to the bottom edge of the crown, which is what makes the second option less attractive in my opinion (hard to see). In the third picture I removed the top bead on the wall extension, so we are left with just one bead at the very bottom.
Assuming you're following my reasoning and agree that the last option looks best except that it may need more width (i.e. more rise), I think the next question is how wide should the wall extension be? I think it's a little short right now. I need to rip some MDF sheet and apply that bead to gain more flexibility in width, but might a good starting point be to equal the width of the large cove on the crown, or some fraction (0.382, 1/2, 0.618 etc.) of the crown width or total buildup width? Also, I believe that the rise should always be more than the run.
There is also the question of exactly how to make the wall extension for the final install.
Second option with top of casing removed leaving just 2 beads.

Third option with just single bead at bottom of wall extension.
I noticed that Gary is using this exact crown molding on page 148 of his first book and he is also using a wall extension. Hard to tell what it is, but it looks to be about 5" wide. Of course, does not mean he was the one to specify it.
Forum Responses
Anyway, you're on the right track by trying to figure out these proportions mathematically. I personally believe you're always safest starting out with the Golden Mean, or a ratio of 1.618. It works out to a little more than "half-again" and a little less than two thirds - kind of like where your first picture (and first instinct, I suspect) is. I'm sure there are folks out there who would be willing (and better able than I) to discuss the importance of the classical proportions you alluded to, so I'll leave it to them, but rest assured that it's time tested. As I said, it�s a good place to start. There�s (thankfully) no law which says you have to use it � take 8 � X 11 paper, for instance. But I also believe you can�t go wrong with it.
I�m in line with contributor L on detail, too. I�d also, as a guy who has scribed more than enough crown around bows, bellies and hiccups, like to suggest that you give yourself a little more reveal between elements if you can. That way it takes a little larger hump or bump to make you have to get back off the ladder to scribe that piece of monster crown. Especially at 19 feet...
MDF moldings are okay, but never stacked directly on top of each other. That breaks two good rules that we learned form Jeff Burkes when he scanned the "Theory of Moldings" (if you've ever been curious about what's right and what's wrong and why, it's worth the read!).
One, you have to avoid repetition, and MDF molding are nothing but repetition - all in one profile, so stacking one on top of the other is a sin.
Two, as others have already said, moldings are only beautiful if the curved profiles terminate at right angles to flat fillets - it's the large or wide or tall frieze and soffit boards that really make a cornice a thing of beauty. Take a look at the built-up cornice on the WindsorOne site (windsorone.com). That's as good a starting point as I can recommend, but there are lots of directions to go from there. The reason that works is because it's modeled exactly on classical proportions and Greek Temple design, right down to the cove on the back of the frieze board - yeah, on the back, not the front. But what I think is most cool... is that you asked the question in the first place.