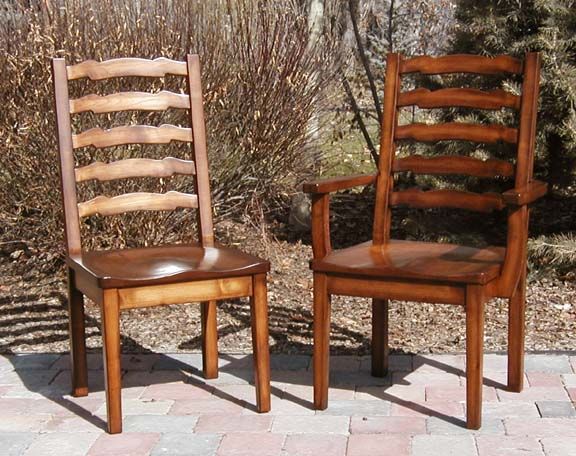
Dishing Out Chair Seats
Here's a whole slew of ideas for crafting solid wood chair seats. October 17, 2012
Question
We have a commission for 6 all wood chairs to go with an all quartersawn white oak table we just made. Our concern is how to efficiently dish out the seat blanks in white oak. Scoops and curved planes and similar tools seem fine for walnut or mahogany, but quartered white oak worries me. Any good ideas out there?
Forum Responses
(Furniture Making Forum)
From contributor C:
I seem to recall reading about one guy who used a belt sander with a lump under the platen (a bandanna if I recall). Would need a skilled touch, but so do scoops, etc.
From contributor K:
Being a small shop, I would go at it with right angle grinders, fitted first with Lancelot cutter, followed by really coarse sanding disk. Then of course working on down to the finer grits.
From contributor H:
Sounds like a job for Forstner bits and depth guide in a jig of some sort. Then you could do the angle grinder Lancelot thing easier and with a greater amount of accuracy.
From the original questioner:
I appreciate the input. I think we will try the Lancelot and Highland Hardware's Sabuur tooth carbide donut with a grinder to rough it out, then RO sanders.
From contributor D:
Pantograph. Make one that is heavier than the router-craft stuff, and able to move in 3 dimensions. Make one seat by hand as your pattern, then use the pantograph to transfer the pattern to the blanks via a ball type router bit. This will keep everything the same from the start.
From contributor W:
The angle grinder in various grits. First work out a grid to drill depth guide holes. The more, the better to define the bottom of the carved out area.
From contributor J:
The carbide donut is awesome. I use one to scoop spoons. I've made hundreds of them and the thing just keeps cutting like the day I started using it.
I would definitely rough out with the Lancelot, aka the wood butcher. It's scary at first, but you'll get good at it. I think I could pick my teeth with it!
From contributor E:
I would use an angle grinder, but would not use a toothed blade on it - those are too dangerous. Abrasives will get the job done, in my experience.
From contributor S:
CNC.
From contributor U:
I've done dozens of these using nothing more than an angle grinder to rough out the profile, and a random orbital sander to finish with. I start with a 50 grit disc in a 7" grinder, then go to 100 grit disc. Take out the grinder marks with a 150 grit random orbital sander and you're done. I use a vacuum clamping jig to hold the seat blanks down. That makes it quick to swap the blanks between grit changes. Once you've got the hang of it, it takes about 20 minutes apiece to do a seat.

Click here for higher quality, full size image
From contributor H:
Nice looking chairs!
From contributor N:
The best way to accomplish this with minimum hand grinding is to cut the pieces you want to glue up for the seat making all glue joints and laying out the pieces how you want to glue them and mark the bottom. Now clamp them together dry, mark out on the edges how you want to dish out the seat, unclamp and cut with a band saw so most of the material is removed before glue up. Glue the seat blank and use whatever grinder or sander best suits you for the finish work.
From contributor Q:
Agreed the last post is probably the best way to achieve the results. A tool I have come across is an Arbatech attachment to an angle grinder. That will take material out very quickly for shaping. However, do be careful - they have a reputation for breaking up!
