Face-Frame Bookcase Assembly on Site
Here are several suggestions for how to assemble a built-in bookshelf cabinet on site, focusing on face frame issues.July 29, 2014
Question (WOODWEB Member) :
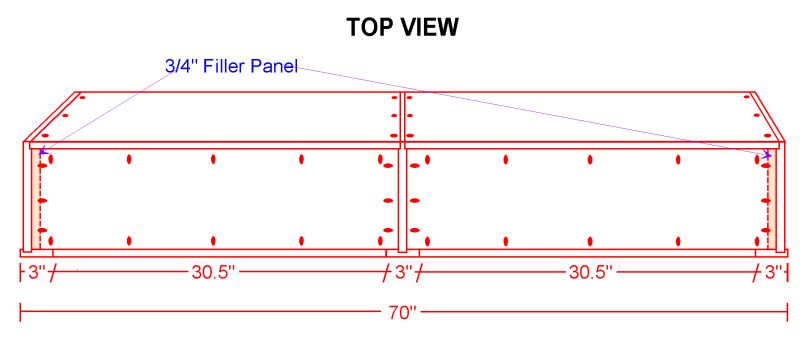
I'm building built-in bookcases that are 35" wide and butt up against each other. I need to make them modular for ease of moving, painting and installing them. Each bookcase side is made of 3/4 cabinet grade plywood. If I butt them together how do I handle the face frames? I plan on making them 3" wide which gives me a distance of 2 1/4" from the edge of the face from to the inside of the bookcase on each end, but only gives me 3/4" from the edge of the frame to the inside of the bookcase where I butt the them together. Having equal face frame widths on the ends and middle looks good but will the difference in distance from the edge of the face frame to the inside of the case look odd? Should I make the face frames separate for each bookcase which would make the face frame stile between the butted cases 6" wide? I've included a drawing showing both layouts.

Click here for higher quality, full size image
Forum Responses
(Cabinet and Millwork Installation Forum)
From contributor J:
My take on it is the bookcase on the left looks more appealing. To keep this at a 3" ff in the center rip the center style to 1 1/2 on the inside edges of each side. This only allows a 3/4" where you butt the together. If it matters that much just inset the wall side on each so you only have your 3/4 on the wall side and build up the center sides with spacers and an extra piece of ply on the inside for you 3/4 inset. It will make them heavier to move but correct for the insets.
From contributor O:
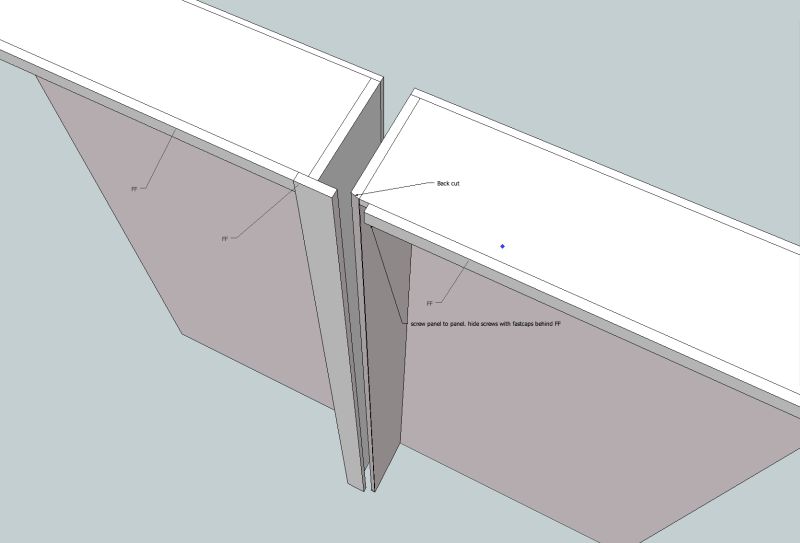
What you could do is build one with the center stile in the correct place to lay evenly over both cases. Only attach to one side. Cut the top and bottom rails back on the other side to accept the overhanging center stile when you assemble them on site. If you are reasonably precise this works well. Judging from the scale of your picture though, you may just make the uppers as one unit.
From contributor K:
Make the top-section as one piece and the bottom part as one piece (also allows one deck instead of two and you won't have to match seams on the deck, it will be one consistent piece). It still is modular for moving, etc. but solves your inset issue for the most part, as you can use a single panel in the center making it 1 1/8" vs. 3/4". Your other option would be to add another panel on the left and right to reduce the inset making it 1 14" on the outside and 1 1/8" on the center.

Click here for higher quality, full size image
From Contributor L:
Attach the faceframe on-site. Build it as one piece like the left side illustration and then attach it on-site. Dry fit it extra carefully in the shop. I've done this before on built-ins that were going in a finished basement with a tight staircase. I didn't want the face frames getting beat up on the way down. I glued and nailed them in place and puttied the holes. In the basement they are barely visible. In a more formal setting I'd spline the face-frames in the shop and glue the face frames on-site with clamps so there were no nail holes. This was of course before they get attached to the walls.
From contributor C:
Here's what I've been doing.

Click here for higher quality, full size image


