Finishing an Extra-Large Table Top
Advice on positioning a large table top to be accessible for convenient spraying. March 28, 2010
Question
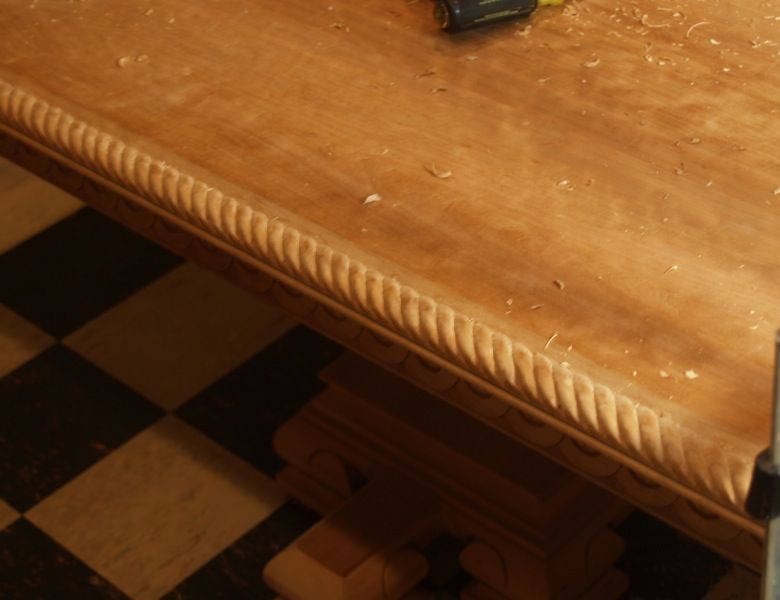
I'm about to finish a 10' X 4' solid cherry table top. It is the last stage in a long project. Though I've sprayed a lot of furniture, some of the pieces rather large, none compare to this. The top will be sprayed top and bottom, though not at the same time. The perimeter is carved into a rope edge.
I spray SW pre-cat and may add a bit of retarder. I would normally spray a flat surface with the work piece in a horizontal position and would work from the area furthest from the fan and progress toward the fan. I can't reach all the way across this top and still keep an even distance from the surface. I will have to walk around the piece to reach all of it. How would you position and spray the table top?
Forum Responses
(Finishing Forum)
From contributor B:
In that situation, I had my helper spray on one side while I was directly across, and we would meet in the middle. We just worked our way down the table. It worked perfect. Adding a little retarder is a good idea.
From contributor G:
You could spray lengthwise. Start on the far side - the side opposite where your gun's lines connect. Spray from the edge and work your way to the center. At the end of the final pass down the center, step quickly around the end of the table and carry on spraying the near side, center to edge. Plan it so your hoses are looped around the same end you will be walking around. Blow yourself down with air before you start, because you will be reaching across wet lacquer and you don't want things falling from your sleeve.
From contributor C:
Is the top attached to the base? If so, can it be easily removed or is it glued on? If the top is a stand alone piece, you can just hang it like I have done with piano lids and other big pieces. This will also allow you to spray both sides at once. You can easily attach some blocks on the back side if necessary where the apron of the base would normally be when attached and then put some large 1/4" eye screws in the blocks and hang wire to suspend top in front of booth.
If the top is glued to the base, you can still gently lay it on its side on low horses and spray. This method will not allow you to put as thick a coat on as you normally do, but it works well.
You can also tilt the top (if it's attached) to where you can easily spray the entire thing without walking around it. If it's not attached and you have a turntable, you can put the top on, then all you have to do is start on the edge nearest you and turn the piece when you get to the middle.
Lots of ways other than this, but these are starters. Take into consideration what's available in your shop to make the job easy, and experiment.
From the original questioner:
Thanks - those are good ideas. No, the top is not attached to the base permanently. In fact, the base is comprised of several pieces including 12" thick pedestals on top of six footed bases. The apron is also carved but can be disassembled into 10 pieces including four aprons, four corner blocks and two stretchers. Just moving this thing is a challenge. I will be very happy when it is delivered and assembled one last time.
All three thoughts are very good. I like the idea of spraying back and front together but that leaves me a carved edge hanging low. I do, however, have a turntable that will handle the top nicely. I still keep thinking I want to spray toward the fan and away from the surface I've already sprayed. That makes the thought of leaning the top to facilitate spraying one entire side lengthwise bottom to top appealing to me. I will box it and shoot the edges first, finishing with the lowest long edge. I'll begin the surface from there, working my way up and toward the fan. I will shoot a sheet of plywood to work out the pattern. I believe I can suspend my hoses over the piece to make sure they stay out of the way.
From contributor J:
We've built angled stands like easels that hold large tops at about a 45 angle. Use cleats screwed to the bottom of the table top to hook onto the stands. A few cross members and wheels - the top stays hooked to the stands until done. Less reach across or run around, although we have had to stand on a plank between two buckets to get the far (upper) edge.
From the original questioner:
Thanks for the thought. I believe using a slanted easel is a great idea. The planking will make me able to reach the top.
From Paul Snyder, forum technical advisor:
Usually if we can reach the middle of a panel or table top, we'll lay it flat on a cart and spray it the way contributor G described. The item is placed lengthwise in the booth so that you don't have to spray upwind.
If the panel is too large to reach the middle, then it has to be sprayed at an angle or vertically. It just depends on how big it is.
We use A-frame carts to move panels and parts around the shop, and sometimes we'll use them in the spray booth to spray medium size panels at an angle. We were spraying some panels using this method this morning, and I've included a picture showing a few of the panels on the A-frame carts along with a short video of the spraying in action.
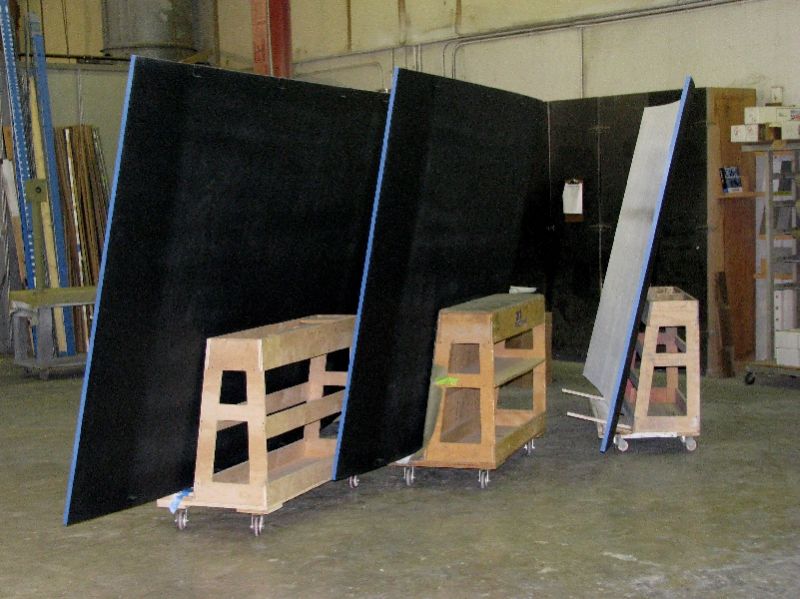
Click here for higher quality, full size image
If you are seeing this message, your version of flash needs to be upgraded to view this video.
Click here to get the latest version of the Flash player. |
From contributor O:
I have sprayed them in a flat position. If for some reason you do end up with dry fog lines, I would just spray the top with a coat of lacquer thinner to fix the problem. Not the preferred method, but it does work rather well. Most of the time I spray like in the pictures above.
From contributor C:
Paul, we had carts similar to yours, but they had a second piece attached with strap hinges so you could start by spraying them tilted up and then halfway through or so, lay them down flat and finish. That way you could get all the edges. The second hinged piece was used for tilting by applying screws through it to hold the top. Something you might want to consider.
From the original questioner:
I don't mind spraying in a slanted position, but since the edges are carved, I am fretting about the fact that I won't be able to do all the edges at the same time as I spray the top.
I really appreciate the effort Paul took to include a picture and, in fact, a movie clip!
Click here for higher quality, full size image
From contributor C:
That's why I recommended upgrading Paul's carts. You can build something similar to hold your top and have a secondary 3/4" top attached with hinges that you can then screw to the bottom of your top so that you can start out spraying it tilted up, then lower it back down about halfway through or so, then finish spraying it and be able to catch the edges you're concerned about. His carts depend on resting the edge on the sticks that protrude. My way it's held up off the edge because it's secured by the screws going through the second piece of the top that's hinged. Yes, it's more work, but how often will you really use it? It's good to have around, though, when you need it.
From the original questioner:
Contributor C, hopefully I understand you. The cart is similar to Paul's in that it holds the large work piece like an easel. The lower edge never really rests on a ledge of any kind but is suspended off the bottom and held there by screws into the work piece. Would you begin by spraying all four edges while the piece is flat, then tipping down and spraying the flat surface?
From contributor C:
Yes, you will have to make yours a little taller than his so that the center of gravity is correct - but when it's tilted up (and with mine they could be tilted totally up), the bottom would be a good 5/6" off the ground. The extra wood top (secondary hinged top) was added with good strap hinges to support the weight. Think of it like opening the front cover of a book - that hinge action is what I mean.
This way you can tilt it as much as you want. Yes, you can spray all the edges first if you want, but you'll find by the time you spray the second part of the table you'll need to hit the edge again to wet it out - or as someone else said, you can use retarder/thinner 50/50 mist coat, to lay it out if necessary, though a good sprayer would not need to do this. Looking at Paul's stand again, I also see it will have to be wider to give a good center of gravity as well as taller, to prevent any type of tipping problems.
From contributor J:
We didn't adjust the tilt, but did use cleats screwed under the top to engage the stands - French hanger style - leaving the edges free. The buckets and plank were to reach the upper edge from the back.
From the original questioner:
Unfortunately, the type of work I do consumes a lot of time in construction and affords me little opportunity to be a really good spray tech. However, I'm not bad. I believe with the cart idea you gave me I will be okay. I'll let you know how it turns out. I'm sure it will be good.
From contributor R:
It's only a 4' wide top - just spray it flat. I do it all day long. Start away from the booth, lap your pattern 50%, and about halfway through, move to the back side and continue the wet edge all the way to the back side. On tops I usually spray 3 passes, 2 with the grain and one across the grain so there are no streaks or dry spray. (First and last coat with the grain.) On the edges I spray one coat before the first pass and then another right before the final pass (that way you get some flash time between coats on the vertical surface so you don't get runs.)
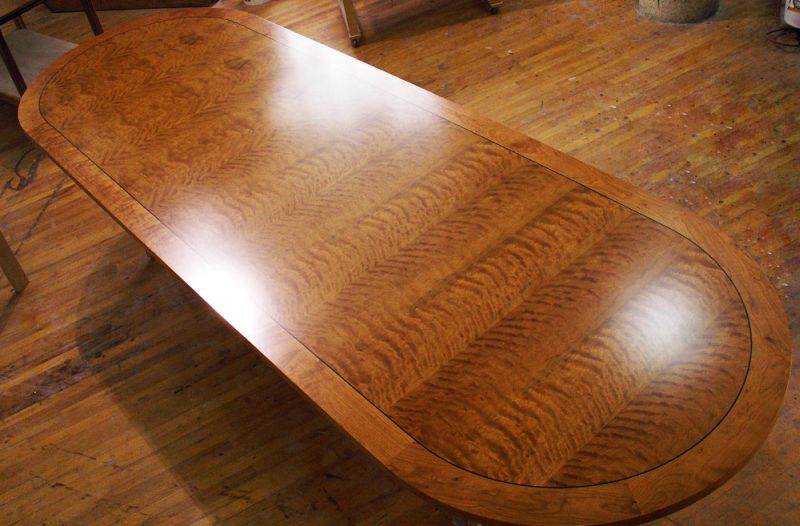
Click here for higher quality, full size image
From contributor C:
I agree if you're well versed enough, even a 5-6 ft conference table can be sprayed like you say. I felt he may not be confident enough - that's why the options.