Flattening Lumber with a Power Feeder On the Jointer
Thoughts about jointer and moulder set-up and feeding technique for flattening lumber. August 31, 2009
Question
Will flattening boards on a jointer with a power feeder work the same as doing it manually? By manually I mean manually flattening boards on the jointer.
Forum Responses
(Cabinetmaking Forum)
From contributor R:
Yes. We had two power feed jointers before we went to a moulder - one for faces and one for edges. It was set up with all wheels on the outfeed. Feed the lowest part of the board under the wheels, so that they are pressing a freshly flattened surface onto the outfeed table. You can lighten up and take more than one pass this way. I would highly recommend a bridge type guard for this. For our dedicated facer, I removed the fence and bolted a guard across the entire cutterhead.
From contributor Z:
I can see how your powerfed jointer flattened boards because there was no downward pressure until the wood hit the back side of the knife. Our 4-side planer has the option to lift the first feeder roller but we usually still flatten on the jointer for boards that need to be flat when they come out of the planer. How do you accomplish flattening with the moulder?
From contributor R:
I have been experimenting with the moulder for flattening and straightening. To simplify things, we set up so that the balance between infeed table depth and finished thickness will just barely shave off the feed roller marks on the entire board. This means that for most pieces, the moulder is removing slightly more from the bottom. I also run the first (infeed) wheel up. I have found that feeding the crown down on the moulder set up like this yields flatter material than feeding as if you were hand jointing (crown up). This might just be related to the average moisture content of the stock vs. the average humidity in my shop though?
From the original questioner:
To contributor R: can you explain a little better about the guard over the cutter head? What would be its function, and what would happen if I don�t set up this guard being that I have only one jointer and removing the fence and setting up guard would be a pain in the neck every time I want flatten and joint edges.
From contributor R:
With a power feeder set up on the outfeed table, the stock guard will leave the cutterhead fully exposed in front of the feeder. The bridge guard is common on European jointers and is a flat section that covers the cutterhead along its length. It is spaced up above the table to allow the wood to pass underneath. The disadvantage for hand feeding is that you can't maintain contact the whole way through the cut. For edge jointing, the bridge would be almost on the table, and pulled away from the fence to let the board pass by.
The solution for you depends on how your guard is attached. Ideally, you want to be able to slip it off and slip on a guard that can extend over the cutterhead (and a couple of inches over the infeed table) in front of the feeder. If you didn't mind the swing away being in the way a little, you could even tap some holes in it to attach another guard on top of it reaching over to the fence. Here is how my jointer used to be set up. If I were doing it again, I would extend the guard over the infeed even more and not do short pieces.
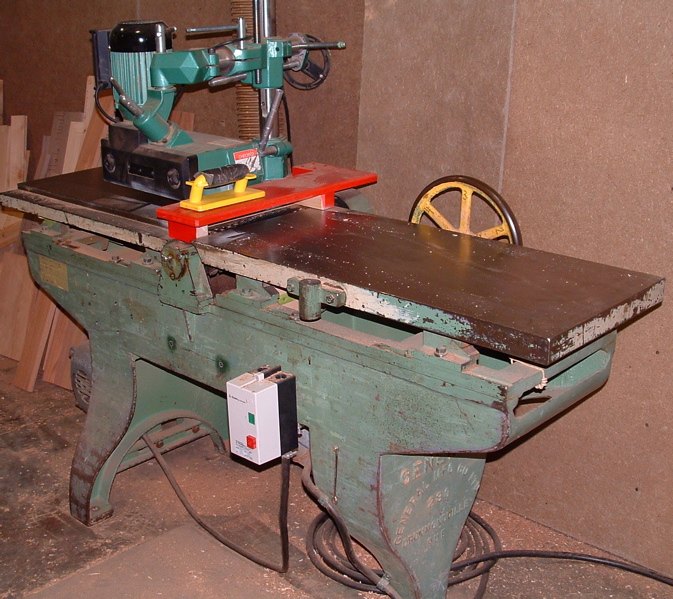
Click here for higher quality, full size image
From contributor W:
Years ago a guy told me in his shop they always joint with the crown down. So I changed what I was taught and found that a lot if not most of boards were high in the center in both the length and the width, usually the crown side. Jointing this way is sort of a balance and I usually don�t hit the ends right away but rather the high in the middle.
What I found is that by working the high side it seems to take some tension out of many boards and some even seem to work their way a bit straighter, almost like you are taking strength away from the side that is pushing the board away. A year later he told me the reason they did it that way was because of some problem with the jointer.
I never went back to jointing the way I was taught originally. I find that putting the board upside down and working the center first works the best for me. Given time I will joint that side straight, plane and let it sit a few days then go back.
This would not be so easy on the jointer with the powerfeed. I have never tried it but wonder. When I do it by hand I might not even hit the first foot or two of the board on the outfeed table on the first pass. With a power feed it would be forcing the board down onto the outfeed table right away. I�ll have to give it a try sometime.
From contributor L:
On long boards crown down will get you there better because the other way around lets the overhanging part of the crown up affect the part of the board going over the cutter as it drags up and over the end of the jointer. Twisted boards may still be better hand fed. We rarely use our 16" jointer anymore. Never for edge jointing as the straight-line-rip-saw does a better job. We will sometimes face on it but only if there is quite a bit of reason. We used to have a 4 wheel feed on it before getting the molder. Otherwise the 6' long infeed of the molder seems to do a good job, and it�s a lot faster. As with a lot of my tool purchases I should have bought a molder, grinder and rip saw a lot sooner than I did.
From contributor R:
On problem boards, we used to shim under high spots on the infeed end to prevent the feeder from twisting it. There are usually enough chips or dust around on the bed to place a strategic pinch.
I'm glad to hear that my moulder technique isn't out of the blue. I think a lot of it has to do with moisture. If the outside of the board picks up more than the core, it will cause the plank to bow. Skimming that swollen surface off removes the tension. My shop is usually drier than the lumber, so the top stave on a stack left overnight will bow so that the ends lift as the top surface loses moisture. A humidity gauge on the wall can clue you in to a lot of wood movement issues.