Installing Frameless Cabinets Under an Out-of-Level Soffit
Tricks for using scribed molding to fudge the gap between a set of frameless upper cabs and a ceiling soffit that's out of whack. March 28, 2010
Question
I make frameless cabinets, but when I install them in a kitchen that has a soffit, I have problems. The soffits are never level. If the gap between the cabinet and the soffit is small I can caulk it and paint it to match the wall, but when it is way out of level ( I had one that was 1" out), I don't know the best way to handle it. Can anybody offer advice?
Forum Responses
(Cabinetmaking Forum)
From contributor J:
In residential work, I build the cabinets 4-5 inches shorter, and run a 4" flat band above the doors and a crown at the ceiling. This gives you a little fudge factor. On long whacked out runs, you can roll the moulding up or down to hide the slope. The wider the band, the easier it is to hide any variations.
From contributor S:
Keep your level. The builder should fix the soffit.
From contributor K:
If the cabinets are to go flush to the soffit, we make a 1/2 to 1" filler and paint it black, install it flush or just shy from the front of the box, and scribe that to the ceiling. It's a pain, but most people don't want to pay to fix the drywall.
From contributor P:
I use this method. One groove is for scribing, the other is for the final position.
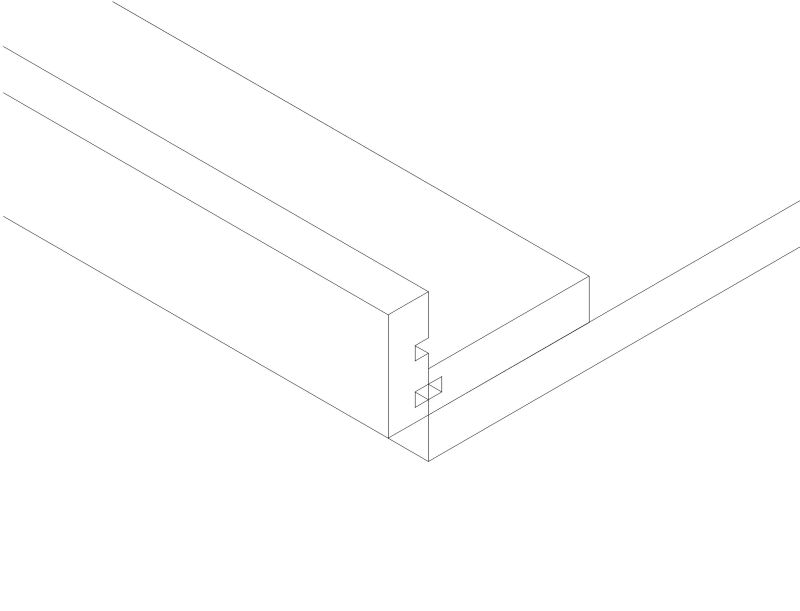
Click here for higher quality, full size image
From contributor T:
If the reveal around the cabinet is only an inch or two, I run a band with the same edge profile as the doors, then a 2 1/4" or 3 1/4" crown and then cap that with a 1/2" beaded piece. It wraps around the bottom of the soffit; I don't like the look of soffit, so this camouflages it. If it's a flush euro look, then just a band scribed to the soffit.
From contributor O:
Contributor P, can you elaborate on that?
From contributor P:
It is a way to index the scribe piece to the ceiling. The lower piece is the top of the cabinet. The upper piece is to hold a spline that fits into the back of scribe piece. Does that make sense?
This would put the scribe piece flush to the front of the door. If you wanted it back from the front, you scribe the piece first and then move the top cleat back 3/4".
Maybe this gives more context.
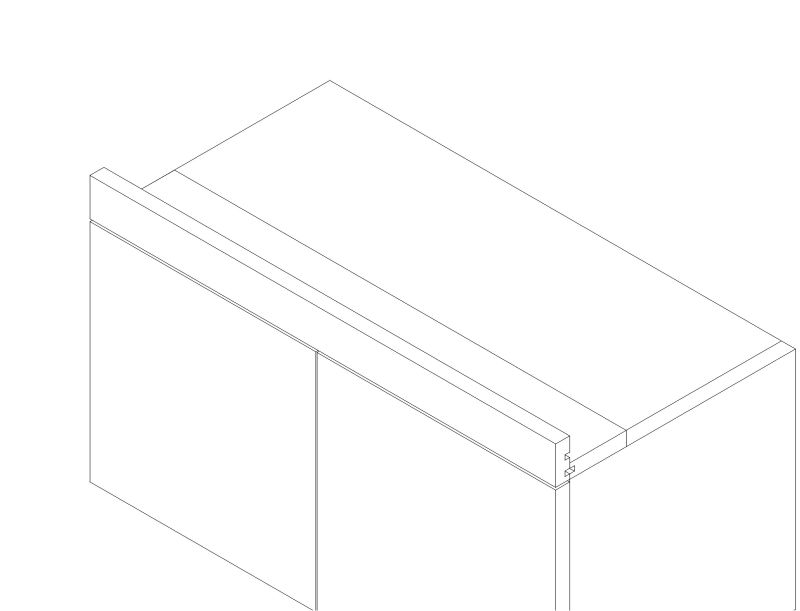
Click here for higher quality, full size image
From contributor O:
I still don't understand how you use that uppermost groove.
From contributor P:
This is the position when you scribe the piece to the ceiling.
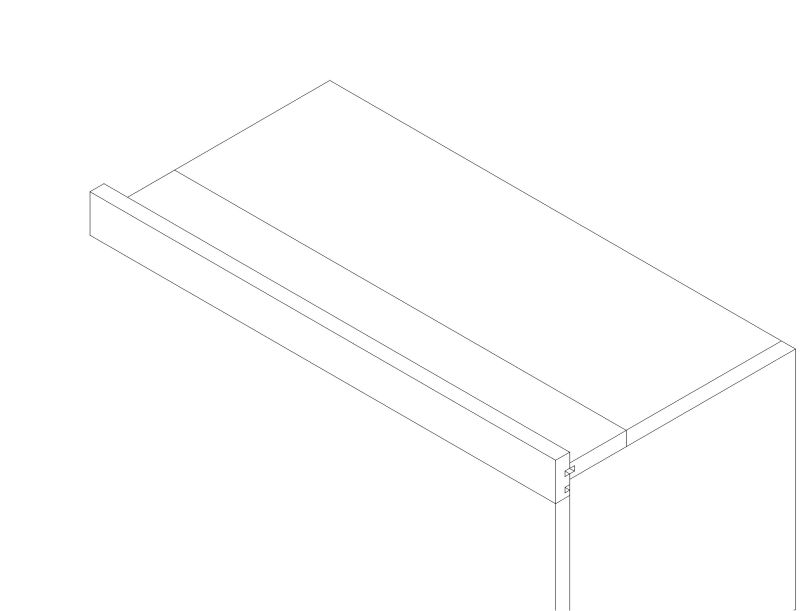
Click here for higher quality, full size image
From contributor O:
Thanks - I got it now, and will have to try that out. Neat trick. (Sometimes I'm as dumb as I look!)
From contributor D:
Same concept using Keku connectors.
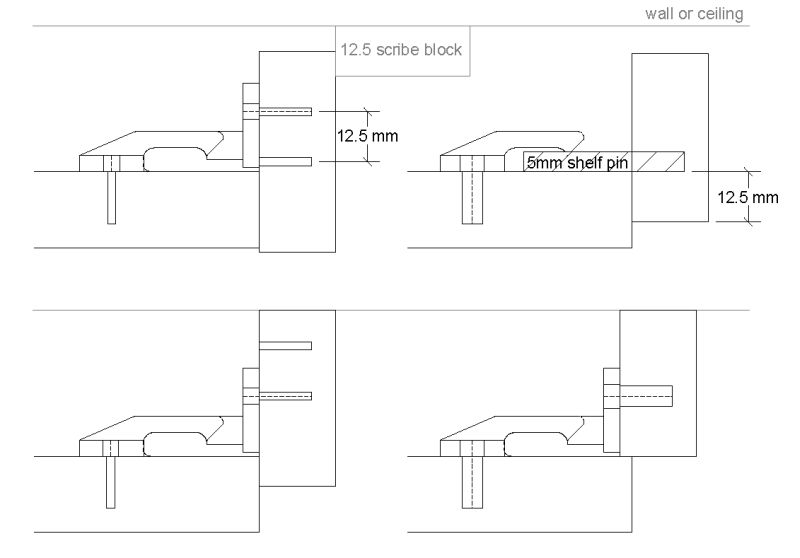
Click here for higher quality, full size image
From contributor M:
Using this fascia board idea to spread out the reveal between the top of your straight doors and the not-so-straight ceiling is an old trick and a good one. You don't have to use any fancy fastening tricks to attach the fascia board invisibly, however. You can just run the cabinet up to within an inch or so of the ceiling and attach the fascia board with nails or screws into the edge of the top of the cabinets. Then simply use a wide enough crown molding to hide the row of fasteners. The bottom edge of the fascia can hang down as low as you wish.
With a gap from the top of the cabinets to the ceiling varying a full inch from one end of a run to the other, however, you will have to use a pretty wide fascia to hide the discrepancy. The way to remedy that situation is to put the cabinets (at least the uppers) up parallel to the ceiling or soffit and stop worrying about being perfectly level. You guys and your levels are like Moses and his bible sometimes.
From contributor L:
We've used a method much like contributor P's. Make a scribe piece that has a thinned down (from the back) upper part that will be cut in scribing. Set the scribe piece to the lower position and use an offset base trim router to directly cut the scribe, letting it run along the soffit or ceiling. The distance between the slots is related to the distance between the edge of the router base and the inside edge of the 1/4" router bit. We've run the grooves using a wobble saw blade to make 4mm cuts and use Lamello plates. The wider the scribe, the less you notice the variations. Same scheme works on walls.
From contributor R:
Of course we are! It's right there in the Bible - Installations 7:14 - go look it up! Seriously, how do your customers like it when stuff rolls to one side of the shelf, or the self-closing hinges on the doors don't self-close?