Large Ogee Edge Profiling
Woodworkers discuss methods for machining a very deep edge profile onto a big, heavy countertop. April 18, 2015
Question
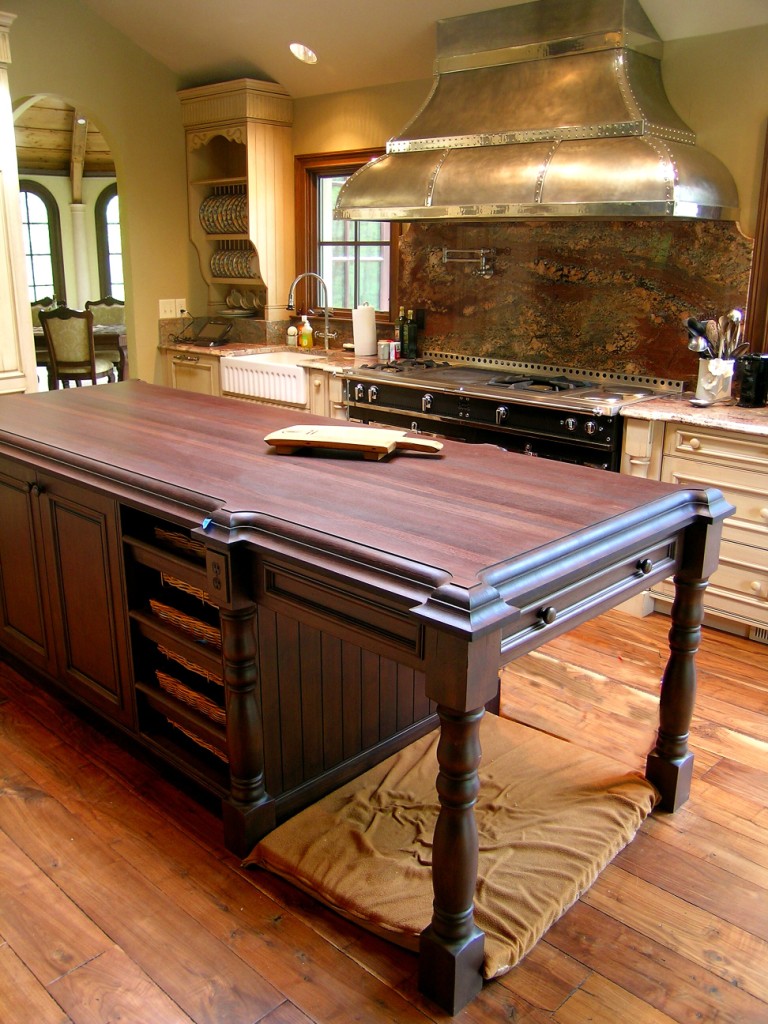
We have a client who has asked for us to build a large 11' x 5' face grain countertop with a large Ogee profile that will essentially have a bit profile depth of 1-3/4 inches. We cannot find a one piece bit for this profile application and do not feel comfortable running this through a shaper due to size and handling. We have seen many fabricated edges with a large profile, but I�m curious if this is a two-bit process or if folks have custom bits made for this.
Forum Responses
(Solid Wood Machining Forum)
From Contributor H:
I would think this would definitely be a two bit process, maybe a three bit.
From the original questioner:
Is there a taller cutter that can profile an edge that thick without going to a two or three step? Amana makes a 1" cutter that may work, but obviously won�t have the same effect.
From contributor M:
How thick is the countertop? We have run many profiles as deep as 2" or more for counter edges - these are mostly 3" or thicker. We utilize shaper cutters on our 9 hp Wadkin shaper - more than capable of running cutters of that size (we have some that are 10" in diameter and 6" high). It sounds scary but not when using a power feeder. We also have corrugated cutterheads with a huge assortment of high speed steel profiles that also lend to a wide variety of edging at our disposal. We are fortunate to have a substantial inventory of large shaper cutters accumulated over four decades of work.
Is your customer sold on end grain for the two ends of your countertop? For most large projects I prefer veneered tops and for this we run the edging first, then applying it afterward using either biscuits, splines or dowels. Veneered tops have many advantages over solid wood tops of that large width - there's a lot of expansion and contraction on five feet! For this reason (depending on the size and shape of the countertop and any possible radius) we may run an edging after the rough blank is applied to the countertop. With your basic 11' x 5' rectangle clamping edges on that would be a cakewalk - we have pipe clamps up to 22' in length. You may think about a veneered top here. Speak to your customer about the pitfalls of a large width solid top. If he's sold on solid wood - you have no choice but to profile afterwards. For this reason a big shaper, powerful feeder and additional roller supports are necessary. You can easily whip up a couple wood horses of the proper height to facilitate feeding a top of that size. Not sure what shaper you are using, but if at least a 5hp or 7-1/2 hp you should be able to handle a profile cutter for that size, though I'm not sure yet what your thickness is.
I feel better with shaper cutters than router bits when going to that depth of cut. Of course - using multiple buildup pieces is possible with one-three or more router bits and layered pieces of stock. More work as well, but if it's just one countertop, the cost of a shaper cutter ($250 and up) might make multiple router bits a more feasible option (financial and safety).
Cutting your counter longer in length gives you the option of cross cutting a few inches off the length which can be folded back underneath for end buildup. Then you apply the two side pieces last - giving you the opportunity to show more thickness while hiding any glue lines (strategically laid out in your profile). If you don't have either the router bits or shaper cutters (or a powerful shaper), perhaps you could outsource the edging to a local shop that might have a profile and shaper/moulder that would work for you. If you were close enough I'd be happy to assist you, and I'm sure shops in your area would feel the same. We are a dying breed and do share a kinship here that brews support for peers when in need. So, depending on your area and local shops - perhaps you can find one such as ours in your immediate area that could help you out here. See the photos below for examples of a couple of related carbide shaper cutters we have for this particular application.
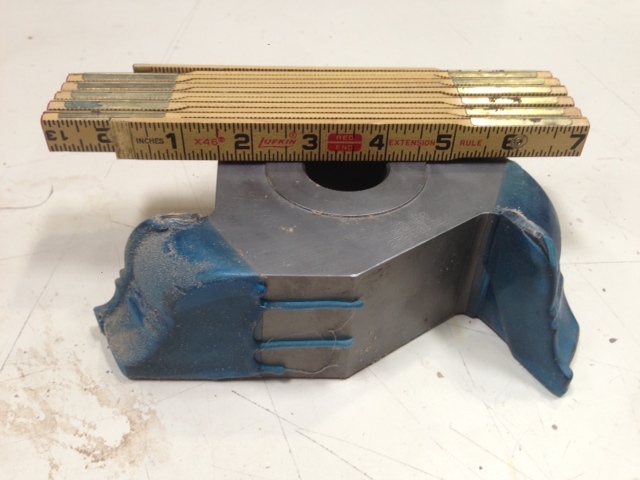
Click here for higher quality, full size image
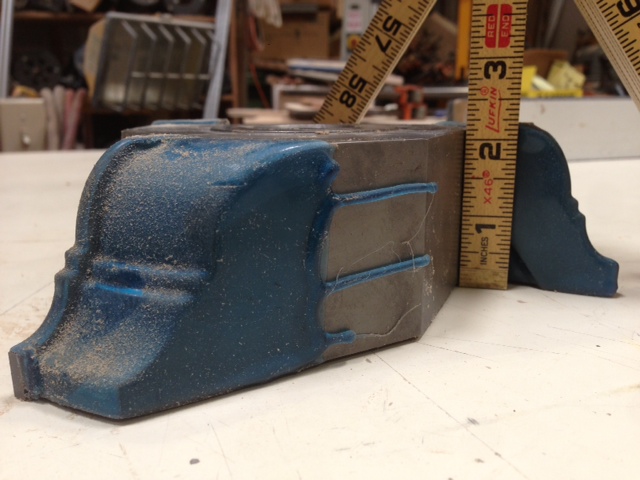
Click here for higher quality, full size image
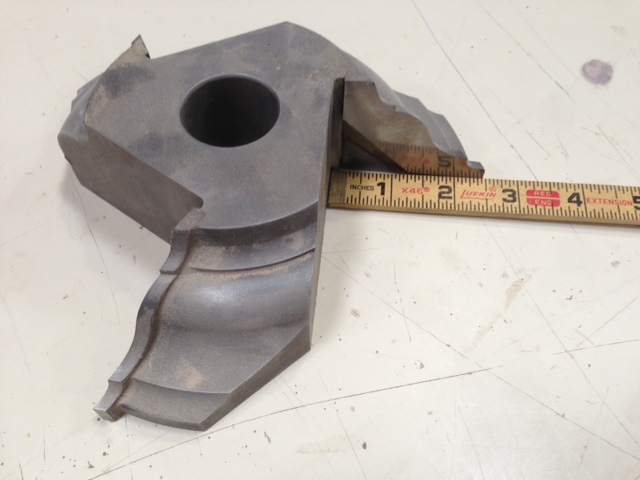
Click here for higher quality, full size image
From the original questioner:
The thickness may end up 1-7/8" which may make more doable given the shaper idea with the cutters I have available. I am always leery feeding a piece that large through, but this may be more manageable. The feeder we have is less than stellar for a piece of this size which is cause for my timid approach.
From Contributor O:
It is not unusual to have multiple router set-ups for the fat profiles. A whole lot easier than flipping the shaper upside down on the countertop and running it like a router. At some point the wood can't go to the tool, and the tool has to go to the wood.
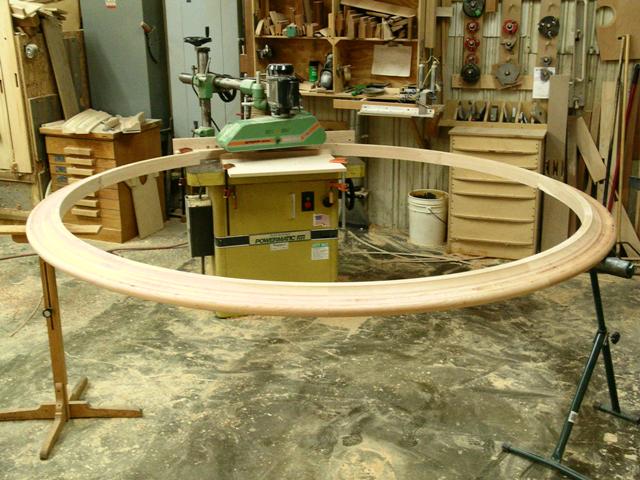
Click here for higher quality, full size image
Click here for higher quality, full size image
From contributor S:
We used to make Corian counters with 2" round over edges. Too big and complex for taking to the shaper so we had some very large router bits made and ran them with a big
Porter Cable hand router. We made very large router bases for safety and stability and just made numerous shallow passes until finished. Some guys were too afraid to use it but it got the job done on hundreds of huge counters and really didn't take long and wasn't as risky as some thought it would be. It did create a lot of torque though, like a large gyro. It was always fun to see the look on some new guys face when he was handed the tool.
From contributor M:
I hear you on the large bits. We've done the same as you, with the larger, custom bases (made out of Corian) and multiple passes (2-1/4" radius for a 5-1/4" thick bullnose) counter edge. The one nice thing about the large PC router is the soft start - I don't think I'd want to use a router without soft start with those large bits.
Yikes!
From contributor G:
What combination of cutters did you use for that countertop? We cut a similar profile for a project and couldn't get that much of a step between the roundover and cove. We switched bearing sizes but the step was not as big as yours and it put a "death line", as referred to by my sanding guy, where the roundover bearing rode on the cove cut that was pretty hard to sand out.
From Contributor O:
Well, I confess to removing bearings and grinding off the posts of most of these types of large cutters. This allows a deeper cut than provided by the bearing, and then a straight bit is used to create the ledge at whatever dimension we want/need. Instead of the bearing, I make a fixed bearing the runs under the bit from a scrap of wood that is the same height as the top. This can run on the bench and keeps the router from tilting - going out of control. The fixed bearing also has a much larger diameter than those little stock ones so you can get on or off the work with the bearing still in contact. The fixed bearing is used for each of the three cutters - moved in or out as the bit requires, riding always on the lower 1/2" or so of the top.
From the original questioner:
Contributor O - what do mean by fixed bearing. Are you attaching to router base plate or under the bit itself? Any chance you can take a pic of the rig?
From Contributor O:
Nothing photographed on hand. Basically it is a fixed piece of wood that is attached on to the plywood over-size router base. The 'bearing' runs the thickness of the top (is often a scrap of said top) and runs down under the bit to contact the lowest edge of the top. This is often cut on the band saw, but sometimes cut by carefully running the router and slowly dropping the bit into the 'bearing'. If the top is all straight edges, or convex curves, then this is just a 12" to 16" fence, with provisions for the bits to spin. The bearing or fences can be moved by removing the large screws that fasten it to the base. These are all custom one use things cobbled together.
I fantasize about making a universal jig that will do any profile on any top, anytime, anywhere. That's a long way away. If the top has inside corners, then the radius of the cutters is figured and the bearing becomes a half circle 'finger' that runs under the bit to fence against the work. To get into real tight corners with smaller radii (as in the photo above), the finger is replaced by a half fence that runs from the center line of the bit to one side or the other and is then run into the sawn corners. All the 'lefts' are done, then the rights for instance. These are made after the straights are cut with the simple finger, or a more common fence. The inside corners can also be finished by carving to make for a mitered look, but it still helps to get the cut as far into the corner as possible to lessen the carving time.
From the original questioner:
So you are essentially building a beefed edge guide for the router. We have in the past used factory edge guide as a secondary "safety" as to not go too deep. Typically for the larger tops that don't go to the shaper will use a jig on the top of the table as the "bearing" if you will and let the flat portion of the router base ride the rail. This works fine, but I can see how your method saves time in resetting the top jig due to several cut depths. I may give it a whirl.
From Contributor O:
Whirl is right. Yes, an edge can be clamped to the top, but has to be relocated, accuracy, etc. We like a big 12" x 24" x 3/4" ply or MDF base, well waxed, to slide on the top. This also gives us plenty of beef to run nice long screws through into the bearing stock.