Making Mitered Boxes with MDF
Here's a long discussion of how to get accurate, clean miter joints with MDF, time after time. September 26, 2009
Question
I have several hundred cubes to be made out of 1/2 MDF. They will be lacquered glossy black and I need to build them with mitre joints. What�s the fastest and most foolproof way to do this without CNC?
I suspect a router table setup with a Lockmitre bit, holddowns and pushsticks. Some of the boxes are 3x3x8 high and some are 6x12x24 high. I own a 3m pur gun which can be used for faster dry times, but suspect that white glue and a few 23 guage brads would be faster. All opinions are welcome. I've got to build them fast and the least expensive way I can.
Forum Responses
(Cabinetmaking Forum)
From contributor L:
High Gloss and cheap should never be used in the same sentence. Lock miter on a shaper would probably be best and quickest. Next would be a router table.
From contributor Y:
We leave an old Moak shaper setup with an inserted lockmiter cutter. Two power feeds are on it, one for vertical and one for horizontal. Changing a feed from vertical to horizontal is a real pain and since this setup is used fairly frequently we just leave it set up. If you once get the cutter setup on a shaper (or router table) make a set of jigs to locate the fence and tool so it is easier to come back to later.
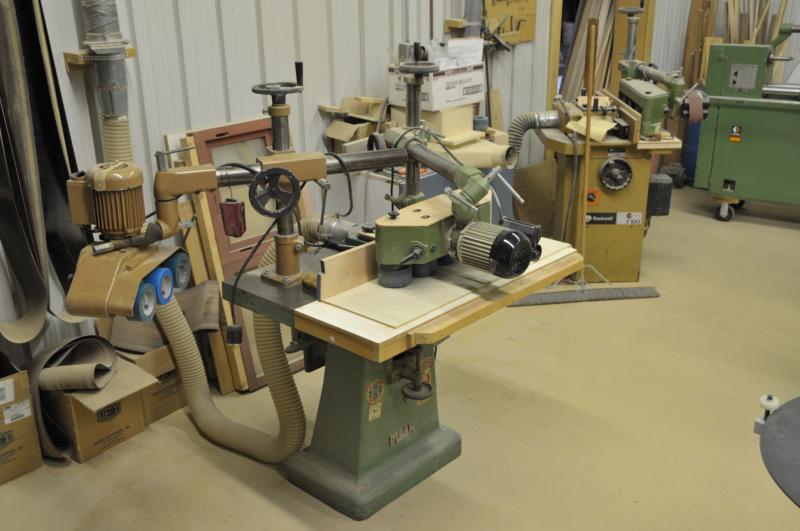
Click here for higher quality, full size image
From contributor G:
Are you doing the lacquer, too?
From the original questioner:
Thanks guys. I am outsourcing the painting to my regular finisher. This is a one shot deal that is in the 50K range. Looking at the routertable kits it may be better to get a small shaper.
From contributor U:
Why the lock mitre? They're just MDF. There is no sub-strata to MDF. What are you locking - sawdust? Just back-mitre them on the table saw, fold them with packing tape and white glue. Let them sit a couple of hours, take the tape off, break the edge, and you're done. You're already going to be precise on your cutting, lock mitre or not.
From contributor V:
I agree about straight miters instead of locks. I once worked in a shop were we ran miles of mitered MDF. Here is the trick: cut your parts to net width first, taking care to rip oversize and re-rip to remove the bow from the release of tension in the sheet material. Now, set up a perfect 45 degree miter on your table saw. Depending on which way your table saw tilts, you need to attach a sacrificial fence to the saws fence on the side that the blade tilts toward.
The bottom edge of the sacrificial fence needs a rabbit that is 1/8" less in height than the thickness of your MDF parts. This rabbit gives the "off cut" a place to go so it doesn't bind up and shoot out the front of the saw.
Using a piece of your materials scrap, set the fence location so that it miters right to the top edge of the materials thickness without removing any of the parts width dimension. The top of the blade will cut into and be buried in the sacrificial fence.Make sure that the out-feed end of the fence is supported /locked down and will not deflect outward. Now you can miter both edges of all of your mitered parts regardless of differing width dimensions on a single saw setup. This works especially with a power feed on the saw but can also be fed by hand if you use hold downs if front of and behind the blade at the fence.
From contributor R:
It might be worth looking into having a CNC nest these parts. I know you said other then CNC but if you have several hundred I would sure consider it.
From contributor T:
How about looking for a job shop that makes home speakers? They are all set up with v-groove lines and could whip out the cubes all day long. I am located in Boston and there are several shops around that Bose and Boston Acoustic use to make the boxes for them.
From contributor S:
Contributor V has it right. I did one thing slightly different. I used an anti-kickback sacrificial fence that has a spring loaded 1/4 x 1/4 x 2" long tongue that pivots into the fence as the material feeds into the blade, and pops back out as the material passes by it. This pivot is located just before the point where the blade (at 45 degrees) enters the table. As the triangular edging is cut loose, it is stopped from moving backwards by the pivoting arm. The next piece comes along and pushes the pivot in, and prevents the off-fall from coming back at you. I would also over-cut the miter by a degree or so, to insure the points are tight. Then assemble with masking tape and yellow glue. The power feeder is a great touch, if you have one. Forget the lock-miter and the CNC baloney. You can set this up and run all your parts before the CNC guy returns your call to tell you he can't price the job because he doesn't know how much the programming will cost.
From contributor T:
Contributor V has got it - except with the table saw method you are registering off the back. When producing long production runs of miters I mount a 1" sacrificial table to the top of my shaper, then I mount my 45 deg cutter upside down on the spindle. You will have to reverse the machine's rotation of course. I don't have a reverse on my shaper so I flip the leeds in the junction box. Now set up your power feed and run your already sized pieces face down. This method allows you to register of the faces and edges that meet-perfection guaranteed.
This is where you need the sacrificial table it supports the fragile edge. This operation really requires a powerfeed - especially because the widest part of the cutter is above the work piece. So for the sake of fingers and consistency be safe with the powerfeed.
From contributor D:
It is a bit funny how the outsourcing craze has started to effect folks thinking sometimes. He has a basic job here that any shop should be able to handle in house with modest equipment. He says he has hundreds but they are small. He has 3"x3"x8" and 6"x12"x24". If I had the job I would run miters along the edges of full 97" long MDF rippings at 3" wide,6" wide and 12" wide. Then I would cross cut them to the respective heights and glue up. It�s pretty simple if not overthought.
From contributor P:
He has cubes to make, if he was to run lengths and then cross cut he would then have to T them off to make the miter again. And then the slow process of laying them all face up, taping all the joints, flipping the whole assembly over, apply the glue and then fold everything up.
Don't you think it would make sense to explore the option of either have a CNC shop nest these, you could make a template of each size to locate the tape prior to running? Or have one of the speaker shops run them on the auto V-groover that applies the tape, runs the miter the long way and then goes into the cross cut V-groover and cuts it horizontally, again with the tape already applied. I�m not sure why you would suggest not exploring the outsourcing route, this is a perfect job to source to someone with the proper equipment.
From contributor Y:
I have a Komo CNC but I would run these parts on a shaper with feed.
From the original questioner:
Thanks guys for your responses and lively debate. The speaker making company sounds interesting with the applied tape, but contributor V's method is probably the cheapest and fastest. At the moment there is not much other work, but if a couple of kitchens come through, then I might consider some outsourcing.
From contributor T:
Contributor Y - could you explain why you would not run these parts on the Komo? Sure seems like that would be the way to go if you have the machine?
From contributor Y:
The parts are too small to reliably hold with the vacuum. It would take a little fooling around to run them on a shaper but once setup they would go very quickly. With an adjustable angle cutter head on the shaper you could put that extra � degree or so on that would make a perfectly tight edge. Lay the parts on the tape, glue and fold.
From contributor T:
Would seem to me that vacuum would not be affected as you are only cutting to the tape that was all ready applied to the face of the MDF? I was thinking you would nest a whole sheet that had been pre-taped, and after cutting you would separate at the appropriate miter with a razor, blow off the joints, glue and tape the cube. Seems like much less handling, as you would be dealing with sheets instead of dealing with all the little pieces. If there are 400 of these to make and each cube require six pieces and each of those 2400 pieces require a miter on all four edges then that�s lots of handling!
From contributor L:
He could use a miter fold if he had a 90� bit and the parts would never be cut all the way through. Just squeeze some glue in the miters and fold the box up. There would be some cut-throughs, just not enough to affect the vacuum.
From contributor S:
I am curious if any of the CNC proponents here will offer a public or private price to program and run all the parts. For sake of apples to apples, let�s say the customer will supply materials, and there are 300 boxes at 3x3x8 and 300 at 6x12x24. What will the customer's bill be?
From contributor H:
The 300-6X12X24 and 300-3X3X8 nested for miter fold would fit on 100 sheets the last 61 sheets would have a 25% off fall or you could cut about 500 more of the small boxes. Chip to chip time would be about 15 min. with hand loading or 25 hours.
From contributor L:
OK - I'll agree with contributor T's method. I kind of skipped over the part about how many boxes there were. This would probably be best run on a machine with a C-axis so you could run a rotary head tilted to 45 degrees.
From contributor T:
I was having a hard time trying to figure where some guys were thinking that with a shaper would be faster and easier than using the router. I agree I would do it using the c axis, not with a router bit - no way the bit would hold up. The programming would take no time, probably as long as it would take to set the shaper up!
From contributor Y:
Since I don't have a C-axis I'd be back to the shaper. V router bits aren't much of a solution for miter fold in quantity. The problem being there is very little (none) cutting edge velocity near the tip. On a pre-taped miter fold you can't let the bit pass all the way through to get some cutting action on the bottom face of the board. Does anyone have a Star or Auto-V-Groove machine?
From the original questioner:
Well guys, after all the posts I lost the job to someone who had a lower bid.
AI enhanced answer (added Jan 21, 2025):To achieve accurate miter joints with MDF (Medium-Density Fiberboard), follow these steps:
1.
Precision Cutting: Use a high-quality miter saw or a table saw with a fine-toothed blade designed for cutting MDF to minimize tear-out. Ensure your saw is perfectly calibrated for square cuts.
2.
Marking and Measuring: Measure and mark your cuts carefully. Use a sharp pencil or a marking knife for precision. Double-check measurements before cutting.
3.
Clamping: Secure the MDF firmly. Clamping prevents movement during cutting, which can lead to inaccuracies.
4. **Back-Cutting**: To reduce chipping, score the cut line on the top face of the MDF with a utility knife before sawing. This helps in creating a cleaner cut.
5.
Test Cuts: Make test cuts on scrap pieces to adjust the angle if necessary. MDF can sometimes require slight adjustments due to its composition.
6.
Joinery Aids: Use a miter gauge or a sled for your saw to ensure consistent angles. For added precision, consider using a miter trimmer or a shooting board to fine-tune the angle after cutting.
7.
Glue and Clamp: Apply wood glue to the mitered surfaces. Use corner clamps or a band clamp to hold the joint together while the glue sets. MDF doesn't hold screws well, so glue is crucial.
8.
Finishing: After the glue has dried, sand the joint lightly to smooth any imperfections.
Remember, patience and attention to detail are key when working with MDF due to its tendency to chip and its less forgiving nature compared to solid wood.