Question
I am making kitchen cabinets (paint grade) that require a wall cabinet with an outside curve. The shelves are fixed and exposed, but the face frame will need to follow the outside curve of the bottom shelf and the top. The radius is 11". The bottom face frame member is 1 1/2" wide and the top member is 3" wide, both 3/4" thick. I'm thinking glue laminated strips of poplar around a form, but I'd love some advice. I've also considered kerf bent plywood, but don't feel too confident about the durability of veneer on the edges.
Forum Responses
(Cabinetmaking Forum)
From contributor F:
If you have never done strip laminating, why not do it for the experience? I would start by making a form with the radius of the cabinet shelves first. Typically, you are better off by setting that radius back the thickness of 1/8" masonite. The masonite serves as a form liner and gives you a better joint on the laminate at the form face.
Then, do the math for your total laminate thickness and also another 1/8" form liner to set the radius for the other half of your clamping form.
Naturally, set the height of the form for your widest rail so you can glue both on a single form. Forms can be built up with ribs, but in the case of only 3" and the small radius, I would probably just use multiple layers of particleboard to make a solid form. I like this two-part form but you can get by with one form and more clamping.
I like to saw my laminates on the bandsaw and then plane to final thickness before gluing in the form. Some folks like to plane only the inner and outer faces and glue saw mark to saw mark. Do a test laminate to get a feel for what the best thickness is to bend to your rather tight radius.
There is always a bit of springback, but in your case it wouldn't be a problem because you can glue and clamp the finished curved part to your cabinet carcass.
Your options are...
Bandsawn and sanded from solid stock. Quick but hard to sand the rad perfect.
Vacuum form around a form. I assume you do not have a vac press.
That leaves bent lam construction as contributor F lists.
Most important, do a good job on the form - everything else is easy. I would make just one piece about 5.5 wide and cut both pieces from that. 1/8 is probably the thickest you could get away with. If your planer will go thinner, or you have a widebelt, I would shoot for .09 thick. You can go with either a one or two piece form. I will just list the one piece as contributor F discussed the two piece.
For one piece forms, the form is always convex. This seem to be easier, as pulling the lams stretches them and the end result is smoother. A 6 in thick form out of whatever is fine. I put plastic on it to keep the glue from bonding the form. You may have to make notches for your clamps. Dry pull the stack of lams to see how it behaves. You will need a caul strip or two on the top to evenly distribute the clamp pressure. This is critical and should be thicker and stiffer than the poplar strips you are forming. Two .25 caul strips should work. .312 if they bend without breaking. Spread the glue and form. Plastic resin is the best, but if you use thinner lams, yellow glue will be fine. Make sure you make the lams at least four inches longer than final. This is where the curve will flatten or discontinue.
For an 11" radius, I'd be looking at 4 layers, sanded to a final total thickness of 3/4". Resaw them thick, then sand them on a widebelt or drum until the stack, clamped together, measures 3/4". You do not want to have to correct the thickness afterward.
I would also make a single piece 6" or so wide, then rip it into the two parts you need. That way they will both be the same radius. Keep them oriented properly and any distortions will match top and bottom.
Using vacuum, be sure your form is plenty strong. You'll be amazed at how much pressure the bag can generate.
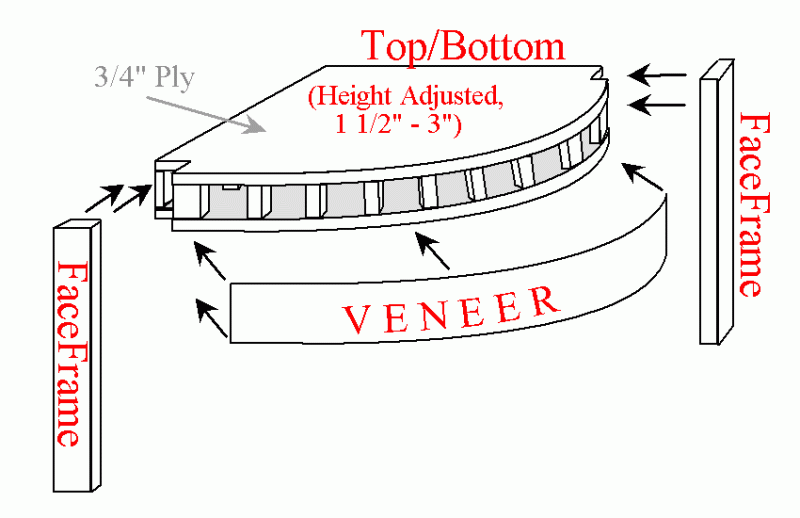
Another simpler option for flush top and bottom is below... Either option will eliminate springback, minimizing and taking longer for the eventual hairline joint cracks (that always happen in painted product eventually) to present themselves...
