Matching a Curved Apron to a Curved Top
Explanations of how to template a curved tabletop or countertop and fabricate a matched nosing or edging piece. November 14, 2009
Question
I will be building a corner cabinet 30 inches high. I want to keep the top round (quartered). I read somewhere a long time ago how to cut the curve, then use bearing guides or different router bits (?) around the template to make the edging mate with the top's curve. Can someone help me with this technique or another application?
Forum Responses
(Furniture Making Forum)
From contributor R:
I've done a few of these over the years. I prefer to use a router trammel for this. Using one center point allows you to cut perfectly concentric arc segments. The big trick is to be very careful about the settings of the trammel. As long as you are accurate, you'll get really clean glue joints.
From the original questioner:
Thank you. I have used a shop made jig for circles. Thought there was an accurate method to cut the apron.
From contributor R:
The same trammel can be used to make both the edging for the top and the form for the apron if you are laminating it.
From contributor T:
Contributor R's last post mentions laminating, by which he means bent laminating the apron from thin layers of solid wood. It's probably the easiest approach (the other being cutting from solid stock). You should make a full-scale plan view drawing of the apron-to-top relationship. The curve of the top (a replica of it) may be the curve you want to use to make a form for your bent lamination. But it depends too on how you make the form. If you want to go that route, I'd peruse the laminating Knowledge Base section of WOODWEB, and maybe track down a book or magazine article that's focused on that specific technique.
From the original questioner:
I would like to use a solid wood apron. My reason for posting was I read somewhere how you cut the arch, then change guides or router bits to form the mating arch. I can see how a solid wood apron on a quarter circle can/may lead to the seam opening - wood movement. It was a technique I was considering. Veneering at the moment not in the plan.
I can cut the top's arch into angled pieces and then mate an apron onto that. I'd prefer to keep the arch fluid. Starting to sound like some practice and some sampling. Thanks again for all replies.
From contributor R:
If the apron is not too tall, you can still use a trammel to strike the arc. You can swing the router to cut the top section of the apron, then use a pattern bit to follow that cut. If the pattern bit still does not reach, a flush trim bit can add a couple inches cutting up from the bottom on a table.
This photo is cutting the first part of a thick leg. A pattern bit is used to cut the upper part of the stock, which has been bandsawn to rough shape.
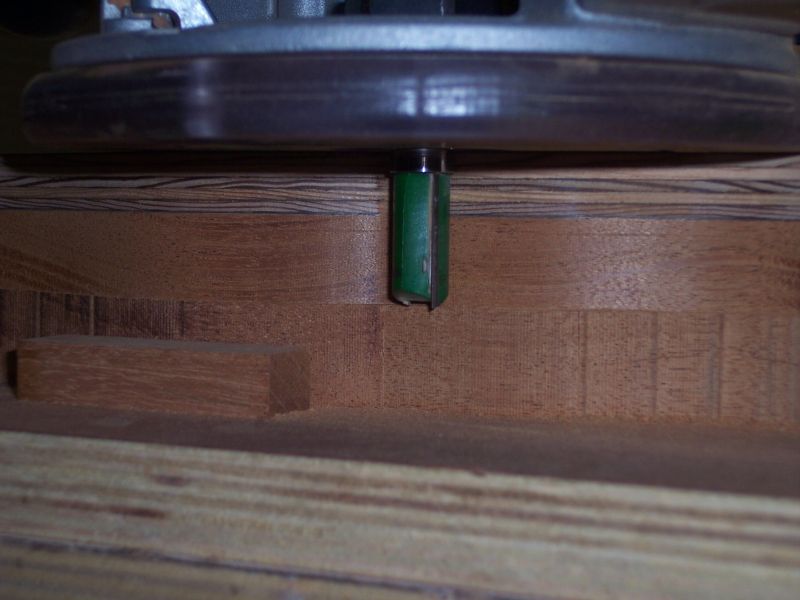
Click here for higher quality, full size image
As you can see from this close-up, the previously milled profile can be used to guide the pattern bit in a deeper cut, or a flush bit can be used from below with the bearing riding on the upper profile. The leg in the picture is not too thick, but I've been able to mill stock this way up to 3" tall.
Click here for higher quality, full size image
From contributor G:
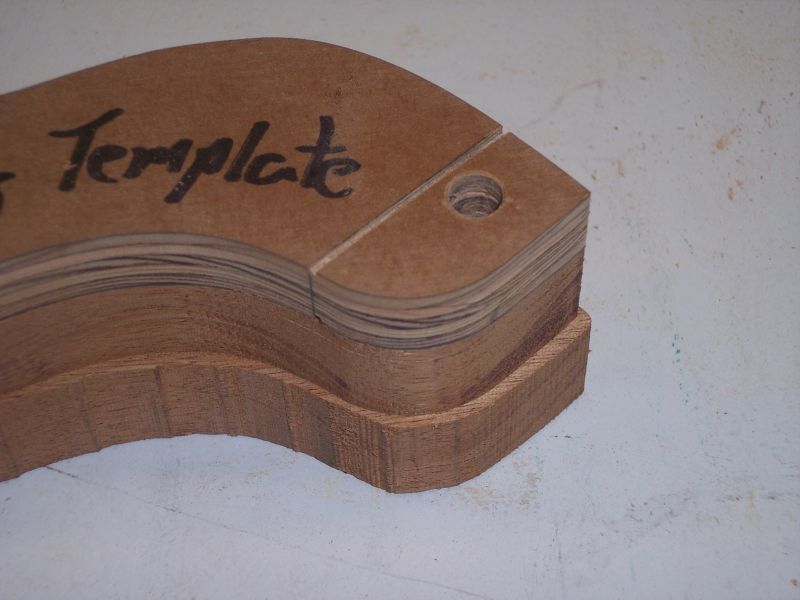
A book I own, "Fine Woodworking on Joinery" (1985) has an article in it called "Joinery Along Curved Lines" which may be what you recalled reading (originally a Fine Woodworking Magazine article). I've never tried it. The method looks neat, though fairly involved. It's more obvious with a diagram, but explaining it is difficult. Here goes...
Starting with template A (your curve), you clamp another piece to it, and use a 1/2" bearing guided bit to cut template C. Now, template C is not simply identical to template A, but is the offcut (other side) of the piece clamped to template A, so it's the negative image of the same curve, offset 1/2" (the diameter of the bit). Next, you cut template B, using template C and a bearing-cutter combination with 1/2" offset (the example is a 1 1/8" bearing guide with a 3/8" bit). With templates A and B, you have matching positive and negative sides of the curve. So essentially you use your curve to make an offset negative template, then eliminate the offset. Sound familiar?
From the original questioner:
Thank you. Contributor R, I've used your technique. Contributor G's technique is either the one or hits what I was thinking. When I read the post the little light upstairs went on. I'll have to practice.