Question
I was wondering if anyone can enlighten me on the 32 mm system. We cut closet parts for a few closet companies in our area. We start the first 5mm hole 9.5mm from the edge of the panel on the top and bottom edges. That way the panel is balanced. So when an 84" panel is specified, we have to cut it at actually 83.9 inches to achieve balance.
So, our first commercial job comes up. Architect's drawings specify standard 34.5" base with 4" toe kick (30.5" end panel). Fine, but with our closet system standard of starting and ending the holes at 9.5mm, we now need to cut a 30.5" base end panel at something like 30.875 in order to keep balance. Is it understood in the commercial industry that specified sizes might change in order to accommodate the 32 mm system, or am I way off base and somehow need to develop a system where I can cut the panel to 30.5 and still keep the panel balanced?
Forum Responses
(Cabinetmaking Forum)
From contributor R:
There are several good 32mm systems, so reinventing your own is not a good use of time. I always thought a balanced panel was referring to the door where the hinge holes were bored the same distance from the top and bottom. Then they are not handed. And shelf holes are always bored from the bottom.
The cabinets do have to be a certain height to get a balanced door, but the holes are not balanced on the sides. My doors then are flush on the bottom of the cabinet and 10mm below the top of the cabinet. This gives a balanced door. And whatever a designer says, you are the cabinetmaker. You build your way to ensure the cabinets meet code. In California that is ADA.
Most designers or architects will be okay with minor adjustments, but ask first. I offer my standard sizes in 32mm height increments. I can usually adjust the toe kick 16mm up or down to cover the difference on lower and tall cabs. If the client is insistent I can alter the top and bottom a few mm. Worst case scenario is I have to deal with unbalanced doors. In reality the changes on the boring have almost no effect on my production, and I am using 21 and 23 spindle boring machines, not CNC. What machines are you using to bore the panels?
Then it can affect how the top of the drawer front aligns with the shelf above or the cabinet top. Also it will matter with cabinet doors if they are being hinged in the top holes using the 32mm system. It depends a lot on how the particular system has been designed.
Blums_Process_32_Manual_PDF.html">Blum Manual
Contributor R, there are balanced panels and balanced faces. The 32mm system requires balanced faces, but not balanced panels. Having your faces flush to the bottom of the box requires using unbalanced panels.
Contributor J, if you are using the 32mm system and your 774mm panels are balanced, you have a 3mm top and bottom reveal on your cabinets (assuming 3mm field reveals).
Contributor M, I agree with the concept of doing a +/- on the toe-kick; there is no reason a toe-kick has to be, or can be (end to end of a run), 4" exactly.
Contributor S, your 768 mm panel is divisible by 32mm and is either balanced with 1.5mm top and bottom reveal or unbalanced with a 3mm top and 0mm bottom reveal (assuming 3mm field reveals). It's a standard full-overlay stackable box design, the one used by the True32 folks.
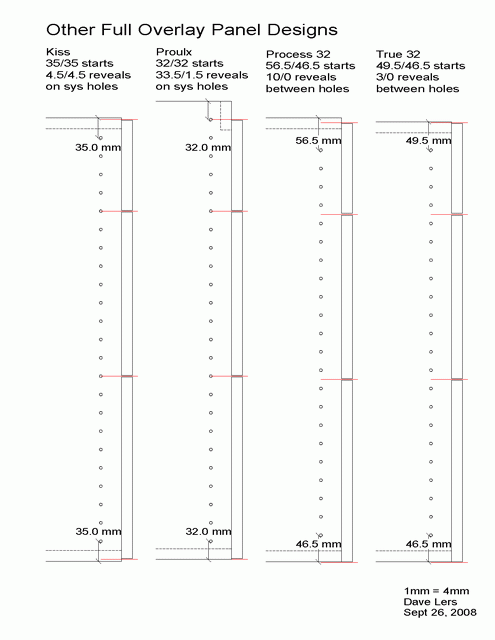
To the original questioner: there really is just one 32mm system. To be able to use the system holes to index components, all face heights plus reveal must be divisible by 32mm (full/half overlay and no rail inset designs). The differences in 32mm designs have to do with the top and bottom face to panel reveals and if the face edges center on or between system holes. Full overlay panel sizes: Kiss = 32 x n + 6mm, Process32 = 32 x n + 7mm, Proulx and True32 = 32 x n.
Balanced panels only really matter if you use manual boring equipment and line bore every hole in the pattern. And for most situations even reveals top and bottom are bad. For example I want my uppers to have 0 reveal on the bottom and a 3mm on top. This way there is no edgeband stripe under the doors and if I add a cap or crown to the top the top gap is already correct. My base cabinets have a 4.5mm reveal on top and 1.5 on the bottom. This way I can still use slides that ramp up when the drawer is opened, and the doors do not get damaged when sliding the cabs on the bench or floor. For stacked cabinets I use 1.5mm top and bottom.
This creates unbalanced panels but the doors and drawers are balanced and the reveals/gaps always split a system hole. I use manual boring machines and the only setting we change is the offset for the first hole location (uppers have no offset). The machines do not care how tall the panel is. All the operator has to do is drop the bits into the correct spindles based on the indicated pattern. My internal cabinet names include all the boring information the operators need.
Like others said, if you are using CNC, it doesn't matter very much. It is still good to keep doors balanced and to keep things like the drawer false front reference the same. But I still think a CNC has a hard time competing with a 32mm shop using a good system. What we can do in one day with three or four guys is pretty darn amazing and my equipment was 1/3 to 1/4 the cost of a good CNC.
Whatever you do, don't try and convince the GC or the architect.
I had purchased a couple of jobs from Cab Parts and just hated their count from this and that and that is where the slide goes or hinges or whatever. So I bought a ptp, slider and bander and made my own system. Believe me, I do not pay anyone to count holes to put hinges and slides where they belong. Our doors roll up to a Blum hinging machine and we drill and press all at once.
Because you are programming a machine, you can pick and choose where hardware goes. When we drill for a 4 drawer base, we drill for construction, stretcher and hardware, and the placement of hardware takes seconds because there are only holes for the hardware.
You need to think engineered cases, not 32 system. The only relation 32mm has for you is that is the spacing for hardware and shelf adjustment holes. Don't waste your precious money drilling for what you don't need. Others that are running gang drills are correct with what they own, but what you own is a different beast.
We have 8 spindles on our line boring block. We only drill for the exact amount of shelf pins that is efficient so we can get the next part on the machine. I will not waste my money drilling for a balanced panel. Some of the blueprints I get have a drawing for 11 adjustment holes in an upper of 30" tall and 7 for a base; that's all they get. When I produce shop drawings for jobs, I show less than that, and that is what they get. Period.
Something else, along the lines of shelf holes and hinges - I drill 37mm back for hinge plate placement at the same distance from each edge - parametric, and if the length of the end changes, we can make the change at the machine and it always remains the same. For the adj holes I drill at 50mm back and therefore no one can confuse what is a hinge plate placement set of holes and what is shelf holes.