Radius Bead
A craftsman asks for advice on cutting a bead profile into an arched bookcase front, and hears the details of several alternative methods. October 4, 2005
Question
We are building the unit below for a customer. I am looking to get suggestions on what would be the best way to cut the bead around the opening of the bookcase. I am wondering if it would be ok to use hardwood for the frame, cut the bead, and freehand around the radius? Or would it be better to make the frame out of hardwood plywood then make a bead moulding and apply? This unit is made out of cherry.
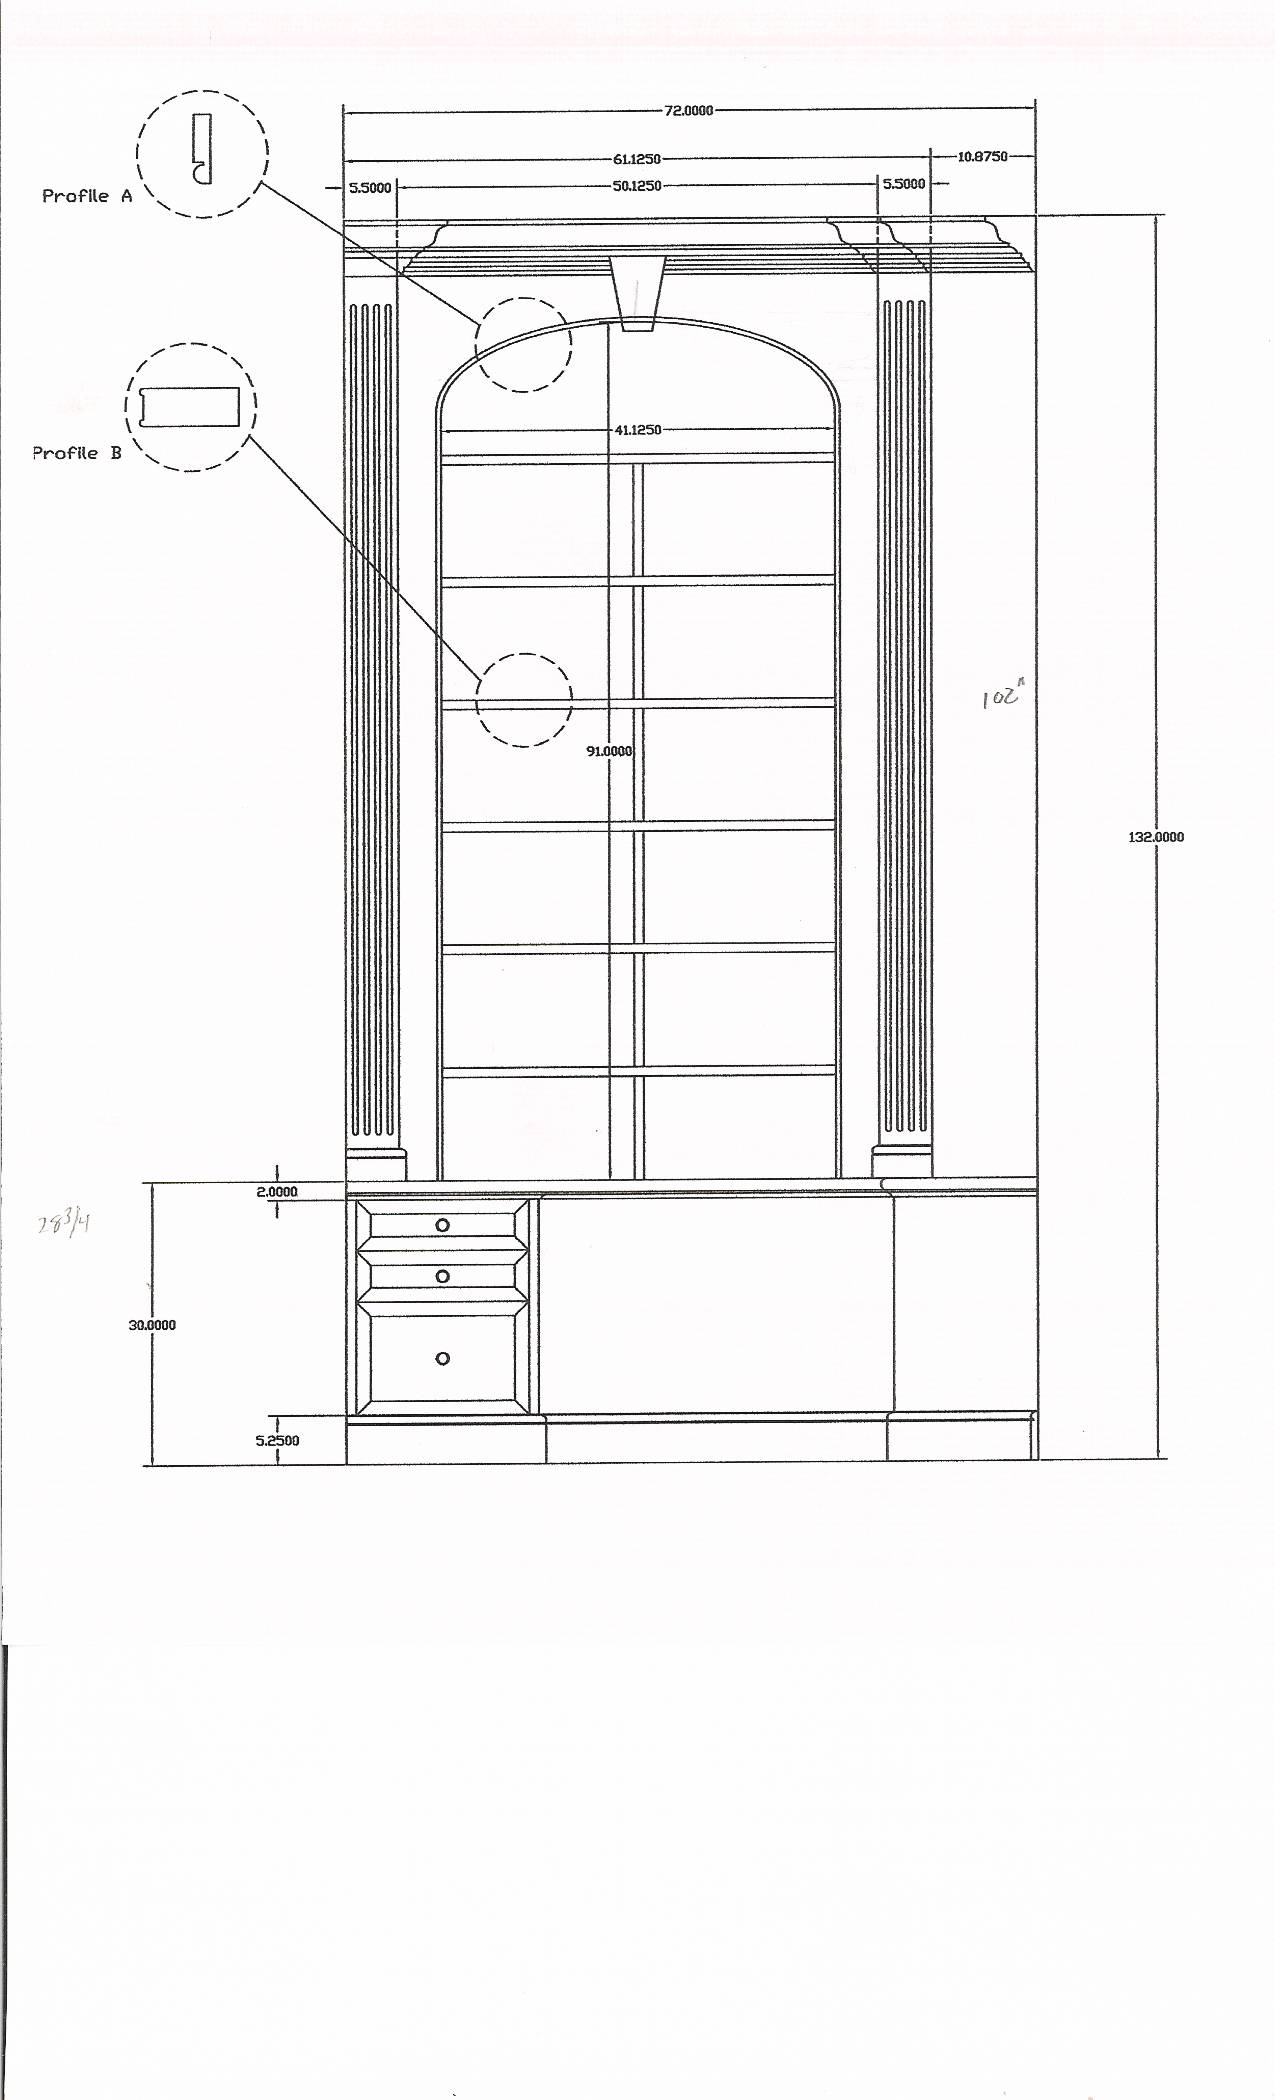
Click here for full size image
Forum Responses
(Architectural Woodworking Forum)
From contributor A:
I would make up the faceframe without the bead. I would then miter the bead and apply it with glue and a 23 gauge pinner. I've had to freehand way too many curved beaded doors to encourage someone to do this on a large faceframe. It is very prone to mistakes.
From contributor H:
To the original questioner: Here's some info. Beading bit + laminate trimmer + curved base on trimmer + steady hand = radius beading. We have done it often. Practice on a few scraps first to get the feel. You'll get it. Do it with the piece laying down flat and the laminate trimmer held horizontally so you can see what your cutting.
From contributor E:
To contributor H: What about the fact this appears to be an ellipse and therefore not a consistent radius? Would the curved base on a trimmer still work?
From the original questioner:
I'm not sure what the best way to go is. I think a plywood frame with the bead attached would be more stable, but I'm not sure what it will look like stained up.
From contributor H:
The curved base is not meant to match the ellipse. It just allows the driver to freehand the bit, keeping it cutting at the tangent much like Aaron said.
From contributor K:
I would suggest that you make up the frame out of whatever you want, use the router table to make the moulding, and then apply with nails and/or clamp. It looks like 1/4" or 3/8" x 3/4" with a flat before the round. It's easier and just as fast to make it separate and there will be no errors.
Remember that if you use plywood, after you make the bead with the flat spot (to separate the bead from the ply) the side of the moulding hitting the frame will no longer be 3/4" wide but will be 1/2 or so. This will show some of the plywood edge.
From contributor M:
Take the time to make it integral. Trying to wrap that tight radius where the legs meet the head will drive you crazy. You will snap many pieces before you get one to work. You can bandsaw block to fit the corners and machine then that, and then run the loose pieces up the legs and across the head. It�s time consuming no matter what you do.
From contributor R:
The other option is to steam the bead moulding to fit the curve then apply.
From the original questioner:
To contributor K: I understand what you mean. I already thought of that. I think the plywood would be more stable, but I don't think the two will stain the same. As far as the moulding, I was thinking of making the blank, then running it through the W&H to put the bead on, then applying it. I'm just not sure which way is the best way. I just want a nice finished product.
From contributor T:
It seems to me the bead would get a bit prone to breakage near where the curved rail meets the stile on account of the grain direction. Also, bear in mind the stiles will have to be notched. I think if I were doing this piece I'd use solid stock for the face-frame but apply the bead - or at least try to.
From contributor L:
This is a smaller version of what you need to do, but the radii are probably just as tight. The larger square dimension across the opening was 14 1/2", so I think the 1/2 ellipse is about 9 1/2" on its long dimension and 6 on its short dimension (3" showing on the 1/2 ellipse).
This was an applied bead and it was made from 4 pieces 1/16" strips laminated together using the opening as a jig. I used the drop from the cutout as the inner clamping jig, and then I removed the 1/4" thickness from the inside of the drop so the 4 - 1/16" strips would fit perfectly and glued and clamped them for 2 hours. Then I used a 1/4" round-over bit with a bearing on a router table to make the beaded front. In your case you would need to use 5- 1/16" strips so you could get your flat (quirk) shouldered area. It worked great and fit perfectly with no stressing at all.
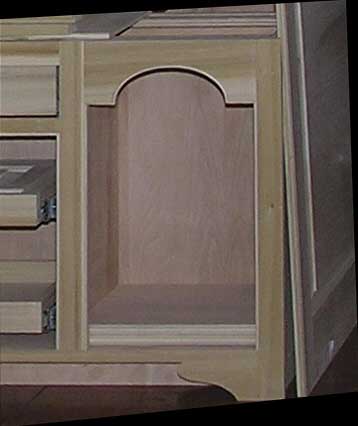
"Photo by Leo R Graywacz Jr".
From contributor B:
As this is only one unit, why not use an old hand tool method? Make a scratch bead tool by grinding or even filing the bead profile into the corner edge of some old saw steel or scraper blade. Form a sharp cutting edge and clamp a small stop block to set the bead the right distance from your ellipse edge. Drag out the profile to the desired depth and lightly sand to finish.
From the original questioner:
Actually there are two of them and this is the smaller one. I guess there isn't any easy way of doing it.