Question
I am currently in the beginning stages of staining a pine bar/lounge (a 20x20 room finished floor to ceiling with panels, mouldings and cabinetry).
We received a few small samples from a designer that were generated from a larger company out of Canada. These samples were all on 1/4" MDF (12"x12") with a heavy pine veneer (ideal for an even finish). The samples came with formulas and instructions on procedure. The instructions clearly say that he sanded only to 120 (which jumped out at me as asking for trouble from the get go).
I have now been presented with the challenge of finishing a huge project consisting of various mouldings, hardwood frames, cabinetry, and panels made of both MDF and plywood core (some sheets were also from different distributors, to make things even easier). I did a lot of experimenting and was able to obtain a uniform finish on some of the MDF core panels and even some of the hardwood. But at the same time, the higher grit I finished out at (180, for example), the more even all the different materials ended up. Since I have been instructed to only sand up to 120 on hardwood and panels alike, I'd like to get some advice on how to go about this. I have successfully stained and finished about 1000' of moulding but did run into some pieces that stained up pretty unevenly (even with a wash coat and spraying on the stain). Right now I am most concerned with making sure the panels and frames all come out even.
Forum Responses
(Finishing Forum)
From contributor D:
It sounds like you are applying the stain by hand, even though one part of your project you applied by spray. Your best shot at even results from so many different sources of wood would have been to begin with equalizing stains (aka tinting toners).
http://www.woodweb.com/knowledge_base/Tinting_Toner_Tips.html
The solid woods you are calling "hardwoods". Not to be anal, but pine is a softwood. I think that you mean to call these pieces "solids".
After the tinting toners, I find it useful to use a toner spray with dye stains to get the coloring that you need. If the equalizing toners are made with pigment colorants (which in this case I prefer), then go onto the sprayed dye stain as the next step, as I already said.
To whitewood sand pine with 120 grit seems to me to be too coarse, unless they are referring to a different grit-rating scheme. I do not know much about the different grit schemes and their ways of being rated because I have one collection of sandpapers and I have been working with them only so I never got a grip on the rating conventions. Ask your finish supplier about what grits to use with solids and veneers. They will advise you best based on your woods and your chosen finish system.
Are you letting the stain flash before wiping?
What percent solids washcoat are you using?
Is the stain compatible with your topcoats?
Can you get the clear stain base for the brand of stain you're using?
If you're getting blotching, I'd say the washcoat isn't sealing the wood enough for the stain you're using. A small increase in the solids content of the washcoat can make a big difference in avoiding the problem.
If the stain is compatible with your topcoats, you can add some of it to a measured amount of thinned finish for use as a toner (e.g., 2 ounces of stain per quart thinned finish). To avoid making the color too dark, you can reduce the stain with the clear stain base and use that over the washcoat. The lighter stain will also show less blotching and the toner will add the rest of the color and make it more even at the same time. It doesn't really add more steps to the finish, but does make the color a lot more even as well as give you more control over the color.
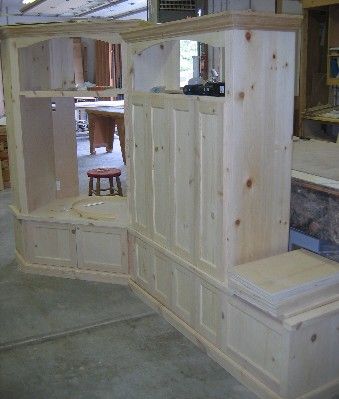
I've used this technique at times, for various reasons, and it works well. Not too long ago I had a pine wall unit that was a mix of solid and veneer. The customer wanted a light color, but the stain caused some unsightly blotching and there was a color difference between the veneer and solid wood (doing samples before starting the wall unit made the problem obvious). Here's a shot of the wall unit before finishing:

To avoid the blotching and make the color even on the veneer and solid wood, I reduced the stain with the clear stain base and used that on the bare wood. In this case, since the color was so light, I didn't need a washcoat first.
Next I sealed the stain with a coat of finish. Then I added some of the stain to some thinned finish and sprayed that over the sealer coat after I sanded it smooth. The toner gave me the rest of the color and made everything nice and even.
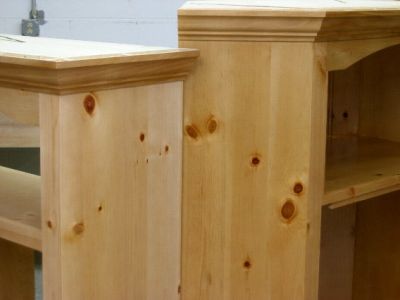
In this picture, the cabinet on the left is stained (very light), and the one on the right has toner:

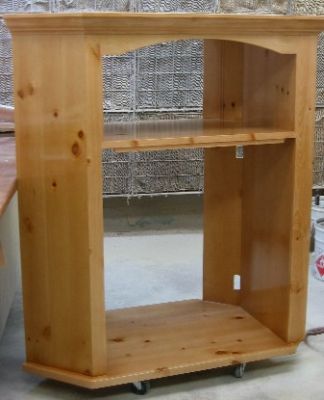
Here's a shot of the corner cabinet with a couple coats of finish over the toner:

If you're going for a darker color, you probably won't be able to skip the washcoat, but you may need to adjust the solids content a little. If the stain comes out lighter with the higher solids washcoat, just add a little more stain to your toner to compensate.