Tips for Defect-Free Sanding to a High Gloss
Finishers trade advice on how to eliminate visible sanding scratches when polishing their work to a high gloss. November 5, 2013
Question
I just got done finishing a table with a high gloss sprayed finish. The spray finish was nice, but that was not enough for me so I decided to sand and polish it. I finished up at 3000 with my Milwaukee palm sander. I did notice after 1500 that when I was squeezing my water that there were some squiggles and I would just hit them again with the 1500 to remove them.
Well after polishing the table out it looked amazing. Then I got it into the sunlight and I could see some very distinct squiggles. I used no pressure and kept the water pretty clean (only doing about two square feet at a time). I have run into this before. What kind of sanding schedule and what tools are best for this? I have heard a lot about the Festool palm sander. Is that any better for some reason? Mine has a 1/32 scratch pattern. Should I start hand sanding after each grit before I move on to the next grit?
Forum Responses
(Finishing Forum)
From Contributor R:
You might want to try and slow down your sanding speed and make sure to have fresh/clean paper. A good air sander (a Dynabrade is a good brand) will really help eliminate the scratch pattern. What sort of coating were you polishing?
From contributor M:
What were the compounds and procedure you used to polish the table?
From the original questioner:
I was wondering about using an air sander and if it would lay down a better scratch pattern? I do all of my work on sight. This instance I set up in their garage. I would need a pretty large compressor to run an air palm right? I used Crystal Sealer with Trans Tints to tone (killer match on the original finish) and Crystal Gloss (two coats). This was my first time using this. It was fine for the first time using a product (I would like to hear what you guys like). I used 800 grit with the palm sander and then by hand until I was satisfied with the scratch pattern I wanted to leave for the next grit. Then I used 1500 grit (same as before), making sure to leave very minimal "texture". I do this so I can make sure that my next step is extremely consistent. Then I use 3000 3M Tri (pricey, but I really like it), palm sand and then go over it by hand once again producing a very consistent scratch pattern. I wiped the surfaces clean between grits and only completed about two square feet at a time before wiping and checking the scratch pattern.
My sander was set to two. I used 3M and finessed it with a yellow foam compounding pad. It popped a mirror shine immediately. I was very pleased with the mirror shine it produced, but after all of my years in auto detailing I knew it could get better. The 3M was perfect for it and a I used a white foam pad � it deepens the sine. Both of the 3M products are body shop safe. The next step is not! I used Auto Magic BC-2 and a black foam polishing pad. This really makes it pop. Once again this product is not solvent friendly. It has silicone in it and will obviously cause fish eye in a shop.
Like I said, it looks good, but there are the mystery squiggles in it and I just can�t figure out what caused them. I am pretty sure I am going to have to sand the whole thing back down until I get to whatever grit left the squiggles, and probably re-coat and re-polish.
From the original questioner:
Correction on the 3000 grit - there was really not a scratch pattern, but a consistent "honed" reflection. Remember this was taken with my cell phone, but if you look in the reflection of the brown door you can see the red mahogany and dark walnut trans tint toning effect that I had to re-create. This was my first time using the trans tints and had a blast with it. Very cool stuff.
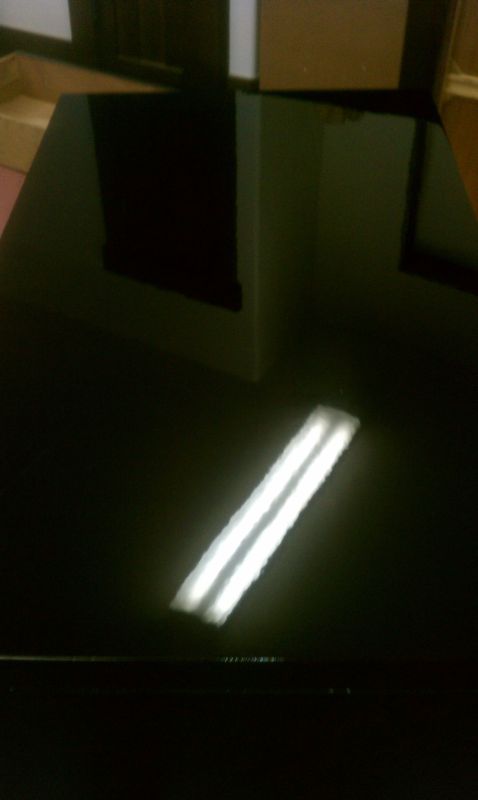
Click here for higher quality, full size image
From contributor S:
When was the last time you changed your back-up pad? That can be very important. Also, if the sander is really old and the bearings are starting to wear the finish will be affected. When finishing, faster is better. You should be running a steady 8000-9000 OPM unless you are putting on buffing pads, then you want to slow to 2000-3000. The sanding discs make a big difference. You really do get what you pay for.
From the original questioner:
Thanks for the reply Contributor S. Correct me if I am wrong, but I am pretty sure my palm sander runs at 32000 opm when on high. So I would guess that running at "2" would probably be in the range you mentioned. Once again, correct me if I am wrong.
You mentioned my backer pad. Well, I do not have one on there. I just have the stock velcro. I will make a softer backing pad to attach to the palm sander. That really makes good sense and I should have thought of it before. For the polishing steps I used my Milwaukee polisher that I have had since I was 13 at around 800 rpm to start and then shot it up to 2800 after the "initial pop" to increase the depth in the clear. I am sure I am not the only one to have this happen, what (if any) tricks were there to remove the squiggles (outside of sanding back down and re-shooting it)?
From the original questioner:
By the way, what do you think of the finish that I ended up with? This was my first gloss job. I know it is hard to tell from a phone cam shot, but I thought some of you may be able to see something I may have missed or could have done better (besides the squiggles that only show in certain light). Don't be afraid to be honest, I am relatively new to finishing and have only been doing touch up for a couple of years now professionally and recently got into complete on-site re-finishing and spraying.
From contributor U:
I think the issue is more mundane. You're just not seeing the scratch pattern you're leaving behind or the one you had that you are trying to replace. Sanding/polishing is just replacing an old scratch pattern with a new, finer one. I never leave one grit for the next without sanding by hand and completely examining the surface under bright, low incidence light. When difficult to detect I can lightly dust with talc or rottenstone to emphasize the remaining scratches. Having a portable/hand-held light source is indispensable.
From Contributor R:
The harder the pad, the flatter it will sand. I contact cemented a piece of P-Lam to the soft rubber pad on one of my
Porter Cable orbital sanders and it sands as flush as flush can be. This was done to sand off a whole bunch of putty that someone else had applied to some panels. That said, I would not use an orbital electric sander to completely cut down a coating that I was going to buff out to a high gloss. That's just my preference and its not etched in stone. I like the air sanders due to the fact that the pads are quite stiff and cut down; as opposed to just riding over a surface flaw. The results I get using 3M 1200 and then 3M 1500 grit paper gives me a perfectly flat surface ready to polish. Looking over you grit sequence I wonder if you might have skipped over a few.
From 800 to 1500 to 3000 leaves a few grits in-between and by skipping through them you�re asking each grit to remove too coarse of a scratch. I like your "persnickety " approach to perfection, I think you just need to tighten up your approach to it. Don't have a piece of paper with me at the moment but I use the round velcro-backed stuff without the holes in it. I buy it online - a bit costly compared to the Tri-Mite but it gives me good results.
From the original questioner:
I agree 100 % about hand rubbing each grit and it being mundane. I am a scratch pattern geek. I know that is where the miney is made (I also teach stone restoration and scratch patterns are every bit as important there as they are with wood). I did do a thorough inspection after each grit, but missed it obviously. I love the idea of the talc and a hand light. I will remedy that when I re-finish this again. By the way, this is a $20 mil home and I charge a lot, so, my feeling is if I am selling myself as a "pricey artist type" the work better be perfect or darn near.
From the original questioner:
What is "p-lam" and where can I get it? I do not completely finish sand with the PS. I leave enough of the highs then get the scratch pattern to where I want it by hand and then move on to the next grit. In stone restoration, we basically double our grits with our diamonds. I had never thought of and did not have access to the 1200 grit at the time. I will pick some up. I recently re-applied some velcro to my PS with some contact cement. I wonder if there is a "high" in the velcro application that is throwing it off? I bet that is it. Either way, I really appreciate all of the help and knowledge.
From Contributor R:
P-lam is just a way of saying or typing out the words Plastic Laminate. I'm sure you can find a scrap piece. I only used a 4"X4" piece on my
Porter Cable Sander. Since your polishing out a gloss coating I would try just the two grits - the 1200 and then the 1500. The 3M polishing compound, the (yellow liquid) is gritty enough to remove the 1500 pattern and then the 3M buffing compound, the (Black liquid) does the rest.
From contributor B:
Before getting into cabinet building/finishing I built surfboards for a couple of decades. Back then all surfboards were rubbed out (polished). I can tell you from experience the longer you let your finish cure the fewer scratches you'll have. In the future let your finish cure for as long as you can especially if you�re not using a catalyzed finish. Also as someone else mentioned a good stiff pad is key to getting less-deep scratches. They don't "bite" as much as a softer pad. We used sander/polishers, not randoms, just like the kind used in automotive. Faster for sanding (2800rpm max), slower for the polish (1500rpm max). Good luck and at least the tables don't have fins on them. You'd be amazed at how far a surfboard will fly if you wrap a polishing pad around a fin.
From contributor M:
Just a couple notes from my experience. I don't like using electric sanders when wet sanding, call me crazy I guess! I use an air sander but I can see that being a problem on site. I also do almost all of my flattening work on the build or sealer coats. I don't like CV for high gloss jobs because of the potential of sanding through layers and getting the dreaded halo. I use polyester for my sealer and a 2k urethane for the topcoat.
As far as wet sanding I find that if I have a nearly perfect surface before my final top coats I can start wet sanding with 1500 grit and work up to 3000 which makes the buffing much easier and virtually eliminates sanding swirls. The picture below was taken after the first coarse compound step.
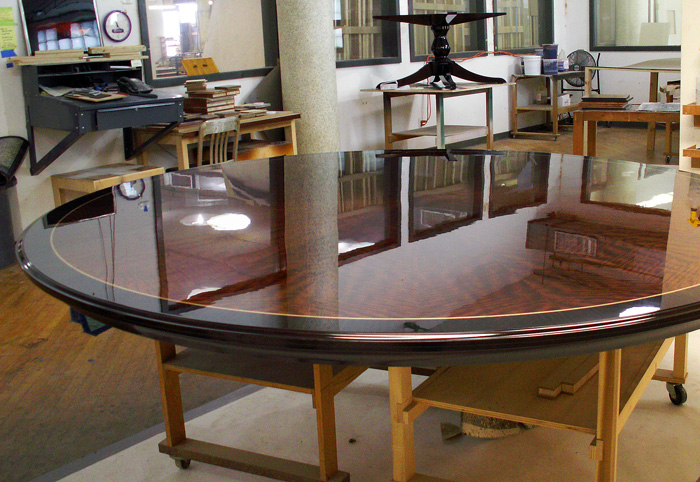
Click here for higher quality, full size image
From contributor S:
In regards to the sanders, there are several orbit sizes available, from 3/8 (coarse) to 3/32, with 3/16 being the most common. Most people will have a 3/16" which is a good general purpose, but the 3/32" is an excellent finish sander. 3M has one of the new Electric Palm Sanders in 5" and 6" with the 3/32" orbit that does a great job. This is similar to the
Mirka Ceros, but
Mirka doesn't have the 3/32" in the US. These sanders really to give a much better finish because the DC Servo motor maintains a constant speed and the center of gravity is much lower to reduce vibration and wobble. There are a variety of back-up pads you can buy to change the action of your sander, from soft to firm. If you are looking for a great light, the 3M Sun Gun Color Matching Light Kit works well.
From the original questioner:
Contributor S - anything out there that may be comparable at a better price?
From contributor S:
The only thing I know of that is comparable at this time is the
Mirka Ceros, but it doesn't have the 3/32" orbit.
From contributor C:
How old was the finish when you started the polish sanding? You can pick up a "nit" on the sanding pad if the finish isn't hard, then it will burnish the finish. Equipment from an automotive paint store will get you to the best level - power buffers, foam pads, and a couple steps of compounds.
From the original questioner:
It was my first time using the Krystal, and it was a bit gummy when I started my sanding. I just picked up another on-site table re-finish today that I start soon. I plan on being more patient .
From Contributor D:
Sandpaper is not always perfect. Some are better than others. If you see a squiggle mark it is most likely from a high point in the paper. When I need to have a polished surface I always rub the sandpaper against another piece of sand paper (lightly) to take out any high spots of grit. This is not the cure-all for every squiggle but it does take out one of the possibilities of a random squiggle. I like to do most of my leveling in the sealer coats as another poster mentioned. I've used straight lacquer, cat lacquer and conversion varnish. My sales rep says I would be better off using urethane for the built-up polished finishes because of final film thickness.
Editor's Note: 2Sand (website) handles a full range of sanding supplies