Touching Up Sand-Through Damage on a Table
It's too late to prevent the damage, but a passable repair is possible using touch-up powder or sticks. October 19, 2013
Question (WOODWEB Member) :
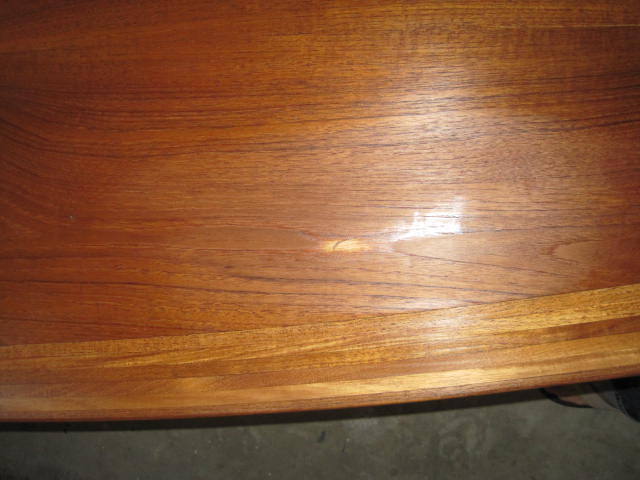
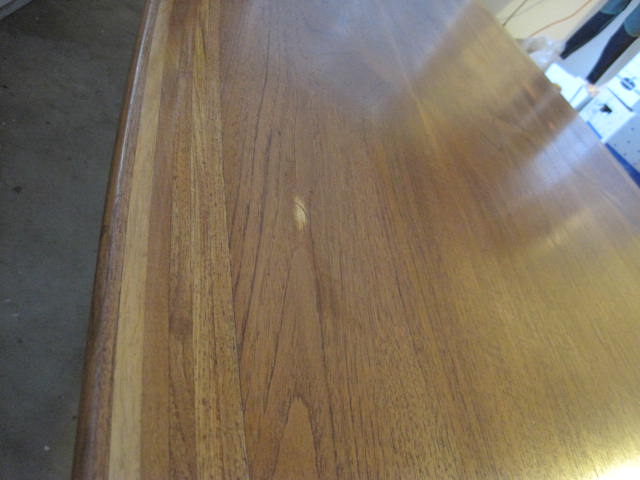
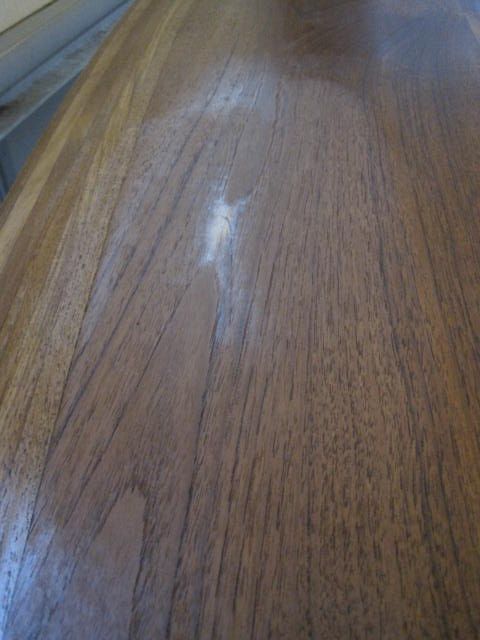
I have a table that I was sanding and going to oil with tung oil progressively and throw some beeswax on top. A scratch was sanded out of the table at the urging of someone else but in its place the underlying veneer or stain that I did not know about was sanded through. I was left with a small light spot the size of a quarter. Various attempts were made with stain pens and then miniwax stains to darken the spot, however the stains would not take.
So I bought a darker stain. The stain directions suggested 220 grit pre- sanding for the stain to take, so I did as suggested and the stain still won�t take. At this point I was going to cut my losses and oil the area and call it a day. However, now the entire area I hit with the 220 is not taking back in the tung oil as it did before. I now have a spot and some faded area I need to fix. Any help is appreciated.
Forum Responses
(Finishing Forum)
From contributor M:
Take a look at some of the Mohawk touch up products. They are made for repairing damage like this. You could also try tinting some. There could be a number of reasons that might explain what is going on. It is hard to say. I think that if the top is veneered by sanding the scratch out you may be close to the glue line beneath. That could be preventing anything from penetrating.
From contributor F:
It�s hard to give specific advice without seeing it but in general those sand-throughs in veneer are tricky to cover up. In situations like yours where you cannot simply replace the part I would try touching up with shellac and powdered colors. They're sold as furniture touch up kits. It's more of an art than a science, but a very basic description is to mix the powders together with a little bit of shellac to get the lightest background color of the wood, then touch up that area. Then you mix a little darker for each subsequent color change in the wood, and then you fill in the darkest grain lines with a fine tip brush. Last step is to coat the whole repair area with shellac before applying your topcoat to the whole piece.
It takes a good eye and some practice but someone with skill and experience can make just about anything disappear! I still have a tough time with it and it takes me far too long to get the colors right. I've come to the point where I can hide it enough that if you�re not looking for it you won't see it, but if you knew where the damage was you can still find it.
From contributor R:
I'm not necessarily advocating this for you, but if I were to start having serious adhesion problems along with your sand-through, as well as adding your difficulties resulting from missteps with staining attempts then I would just re-veneer the top. I have no idea what the top looks like now but I would just start fresh and dump the mistakes made to date.
From the original questioner:
Here are some pictures of the problem area. I took this project on as a favor for someone and everything was going well until I took someone else's advice (sanding more).
Click here for higher quality, full size image
Click here for higher quality, full size image
Click here for higher quality, full size image
From contributor M:
I�m not sure what the client�s budget/expectations are here. That obviously plays a big role in what can ultimately be done. It does sound like you�re not expected to do restoration quality work in this situation. From looking at that, I think you could make it go away with a graining pen, and a matching Mohawk marker/crayon. They have a tech support line and can advise you which product you want. That would be the quick and dirty fix. Your best bet is to fill any more scratches.
From contributor R:
Looking at the mismatched veneer job of the original I'd be even more inclined to put a new veneer on. But, it's probably not worth it unless the table is a real gem which it appears not to be. Take the touch up advice unless there are (as you mentioned) other finishing issues with adhesion and stain absorption. If there are then your topcoat may be a headache too. This is where one might consider bailing on the whole mess.
From Contributor J:
It looks to me like the sanding went through toner and/or glaze layers to a clear undercoat (which would explain why the stain won't take). I would suggest that you airbrush a toner. It�s not easy. Rattle can toners are an option as well and they are not easy either. Whichever you choose start light and build color slowly. Or call a good touch-up guy.
From Contributor B:
Get the Mohawk touch-up powders. Apply with a moistened fingertip or an artist�s brush, then shellac or lacquer spray can to seal in color.
From contributor D:
I would try Mohowk Blendall sticks. They are far more forgiving then powders and you will be able to get a satisfactory repair with the sticks. You will need to find an appropriate background color- seal in the color and then with a fine artist brush you will need to paint in the missing grain. For this you will need a matching color for the grain (this will be the difficult part). Once these repairs are done and sealed it will be hard to detect where the repair was made. Don't dwell on how or why the damage happened. Direct your energy on the repair.
From Contributor B:
I've found that the BlendAll sticks are great if there's a scratch or indentation. When the surface is basically level as with a sand-through, the BlendAll stick repair is slightly higher that the surrounding areas, and either wears off/is rubbed off quicker. That's why I use/suggest the powders.