Question
I used the dried yellow glue and ironing method to bond an expensive maple burl to a small table top. Finished it with three coats of homemade oil/varnish and then two coats of water based polyurethane (Minwax). Now there are several bubbles randomly scattered where the veneer is apparently delaminating! Do you think I can rebond it with more heat and pressure from an iron or am I doomed to start over?
Forum Responses
(Veneer Forum)
From contributor J:
Burl and tensioned species are best laid up with a urea resin glue line due to its rigid properties. Other woodworkers have injected CA glue into such problem areas with varying degrees of success. It may re-bond with additional heat but I do not know how it would affect the finishes.
What is the substrate? How was it prepped? Is the veneer delaminating or is it lifting off the substrate? How thick is the veneer?
9/13 #8: HELP, veneer finishing problem ...
Jeff Jones
geppetto425@comcast.net
The ironing glue method is the same as ironing on pre-glued edging or glue-film veneer. Is it not PVA glue reactivated with heat? I am still a novice when it comes to veneer. I run a small one man shop and my veneer experience so far has been repairs and patching. This method appealed to me because it doesn't require special water-to-glue ratios, soaking time, temperature, or the other messes associated with hide glue. And by using an ordinary iron, there's no need for a vacuum bag, an expensive press or complicated clamping cauls. I also read that veneer applied this way does not cause any distortion. Because of the construction of this particular piece, I did not have access to the back side.
I used 1/4" hardwood plywood glued on the top for a flat substrate. After taping up the 1/64" veneer, I sealed it with a coat of 3-lb cut shellac (which is also thermoplastic like the glue). Then I applied two coats of Titebond III (note: waterproof), thinned 10% with water. When this was completely dry, I ironed it on with great results, it was very flat and secure. I lightly sanded the skid and light scorch marks off and waited several days before applying my homemade oil/varnish finish (1 part boiled linseed oil, 1 part varnish, 1 part mineral spirits). Three coats, rubbed in with 400 grit wet/dry. Okay, I should have stopped there. But I wanted a quick high gloss finish, so I started applying the water-based polyurethane... That's when the veneer started bubbling.
What is baffling me is why it has delaminated in several places even though the veneer was sealed with shellac and I used waterproof glue. Any chemists out there?
I have used the dried yellow glue and iron method and have had a 50/50 success rate. There are many variables involved here when you try this method. Proper glue spread, the right time to start applying heat, how much time to keep the iron in any particular spot.
Did you scuff your substrate and make sure there was no debris or excessive dust, oil or other foreign matter that would cause the glue to fail? Was the veneer also inspected for the same things? This could be the reason for your problem. Was the caul board that you used perfectly flat? When it comes to veneer work, prepping of all your material prior to any glue-up is the most critical, because once you start spreading glue, there is no turning back.
Once again, think it through and go for it. Mistakes will happen, but that's part of the learning process. And to reiterate, it will probably be better to start over. In my experience, once the glue has dried and a finish has been applied, the work piece is pretty much impossible to repair and wind up with a quality product. Don't get me wrong, it is possible to fix, but by the time you fool around with it and possibly get it fixed, you could have re-done the piece with much better results.
Stepping back a level, just because it's been printed doesn't mean it's a good idea. Fine Woodworking also printed an article called "Make a chair with biscuits!" or something like that, which is very foolish. Magazines need new content all the time, and will often print dubious advice in order to fill pages. Much of what they write is aimed at hobbyists, and makes no sense for professionals. Techniques which do no harm in a home hobbyist situation can be inappropriate and even dangerous for professional use.
You can make a low cost veneer press in your shop by constructing a torsion box and using bar clamps around the box's periphery to clamp the veneer down. Ian Kirby wrote an article on this in Fine Woodworking's earlier book titled "Marquetry and Veneer." I have never tried this method, yet if the torsion box is made properly, I have no reason to doubt it would work well.
On one occasion I had to inlay a strip into the center of the table. I placed the substrate on the floor and wedged 2 x 4 studs between the caul and an I-beam directly overhead. With a thick enough caul, or a torsion box, and of course a sturdy enough ceiling, you can do the same.
I (and people who work for me) will iron on veneer edges in the following circumstances:
1. A perfect continuous grain match between the top and the edge is necessary, and
2. The shape of the edge precludes any kind of clamping.
We experimented with aliphatic resins, PVAs, and UF (UniBond 800). The Unibond worked well, but was the nastiest application of an adhesive I have ever undertaken. It stunk and I know the fumes could not have been good for my health. The results, however, were fantastic. I used that method on an ebony desk with an avodire edge 10 years ago.
Overall, we've had the best luck using white glue. Apply the glue to the substrate and the veneer the day before. Just before ironing on the veneer, brush on a light coat of water and when using the iron, press as hard as you can, plus a little extra. I wouldn't attempt this on surfaces larger than an edgeband.
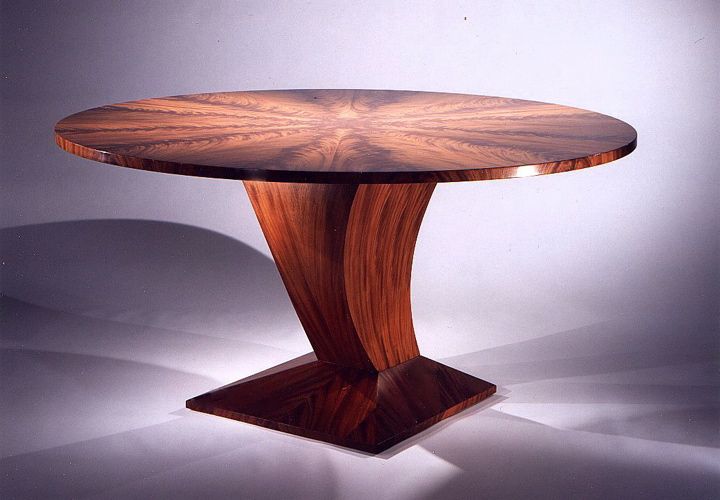
The table below was made in 1998. The edges were ironed on with white glue. The top was glued in a vacuum bag with UniBond 800. I showed the table at the Philadelphia Furniture Show. Ian Kirby (an accomplished and well respected furniture maker) stopped by the booth and admired the table until he found out the edges had been ironed on. He said the edges will surely delaminate. The table is in my office and is used every day. The edges look like they were glued on last week. They're fine.

A water-base finish over an oil-varnish mix can be problematic. If this is a necessary process for you, I highly recommend that you allow enough time for the varnish-oil film to completely cure, about two weeks or more, before applying a water-base film over it. Bob Flexner's book, "Understanding Wood Finishing" has excellent information regarding the compatibility of finishes of different kinds.
Yes, I lightly scrubbed the substrate and back of veneer with 80 grit to get rid of any nubs. It was as smooth as a baby's behind.
Contributor W, you are correct, that was kind of screwy on my part. I had just read an article in the latest Woodsmith, no 163, about this. One coat of oil varnish for color and depth, then water based polyurethane for speed of drying in a dust-prone home workshop. I started rubbing in more than one coat, though, and I should have let it dry longer than a week. (I should have just quit there instead of getting impatient!)
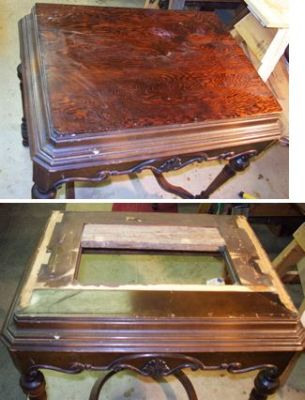
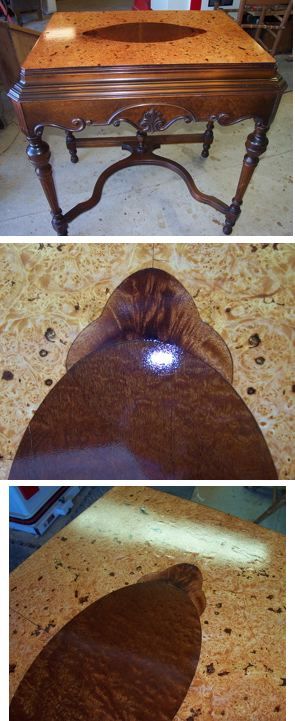
Here are some pictures of the offending piece. I took it to the customer the other day and they are actually very pleased with it. I am going to rub it out so it is a bit smoother, only charge them for the materials, and I will check back with them in a year and if it is worse, I will redo it gratis.
Before...

After. You can see the bubbles at the top of one of the pictures.

Comment from contributor A:
A shellac finish is inherently permeable to water. Old school says never mix your finishes. If you wanted a high gloss finish, the polyurethane alone would have done the trick. Oil base is preferable to waterbase. Either that or you polish or wax the shellac. There would be no good reason to mix those two types of finishes. Polyurethane is simply synthetic varnish.