Troubleshooting a Chipping Finish
The chipping problem in this case could be an adhesion failure caused by sanding wood with too fine a grit. February 16, 2014
Question (WOODWEB Member):
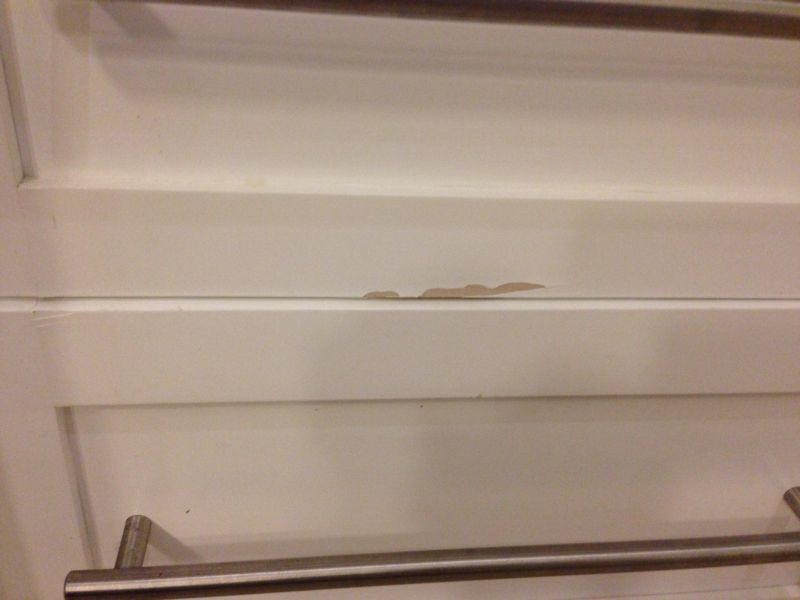
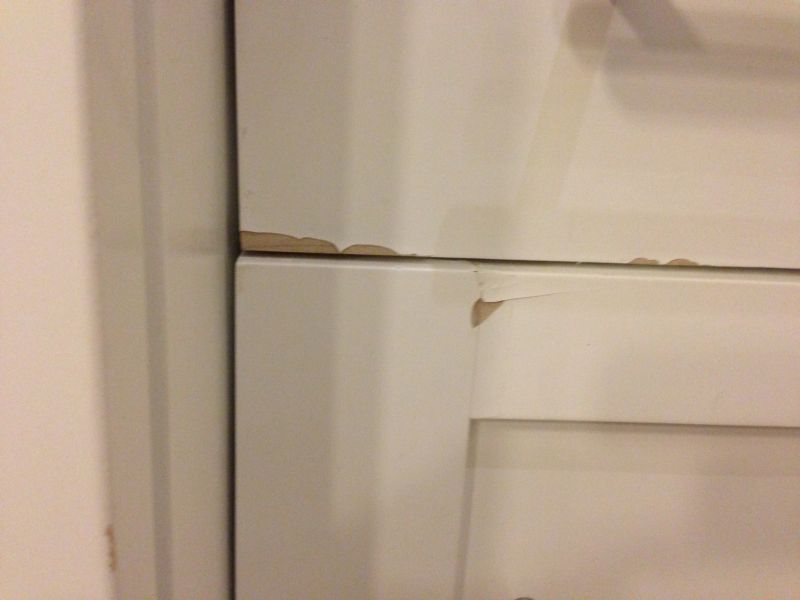
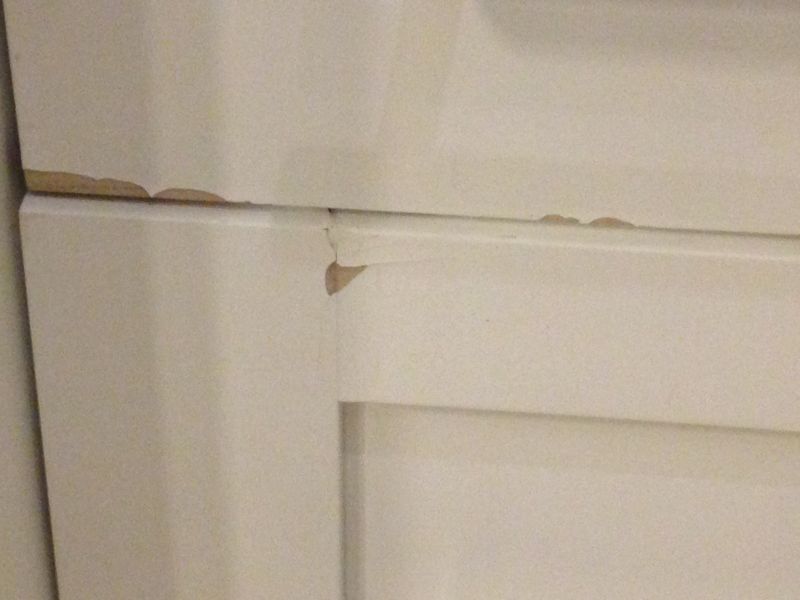
As of late (last year or so) a few of our projects have started doing something very peculiar. The finish on some of the doors/drawers (only on some projects) has started to chip off � see images below. I'm thinking it may have something to do with the clear finish product that we apply once the stain or paint is dry. I'm really guessing here though and I'm hoping that someone out there has encountered and rectified this issue before and can provide some insight for us. Obviously this is not the type of recurring issue any woodworking company needs. I'm desperate to get to the bottom of this and any help would be greatly appreciated.
Click here for higher quality, full size image
Click here for higher quality, full size image
Click here for higher quality, full size image
Forum Responses
(Finishing Forum)
From Contributor M:
More info would be of help. What is the paint, lacquer or conversion varnish? What is the top coat? Is there primer coat?
From contributor R:
Is that by the sink, dishwasher, or stove? Is it pre-cat lacquer clear coat? I'm saying water/steam getting behind the finish from either a crack in the wood or finish, or thin finish on the corners. Switch to conversion varnish. Just guessing since you didn't give us the material or finish schedule.
From contributor M:
It looks like a failure at the wood/first coat interface, not with top coat. It may be poor prep or primer/base coat adhesion. What primer or base coat did you use? How was the door prepped? Or maybe something is in the wood surface? Was it wiped down with lacquer thinner or acetone first to remove oils or other contaminants?
From Contributor M:
I�m with Contributor R. We switched to conversion varnish because of sink
cabinet doors and finish problems.
From contributor O:
The problem shows up exactly where the finish fails. It looks to me like raw wood so I would say you have an adhesion issue with whatever you are using as a primer or sealer. Post your entire finish schedule (including white wood sand grit) and we will be able to help you better.
From contributor T:
Here�s a schedule I use:
1. Sanded to a 220 finish.
2. Blown off with air and wiped with tact cloth.
3. Primed using a pre-cat undercoat by Gemini.
4. Sanded with 220.
5. Blown off with air and wiped with tact cloth.
6. First coat of precat flat finish by Gemini.
7. Sanded with 220.
8. Blown off and wiped with tact cloth.
9. A second coat of pre-cat flat finish by Gemini.
From contributor O:
How about wood species? Is it possible that it is hard maple? If it is 220 is too fine to final sand hard maple. It burnishes the wood and can cause adhesion issues with the primer especially if you aren't using much thinner. I normally sand maple no finer than 180, 150 or even 120 would be fine for a primed application. Maybe you could make some samples with different sanding grits and see if that could be the problem.
From Contributor B:
I agree with Contributor O, If that's maple and you white-wood sanded to 220, that is the most likely cause. Finish two drawer fronts, one sanded your way and one sanded to 150 and allow them 7-10 days cure and check adhesion. I bet you'll be surprised.
From contributor K:
A rougher grit prep would give you better adhesion. Also, I�ve seen that same problem when flooding on the first coat of primer. If you spray it too heavy the primer sort of bridges and when it dries up it shrinks and pulls out of the grains that were holding it in place. To fix this I would prep to 180 and then spray a mist coat of the primer first (a very light coat that you can still pretty much see the wood through) and let that flash off for a couple minutes before making another, heavier pass.
From contributor A:
I agree with others - 220 is too slick. This could be wood related. I had one out 35 plus pigmented kitchens in the last 13 years fail. I re-finished all the lowers near the sink three times over, eased all edges and put on two extra coats (5 on faces/3 on backs). It turns out the poplar doors/mdf panels supplied by MFG (normally they used maple) were swelling from the steam and all the moisture/water from the sink (customer was/is super sloppy). Eventually from all the movement it would crack at the joints and voila failure would ensue. This pattern also became apparent in the whole kitchen. We/MFG replaced the doors with maple/MDF panels and no problems since.
This could also be a bad prep (not easing edges enough). All of the pics show failure in the right places, right near or on the edges. A little off topic, but this is why I have caulked all of my pigmented finishes for the last few years.
From contributor A:
I should have made it clearer about the poplar doors. They eventually were moving all over the kitchen not just in/around the sink/dishwasher area. Possibly to a high moisture content from the factory as these are from major door MFG who sell a lot of poplar doors.
From contributor D:
We never sand raw wood beyond 150 grit unless it is being stained. Then we go to 180 grit and 240 on the end grain of raised panels.
The more typical schedule would be:
1.150 grit
2. Primer
3. 240 grit
4. First top coat
5. 320 grit then second topcoat
This ensure good adhesion. You will also sand off any grain raising in the primer or sealer coat if you sand to 150 grit.
From Contributor S:
When water gets to the raw wood it will cause the finish to fail like this. Some steps to take that can improve the performance:
Make sure the wood has a moisture content around 8% before finishing. If it's holding more water, the finish will fail.
Sand the raw wood to 120 or 150 as recommended.
Use vinyl sealer instead of regular primer. Vinyl sealer improves water resistance. Only use the flat sheen for your final coat of finish. Flat sheen is more susceptible to water penetration than higher sheens.
Switch to a catalyzed finish like conversion varnish for better durability, including resistance to water damage. Use the catalyzed vinyl sealer that goes with the CV you chose.
From contributor L:
I think the problem could be much simpler. If you wiped with a tac cloth you may have introduced a residue that will not allow the coating to adhere. If you take the cloth in your hand and squeeze it, you may feel the residue on your hand. I have advised against the use of these tac cloths for just this reason.