Ted Hunter is the inventor of the Thin Air Press and his company manufactures the Roarockit Vacuum Pump and Bag, ideal for bending wood, using with wood veneer, or for any woodworking plans, such as marquetry, involving a vacuum press. Visit his website at www.roarockit.com.
This tutorial shows how easy it is to build custom drawer faces using vacuum veneering. Learn how to make a custom foam mold that can be used to make multiple drawer faces for furniture or kitchen cabinets.
Vacuum laminating is ideally suited for creating curved surfaces. Traditionally with vacuum bagging systems, a curved wooden mold to shape the lamination had to be built. A new (and simple) way to do this is to build a mold with insulation foam available at most building supply outlets. The foam makes it possible to quickly create a 3 dimensional curve using basic tools.
Tools needed:
Builders square
Sharp knife
Bandsaw or fine toothed backsaw
Thin Air Press
Materials needed:
Foam (I use 2" thick, pink insulation foam)
Laminating materials such as 1/16" veneer, Luan 1/18" door skin, even tempered masonite has proven successful
Glue
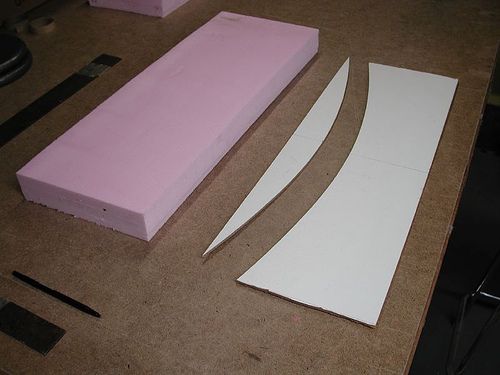
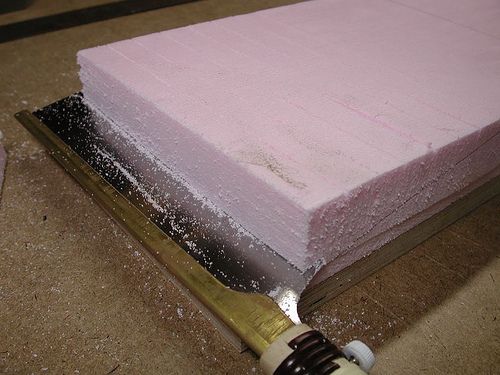
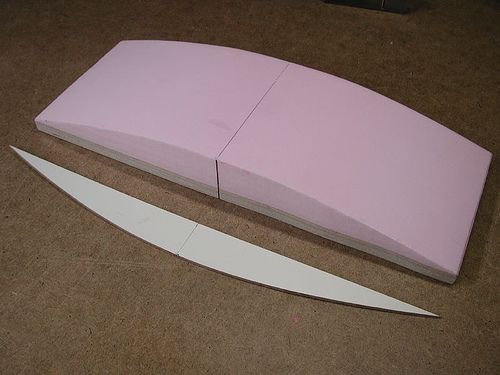
Here is a picture of the foam cut into a rectangle. Foam usually comes in 24" x 96" lengths. When selecting foam, try to pick one that has a high R rating, as it will be more dense than one with a lower number. A typical R rating for building a mold would be a 7 to 10 rating.
I cut my template out of masonite. When doing this, be very accurate, making sure the template is the exact curve of the inside circumference of your drawer. The template should have a very accurate center line drawn on it. Make the mold convex in shape, as it is much easier for a vacuum bag system to wrap veneers over a convex shape than to pull them down into a concave shape.
When cutting out the rectangle of foam, make it slightly larger than your final drawer size in both the length and width. The veneers should not overhang the mold while laminating. Make sure the width of the foam is parallel and the ends are square. Draw a center line across the face of the veneer and down the two sides as shown below.

Draw a single line using the template on either side of the foam rectangle. Use the center line to align the template, as this will help to ensure the line is parallel on either side of the foam.
Because my bandsaw is not wide enough to cut my profile out, I am going to use a backsaw. Make a series of cuts around 1" apart across the foam. Cut down almost to where your template line begins. Do this on both ends of the foam.
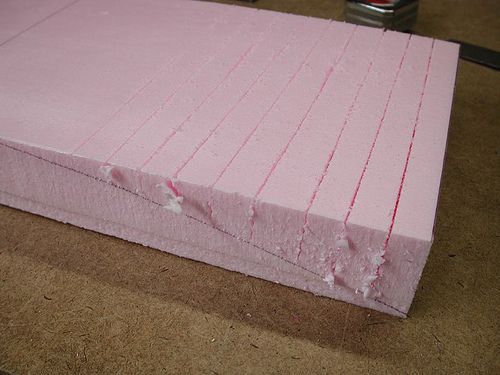
This is what both ends of the foam should look like:
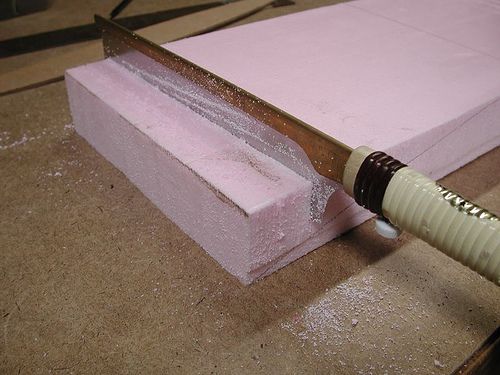
Using the backsaw turned sideways, cut through each of the vertical cuts. Do not cut below the template line. Repeat this on either end of your foam. What you will end up with is a chunky looking surface. Do not worry about this as the next step will make it look better.
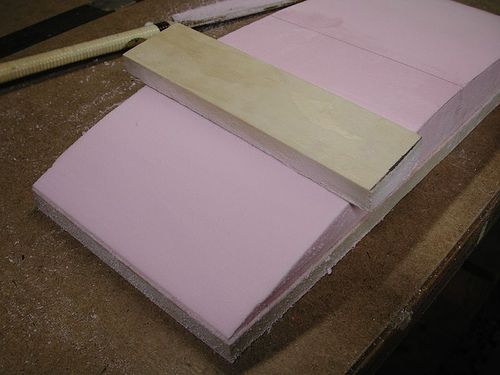
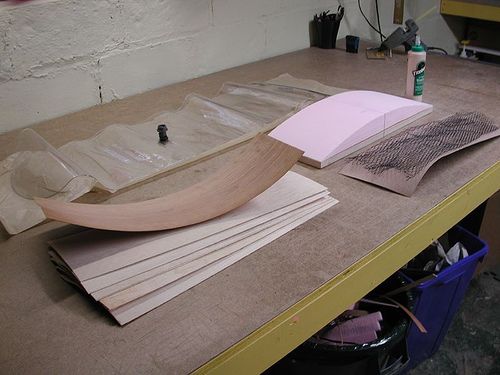
Because my foam looks like it is going to get pretty thin at either end of the mold, I cut a piece of 3/4 plywood the same size as the foam. I glued this to the bottom using a woodworker's glue or spray adhesive. You can see this addition to the foam in the picture below. This will also prevent the ends from distorting in the vacuum bag while trying to bend multiple layers of veneer.
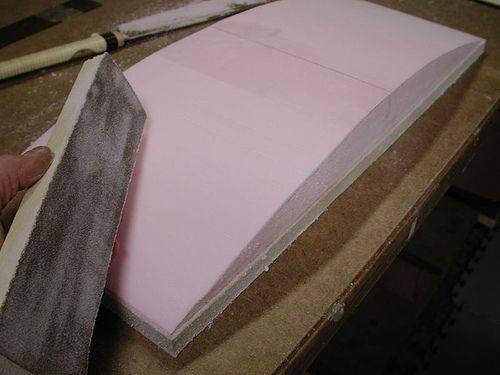
I made a sanding block out of a piece of wood by gluing 100 grit sandpaper to one face. The block should be wider than the mold. This is what I used to smooth down the roughed-out foam mold.
Using the block, sand across the mold, taking care not to sand below the template line on either side of the mold. The sand paper is quite aggressive, so be careful not to get carried away. Do not sand along the mold lengthwise, as this can cause a hollow in the foam that cannot be fixed.
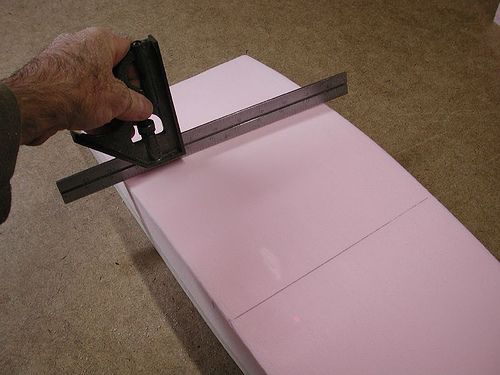
Here is a good way to check how flat your mold is becoming while sanding. Using a straight edge like this combination ruler, hold it across the face of your mold. If there is a gap at the ends between the ruler and foam, you will need to sand a bit more across the middle of the mold.
This is what the mold should look like when finished.
It is time to cut out your laminating materials. As mentioned, I used a number of different materials for this tutorial. I think the best material to use is solid veneer, preferably 1/16" thick. Here is a link to 1/16" maple veneer if you cannot find it locally.
Cut out enough pieces so that the thickness of your laminates are equal to how thick you want your drawers to be. Make the pieces slightly oversized, as you will be trimming the edges later to make them square. Do not make them larger than the mold! I cut this material out with a sharp knife, but a bandsaw will also work. Once you have done this, make sure that the pieces are clean of any rough edges. Sandpaper will clean them up quickly.
I also found that 1/8" Luan door skin plywood worked very well for laminating these drawer fronts. This material is very inexpensive and accessible at most building supply stores. I cut a single layer of fancy veneer for the face of my drawer (I chose cherry). Once you have sanded all the edges, stack your veneers in the order you want them laminated in, with the fancy veneer on top.
What glues to use
There are many types of glue that you can use for veneering. You want a glue that advertises a long wet time. Epoxy glues (like West System) work well and have the advantage of not swelling the veneers like water-based glues. Unfortunately, epoxy is fairly pricey and toxic smelling while curing. Water-based glues, like woodworker's glue, work well for veneering but special consideration has to be taken for veneers expanding because of the water in the glues. I use Titebond III as it has a 9 minute wet time and is waterproof after curing. A quality polyurethane glue will also work for this project. I use a short napped roller to evenly apply glue over the entire surface of the substrate. A thick build up in only one area will cause the veneer to pucker while pressing - an even coat is a must!
It is time to prepare your workspace for pressing. There are many ways to press your veneers. You can invest in an electric vacuum pump and bag system for vacuum veneering or you can use the Thin Air Press kit from Roarockit. I use the 14 X 47" bag for this tutorial. Whatever you use, make sure you are familiar with the process before proceeding. Doing a dry run without glue is always advisable when pressing veneers. Have all your materials and tools prepared and ready, including the glue, veneer, roller, (in this case) the Thin Air Press vacuum bag, breather netting and finally, the manual vacuum pump. Make sure you have everything close at hand when you begin your glue up as you have limited time for applying the glue before it starts to dry. Use a short napped roller to apply the glue. This size of project will use about 6 ounces of glue, but make sure you have extra glue on hand.
Remove your first piece of veneer for gluing from the bottom of the prepared veneer stack. Apply an ample amount of glue to this layer, evenly covering the entire area. Then pull the second piece from the bottom of the stack and place it on top of the piece you just glued. Apply glue to this piece, repeating until all the layers have been glued and your fancy veneer is on top. Keep them all aligned as much as possible.
Apply a piece of masking tape to either side of the stack at the top crown of your drawer face. This will help to keep the veneers aligned while putting them in the vacuum bag. Place the veneers on top of the foam mold. You may also want to masking tape the stack to the mold by placing a length of tape across the center and down either side of the mold. Lay a piece of pre-cut breather netting on top of the veneer to allow for even evacuation of the air from the TAP bag. Carefully place the stack inside the vacuum bag.
Peel the paper from the sealing tape and pull firmly on either side of the TAP bag to stretch the bag flat against the sealing tape. With your finger, carefully press the sealing tape to the vinyl TAP bag working from the inside of the bag towards the outside. Look for any light colored areas where the tape is not firmly pressed down. These will be very visible and only need a little thumb pressure to remove them.
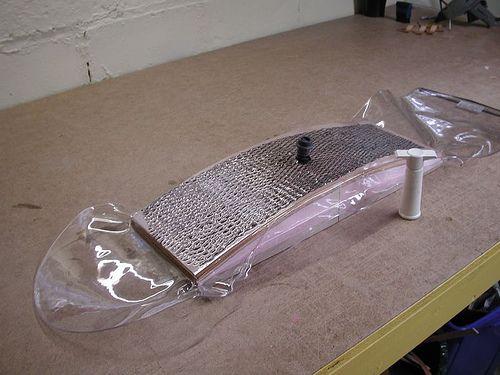
Now press the pump against the grey one-way valve and remove the air from the TAP bag. Because the form inside the bag is fairly flat, it should take less than one minute of vigorous pumping using the TAP kit's manual vacuum pump. You have achieved maximum vacuum when you feel the handle on the pump hard to pull and you can not pull the vinyl away from your project. This will create over 13 lbs per square inch. With a project this size, there will be over 2000 pounds of pressure evenly pressing down on your veneers. This is more than enough pressure to press any veneered project.

In a few minutes, check to see if you have any leaks along your sealing tape by pulling at the edge of the vinyl. If the vinyl pulls away from your project, look at the sealing tape for any light colored areas and use your thumb to press these out. Once done, you can re-pump your TAP bag. The process is very simple and if you follow the basic instructions, the TAP bag will maintain vacuum for as long as it takes your glue to dry. I leave a project like this in the TAP bag for at least 8 hours. Check to see what the glue instructions say to be sure, as some glues take longer than others to set.
After the glue has dried you can remove your project. The paper strip that you removed from the sealing tape should be placed back onto the tape when you open up your bag. Do this before you remove your project as it prevents any flakes of glue from getting onto the sealing tape while removing your project. The sealing tape is re-usable many times over as long as you keep it clean.
After you remove your drawer face from the TAP bag, you will have to square up the edges using either a hand plane or jointer. I used a jointer on one edge of my drawer face before going on to the table saw to cut them down to final size. The last step was to sand and finish each of the drawers faces and apply finish.
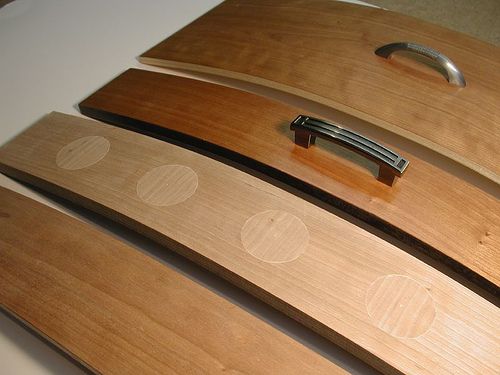
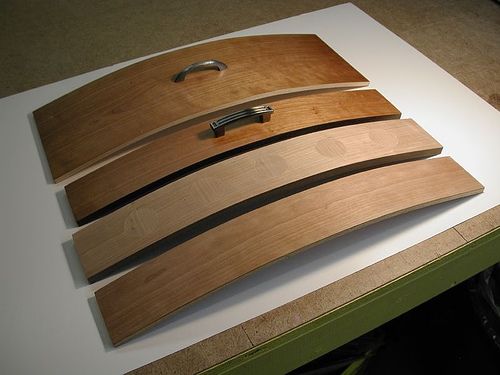
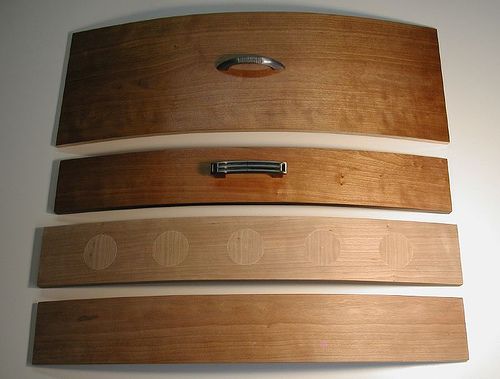
Below are some drawer faces I made using a number of different laminating materials:
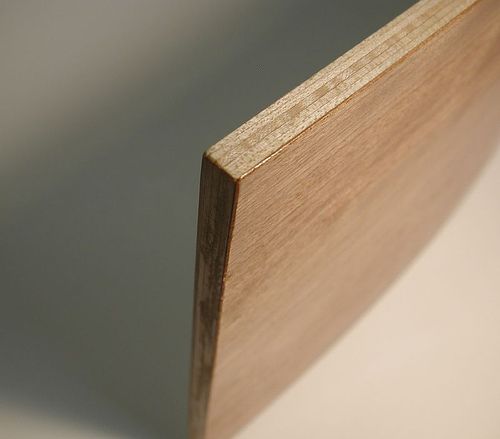
5 pieces of 1/16" maple veneer with a single outside layer of cherry veneer
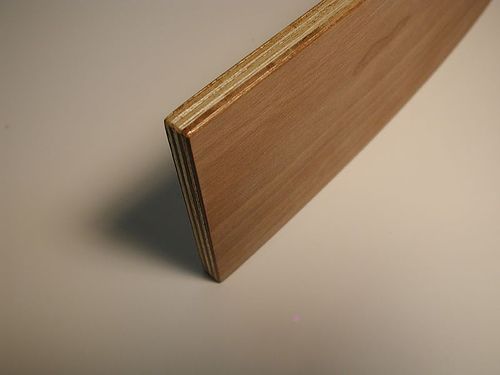
4 layers of 1/8" Luan plywood with a single outside layer of cherry veneer
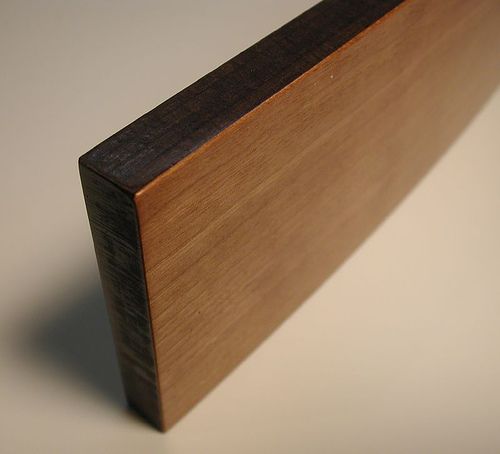
4 layers of 1/8" tempered masonite (shiny both sides) plus a single outside layer of cherry veneer (I sanded the masonite before gluing).
Building the foam mold took around 2 hours, as I had to be careful to get it right. Cutting and laminating the individual drawer faces took about an hour. The foam mold stood up to repeated use. I am sure you would have no problem making a least dozen drawer faces from the same mold!
I think the results of this build look great and are well within the skill level of most woodworkers.
Visit Ted Hunter's website at www.roarockit.com.