Question
(Finishing Forum)
I started using concentrated dyes to make a spray stain. I use the stain to finish cabinets and doors. I am very pleased with the look of the dye stains compared to what I had been using.
My only problem is that I can't seem to get the stain sprayed even enough. A lot of my doors have darker shading going up and down, I guess from overlapping with my spray gun. It seems impossible to get it even without overlapping at least a bit.
Does anyone have suggestions for spraying stain to achieve an even finish? I am using an Astro gun with a 1.3mm tip. I turn my fluid output way down, and my pressure pretty low.
Forum Responses
From contributor R:
Have you reduced the dyes? Many dye stains benefit from reduction with the appropriate reducer. You will need to make more passes with the gun, but you will have much better control. Every manufacturer has a different system and thus a different reducer, but in general, spray the dye at 25-30 psi and turn down the material on the gun so the dye comes out and dries almost instantly on the wood. The speed that you move and the distance of the gun from the wood will also be of influence. In general, you don't want the dye to puddle on the surface and be blown apart by the atomizing air.
Are you suggesting that if I mix the same colors in maybe 32 oz. of thinner I will get the same color after more passes, but a more even color?
If you're seeing color in your first pass, it's too strong, so thin it out. I would rather see a tint of color in the third pass. This will eliminate the striping. Test the stain's color strength on some old newspaper or cardboard.
Keep the air pressure as low as you can and still get good atomization. The lower air pressure will help get the dye into the corners as you spray.
Your mixture sounds pretty weak; you should be able to avoid stripes by adjusting your spray technique (fogging).
I am still having problems getting the dye to "fog" into corners/right angles. I am using a Binks 2001 with pressure pot. I have turned down both the air and fluid. Are you still using a wide pattern when you hit these areas?
When you spray inside corners, don't try to spray at a 45 degree angle into the corner. Shoot parallel to the face of each intersecting plane. So, for example, you will shoot the side up to the corner and then the top up to the corner. The instance where a top, bottom and back all intersect is very tough. Leave the back off to get best results.
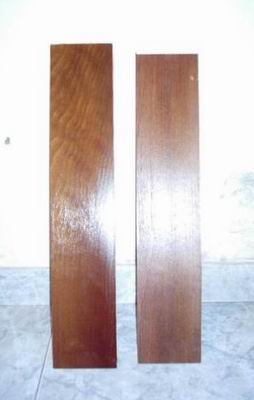
Notice the difference in the deepness and smoothness of the color. To get the same color it depends on sampling and how good you can get.


Contributor S, I know that you have had a great deal of experience with conventional guns. Are you saying that when I spray dye I should use a thinned version for the corners, or use the same solution for everything? When I have used the same solution for both, I still get low coverage in the 90's.
I have a little lazy susan that I set my door on. I shoot the edges first, then I shoot from the left top corner of the door to the bottom and continue across the door. I then spin the door 180 degrees and hit it again.
I noticed in a video that someone here recommended to me that they sprayed the door vertically and then hit it horizontally. Is this the recommended procedure?
When spraying colors, I like to spray with the grain (the panel on a door; I don't spray the rails/stiles separately except for the edges). If there is any slight striping, spraying across grain shows it a lot more than with the grain.
You're getting stripes because you're not wetting the wood evenly with the dye. Do some test spraying on scrap ply or even cardboard. Watch how wide the wet area is as you spray a couple passes. The fluid will be a little heavier in the middle of the spray pattern and stay wetter longer than the edges. That's the portion of the spray pattern that you have to meet when you spray the next pass.
For example, if you have the fan width set at 8" and spray a pass, you'll see a stripe in the middle of the pass 4" - 6" wide that gets wetter than the edges. When you spray the second pass, overlap the pattern enough to meet the previous wet stripe with the new wet stripe.
It takes a little practice, but you will work out the technique. Fan width, fluid flow, atomization air pressure, and hand speed all contribute to even wetting or spraying stripes.
I just wanted to add that with dye stains I mix my colors so that I can develop the full color with just one pass, wetting the wood enough so that it will flow together evenly, but soaks in or flashes off within 5 to 10 seconds. Too dry a spray looks bad and can give you stripes because it doesn't flow together, and too wet a coat makes you have to wipe it to prevent drips and bleed back, and gives an appearance that I don't usually want.
Multiple passes of dye stains often soak the wood with solvents that later bleed back out of the pores and ruin the appearance, so if I goof up and have to make multiple passes, I allow plenty of drying time between coats.
This is the exact opposite of how I handle toners, which go down in very thin layers of highly diluted material.
Even with pigmented stains, I try to apply them so that wiping is needed only to bring up the grain. This is the best way I know to avoid blotching.
Any extra time these techniques require per pass is more than compensated for by the time not used in extra passes, or in wiping.
That is why many finishers say pigments block out the woods like a paint, because pigments lay on the surface of the woods. I personally like all kinds of pigmented mediums, and I know it's the finishers who create the painted look and not the pigmented colorants.
No matter how much or how little you thin, it is very difficult not to get some degree of striping when using a sprayed ngr type dye application as the only coloring step.
To cure this, I nearly always follow a sprayed dye application with a wiping stain. This always evens out any inconsistencies of the sprayed dye and also defines the figure of the grain. Sealing the dye and then glazing achieves the same improvement, if not better. Sprayed solvent dye by itself is a rather cold look.
I also spray my wiping stains and I do want to thank contributor W for the tip about not spraying them so heavy. I was trained to always flood them on and I guess I never really questioned to do otherwise. So I took the suggestion and I'm finding it really does help control blotching on some woods if I don't spray the stain so heavily, not to mention I'm saving time, stain, and wipes.
Just had to deal with some new alder cabinets and the technique worked great. Alder blotches like crazy when you flood the stain on.
Comment from contributor A:
I spray dye stains quite regularly on veneers used on cabinetry for aviation purposes. Too many passes leave a buildup of stain. Allow to dry to about 95%, then even out with a lint-free rag or a stippling brush. This gives more even color and also allows different grain features to be highlighted.