Message Thread:
True Divided 60 Lite Sash
7/18/17

Looking for some feedback on a project I just took on. Hopefully I can explain w/o pictures.
Single Fixed sash window. Sash roughly 4' tall x9' wide. Sash 1-3/4" thick.
Material is vg fir.
Traditional style sash with 1/4" rabbets, single pane glass.
Muntins 3/4" wide-
Mortise tenon joinery - 3/8" x 3/4" mortises for muntins in the flat of profile adjacent to interior of glass.
Grid: 4 rows by 15 columns, each opening roughly 6.5" x 10"
I believe I have the mechanics of how to do this worked out but still have a few questions as 18 lites is the biggest unit I have done to date.
Would it be better to have the three 3/4" wide rails run the full length or have the vertical muntins run top to bottom rail? Why?
I have typically glued my sash with titebond 3. There is no way I'll have enough open time to do that. If the joinery is tight do I even need to glue this up?- it's fixed sash- where's it going to go and the glazing bed should provided the necessary seal. Any ideas on this greatly appreciated.
Thanks
Dave
7/18/17 #2: True Divided 60 Lite Sash ...
Make all the vertical muntins full length, through tenons.
The horizontal muntins will need to vary in length to close any gaps in the middle rows. The middle row muntins will need to be sever hundredths longer than the top and bottom row muntins.
Don't glue the muntins, to allow for fitting after assembly. To fit after assembly, clamp along the rails. In the middle, spread the stiles with a sash stile spreader. It's shaped like an "H". put a clamp across the top of the "H", and the bottom of the "H" goes in the stile rabbets. you can open the stiles 1/2", allowing you to replace muntins as needed to get the right length muntins in.
If you only glue the stiles, you will have plenty of time for assembly with Titebond III.
Don't tell anyone about the sash spreader, it's a trade secret.
Harold
7/18/17 #3: True Divided 60 Lite Sash ...
I also would advise to run the verticals the full height, with the horizontals coped and tenoned in place. The stiles at the side can also be run full length - same length/cope/tenon - as the vertical muntins, unless that would a be problem for someone, traditionally.
Now, the sash spreader is a new one for me. And it sort of makes sense, but I would not start making some mutts longer than others. I learned (trade secret) to intentionally crown the stiles so that the opening without mutts is narrower at the center that at the ends. This will provide tension to all your horizontals as they go in. At 6.5' tall, I would crown the stiles about e/8" to 3/4" each.
I would use TBII or even a slow set epoxy for assembly. The epoxy will give you the time you need. Glue the copes lightly and the tenons with a bit more glue. Use spacers to keep you spacing and alignment. The tension from the crown will be enough to 'clamp' the epoxy copes since you do not want a lot of pressure.
Even though some old guy would not have glued much in an older sash, you have the opportunity to improve on the old guy's work but using epoxy as a sealant. He may have put some white lead into the joints, and said 'good enough!' He also did not have much in the way of glue to choose from.
If this is painted or stained a dark color and then get direct sun in service, the TBIII is prone to failure with a serious loss of strength at even 175 degrees.
7/18/17 #4: True Divided 60 Lite Sash ...
I'd consult a structural engineer on this one. Depending on the location of the window. and your state, you could very easily have a wind load issue with this one. Might even be against code in tornado or hurricane country. Unless there is some historical district override, you may have to build multiple units for strength.
7/18/17 #5: True Divided 60 Lite Sash ...
The spreader is also new to me. I've been looking all over for one with no luck yet. Harold: would you be interested in doing this project for me- I bid $1600, would think that leaves plenty of cushion.
Kidding aside, thank you all for the tips. Running verticals full length makes more sense structurally. Just not thrilled about machining the 6-1/2" muntins.TB3 temperature sensitivity is news to me. Have not had any failures to date but certainly something to keep in mind for future.
Why use spacers? If the verticals and stiles are all mortised at same measurements that will register everything without spacers or measurement during assembly.
Thanks
Dave
7/18/17 #6: True Divided 60 Lite Sash ...
The sash spreader was invented out of need. When building sash, sometimes a muntin gets broken, or muntins are too short. Being able to remove and replace muntins has saved some jobs. It works on French doors, and old sash, too. You may wonder why someone working in a shop would keep on putting sash together if the muntins were too short. However, consider the most screwed up thing you have ever seen an employee do.
Another way to deal with the flex in a big sash is to put a groove in a row of horizontal muntins, and run a stainless steel cable across the sash, under the putty. It's a lot like the way pre-stressed concrete is made. The cable goes through the stiles. Anchor it at one end, and run it around the end of the hole and down to a screw at the adjustment end. It would be interesting ti get an engineer's opinion on the wind load viability of a cable reinforced sash. The biggest reinforced sash I have made was only six feet wide, and was a storm window.
7/19/17 #7: True Divided 60 Lite Sash ...
The cable is a good idea. I have run a kerf in the assembled sash 1/8 x 3/8" deep and splined it the full length or width as needed. Sure does help keep things in place.
I learned in a shop that rarely tenoned short muntins (mutts as they called them). They would use a tight cope for placement and location. Gluing the end was hit or miss - no rules.
I like a tight cope still today, and often omit a tenon on short muntins - usually verticals. Our normal today is 9/16" or wider rabbets, with the tight cope and stick, 1/2" to 3/4" insulated glass in RTV silicone and wood stops, also with the RTV. This makes a rock solid, stiff unit, so the tenons are not missed.
A large sash as the OP is faced with does not get much strength from the glass and putty. I'd use epoxy on every joint, buttering the copes as you go. Yep, 1600 ought to do it, with money left over for new truck.
The photos are of a large sash with long verticals and short horizontals to facilitate the radius. The horizontals were not tenoned, but were coped nicely. The vertical are tenoned as well as coped. We used spacers to locate the mutts, then set the glass and mitered the stops with RTV both sides. Once it was cured, it had almost no ability to twist - it was rigid. The dry fit photo has the straps on it to hold the verticals in place. We had two of these, both just a hair too big to fit out the shop doors.
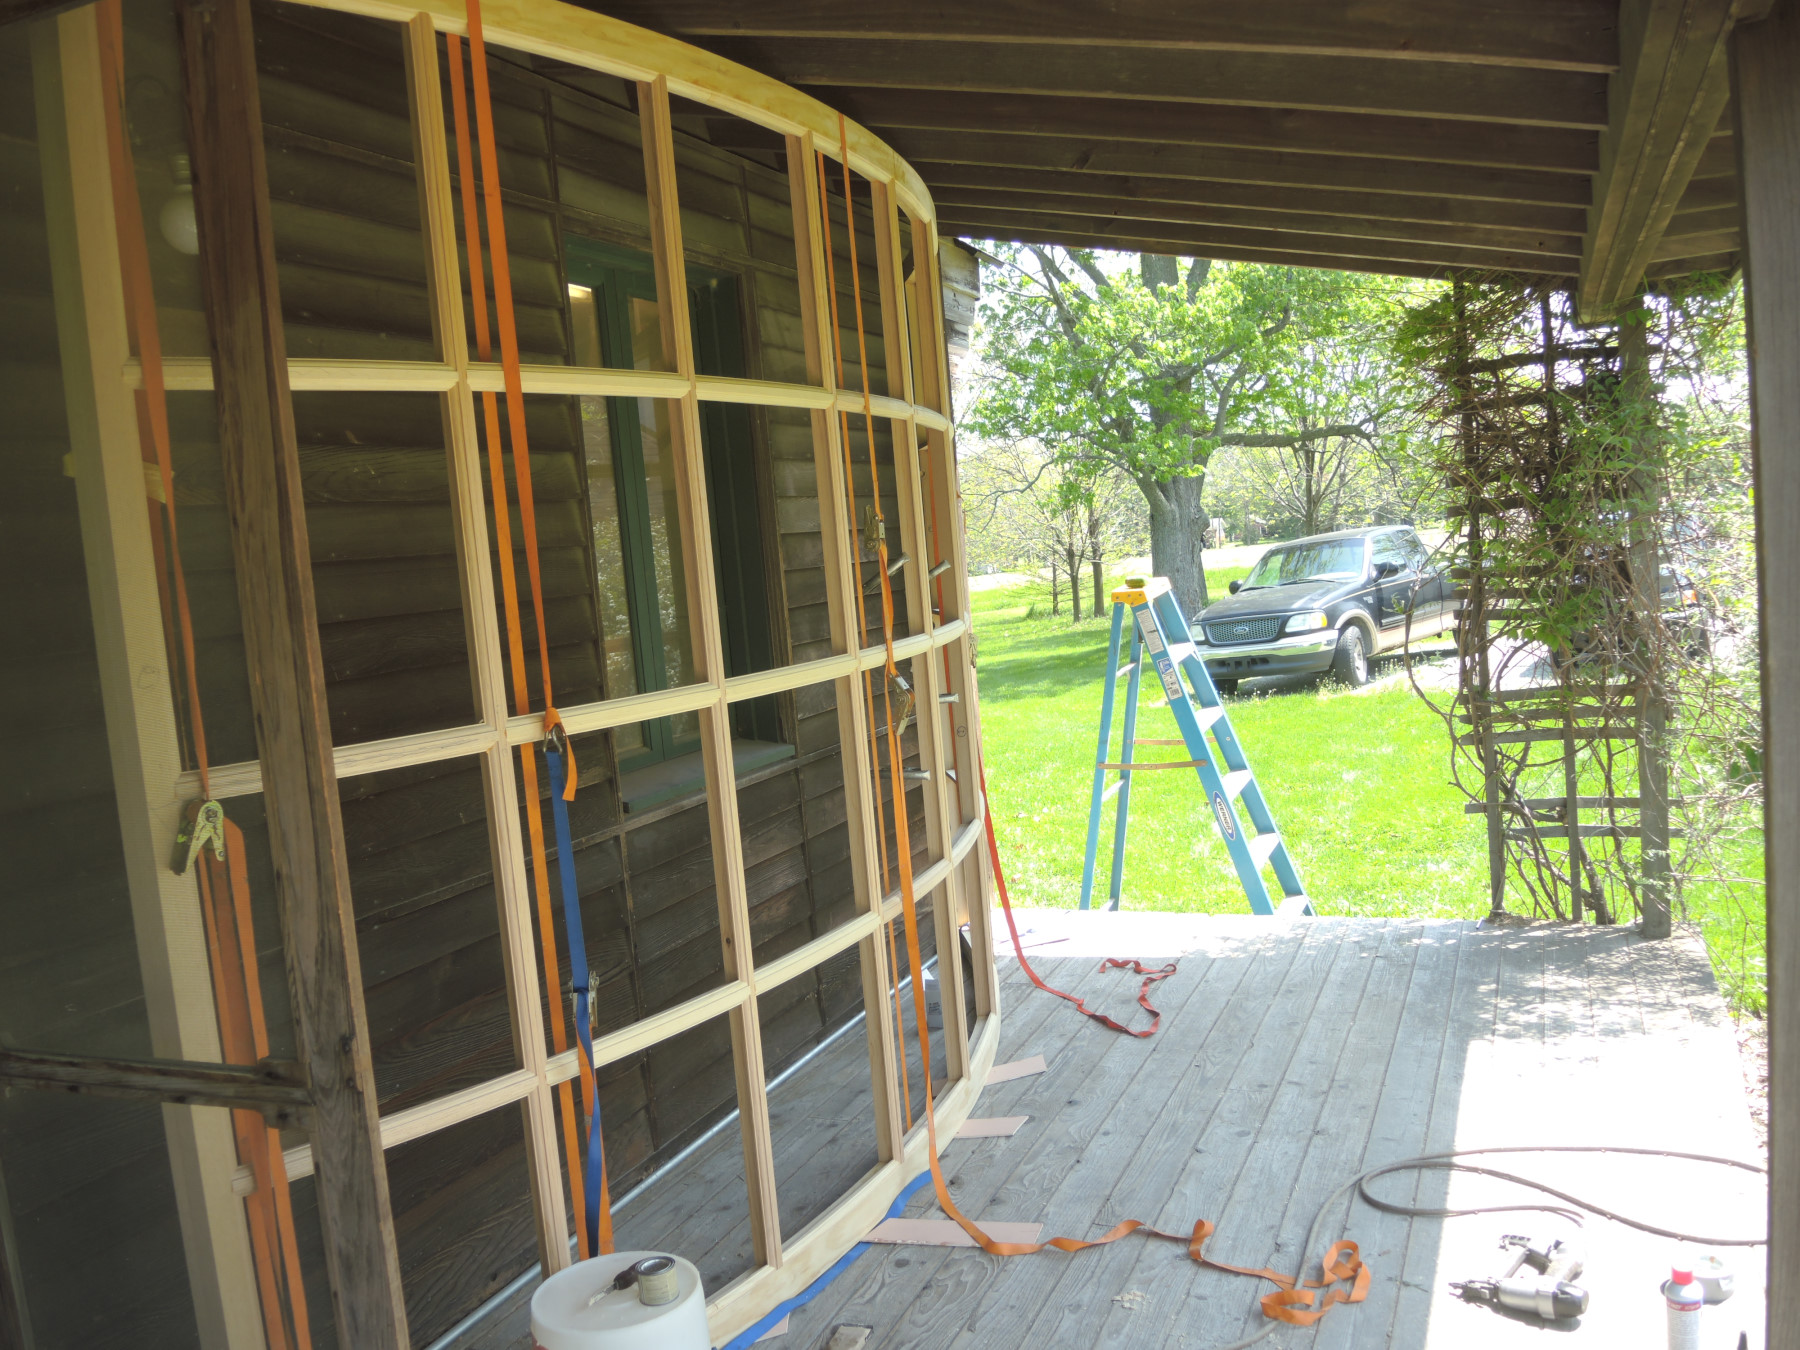
View higher quality, full size image (1800 X 1350)
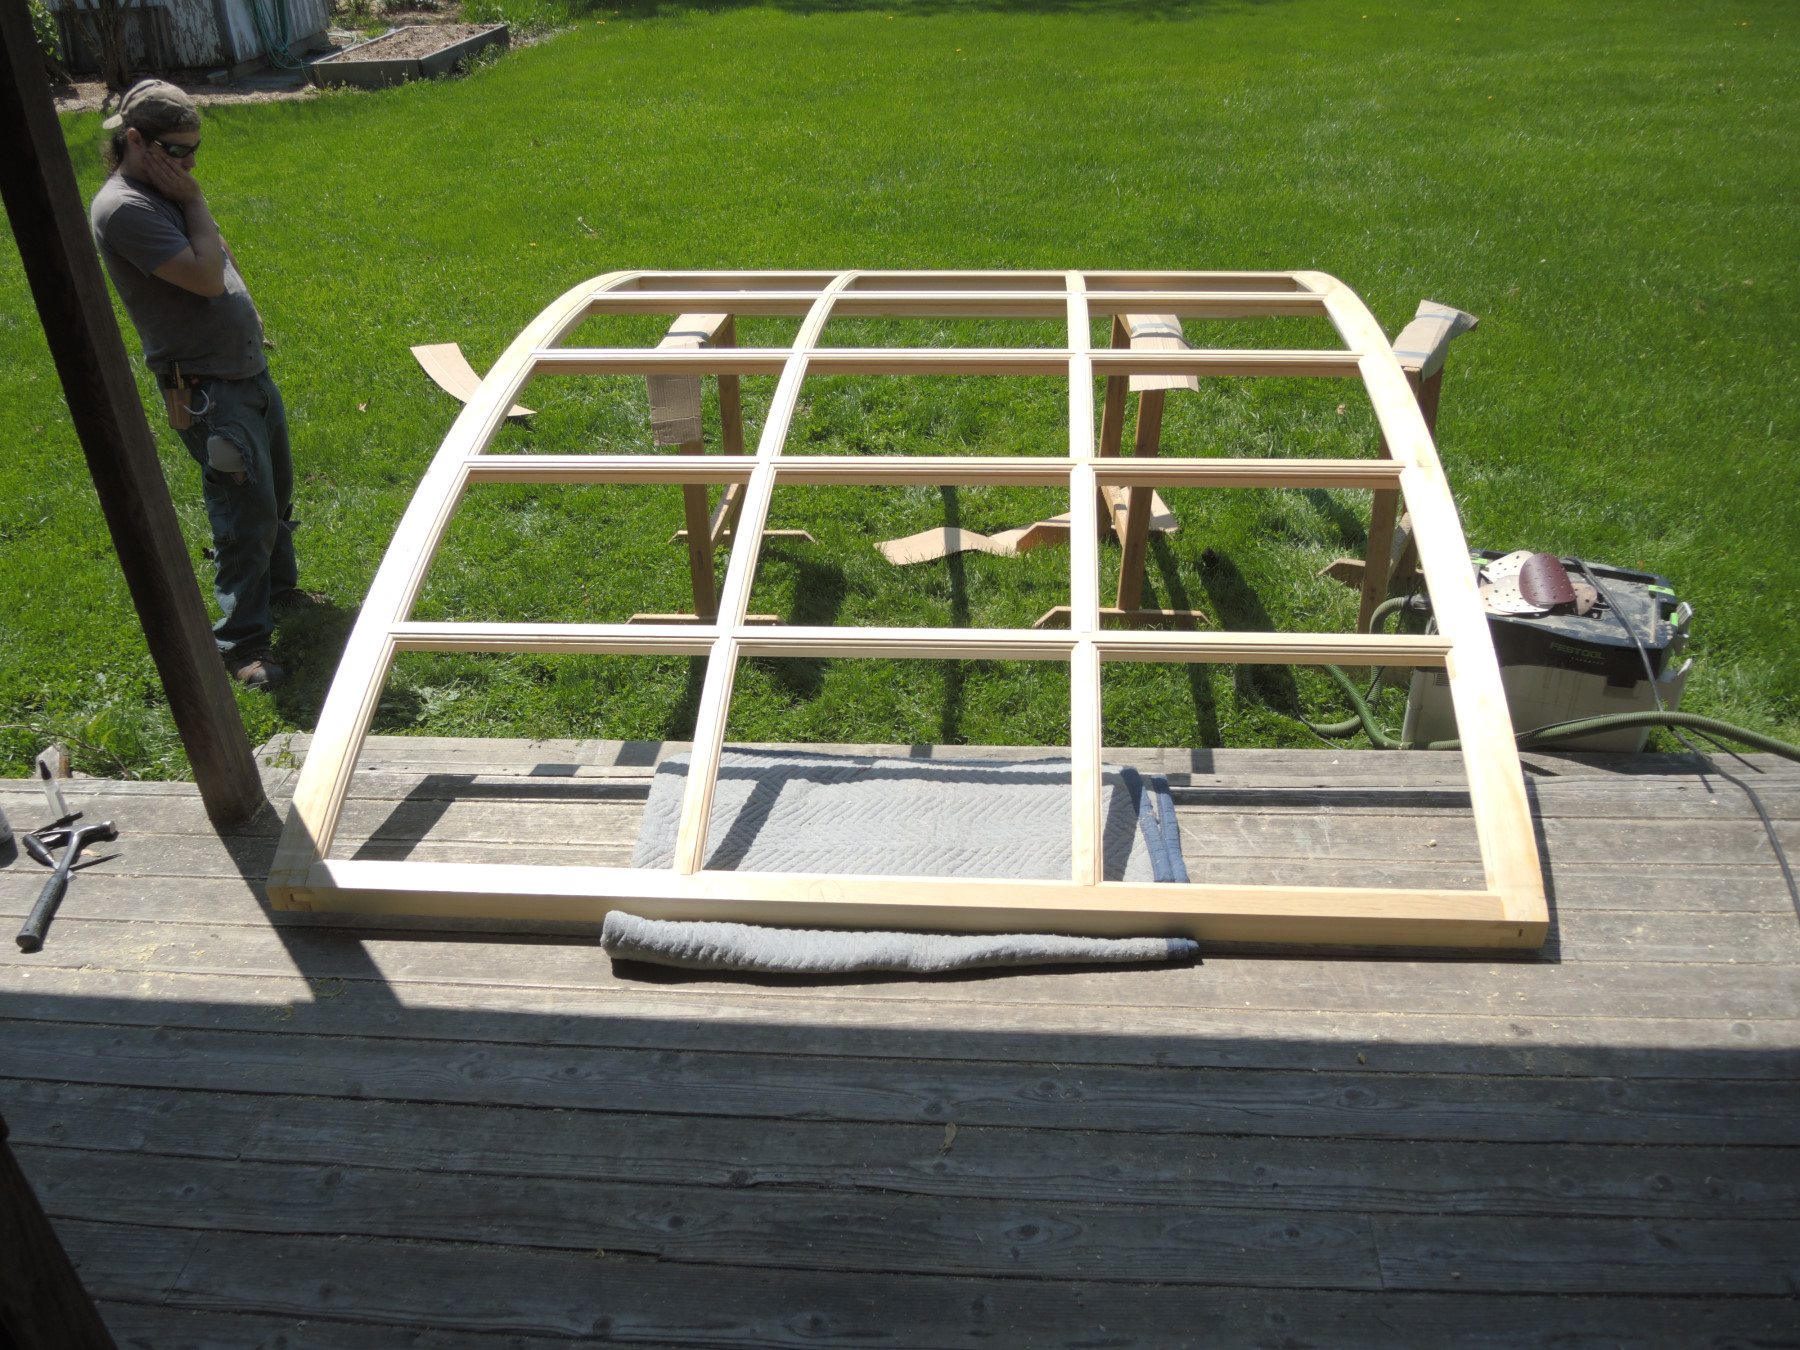
View higher quality, full size image (1800 X 1350)
7/19/17 #8: True Divided 60 Lite Sash ...
David
Couldn't help but notice in the picture
of the porch ... that's a funky looking
beam support arrangement that the
porch rafters sit on .... any back story
to that?
Sam
7/19/17 #10: True Divided 60 Lite Sash ...
Sam - Yes, it is true that I am not a framer. Adequate, but not proficient.
That arrangement came about because I wanted a thin beam to span from post to post - did not want it be low enough to be in my field of view. Also, I wanted a certain angle of drop to the porch roof. Being OCD about such things does not always make for logical pathways.
I moved the beam back off the post tops to where is was half on (or half off), helping preserve the angle by some fraction or another. The beam - two 2x6 and some 3/4" ply - is heavily nailed at the point where is is on the half laps on top of the posts. The rafters are deeply notched.
The odd part is that I built the shop as a hobby shop before quitting my last real job, running a 12 man shop for a full service wholesale lumberyard. No one there - estimators, draftsman, salesmen - could tell me what I needed to span the 12' distance. They asked what I planned and said it ought to work. It does work fine, even with a good snow load.
You may notice the Summer Office - porch swing and rocker - is open in this picture. The porch has come in handy for everything from assembly, to lumber storage, to weddings.
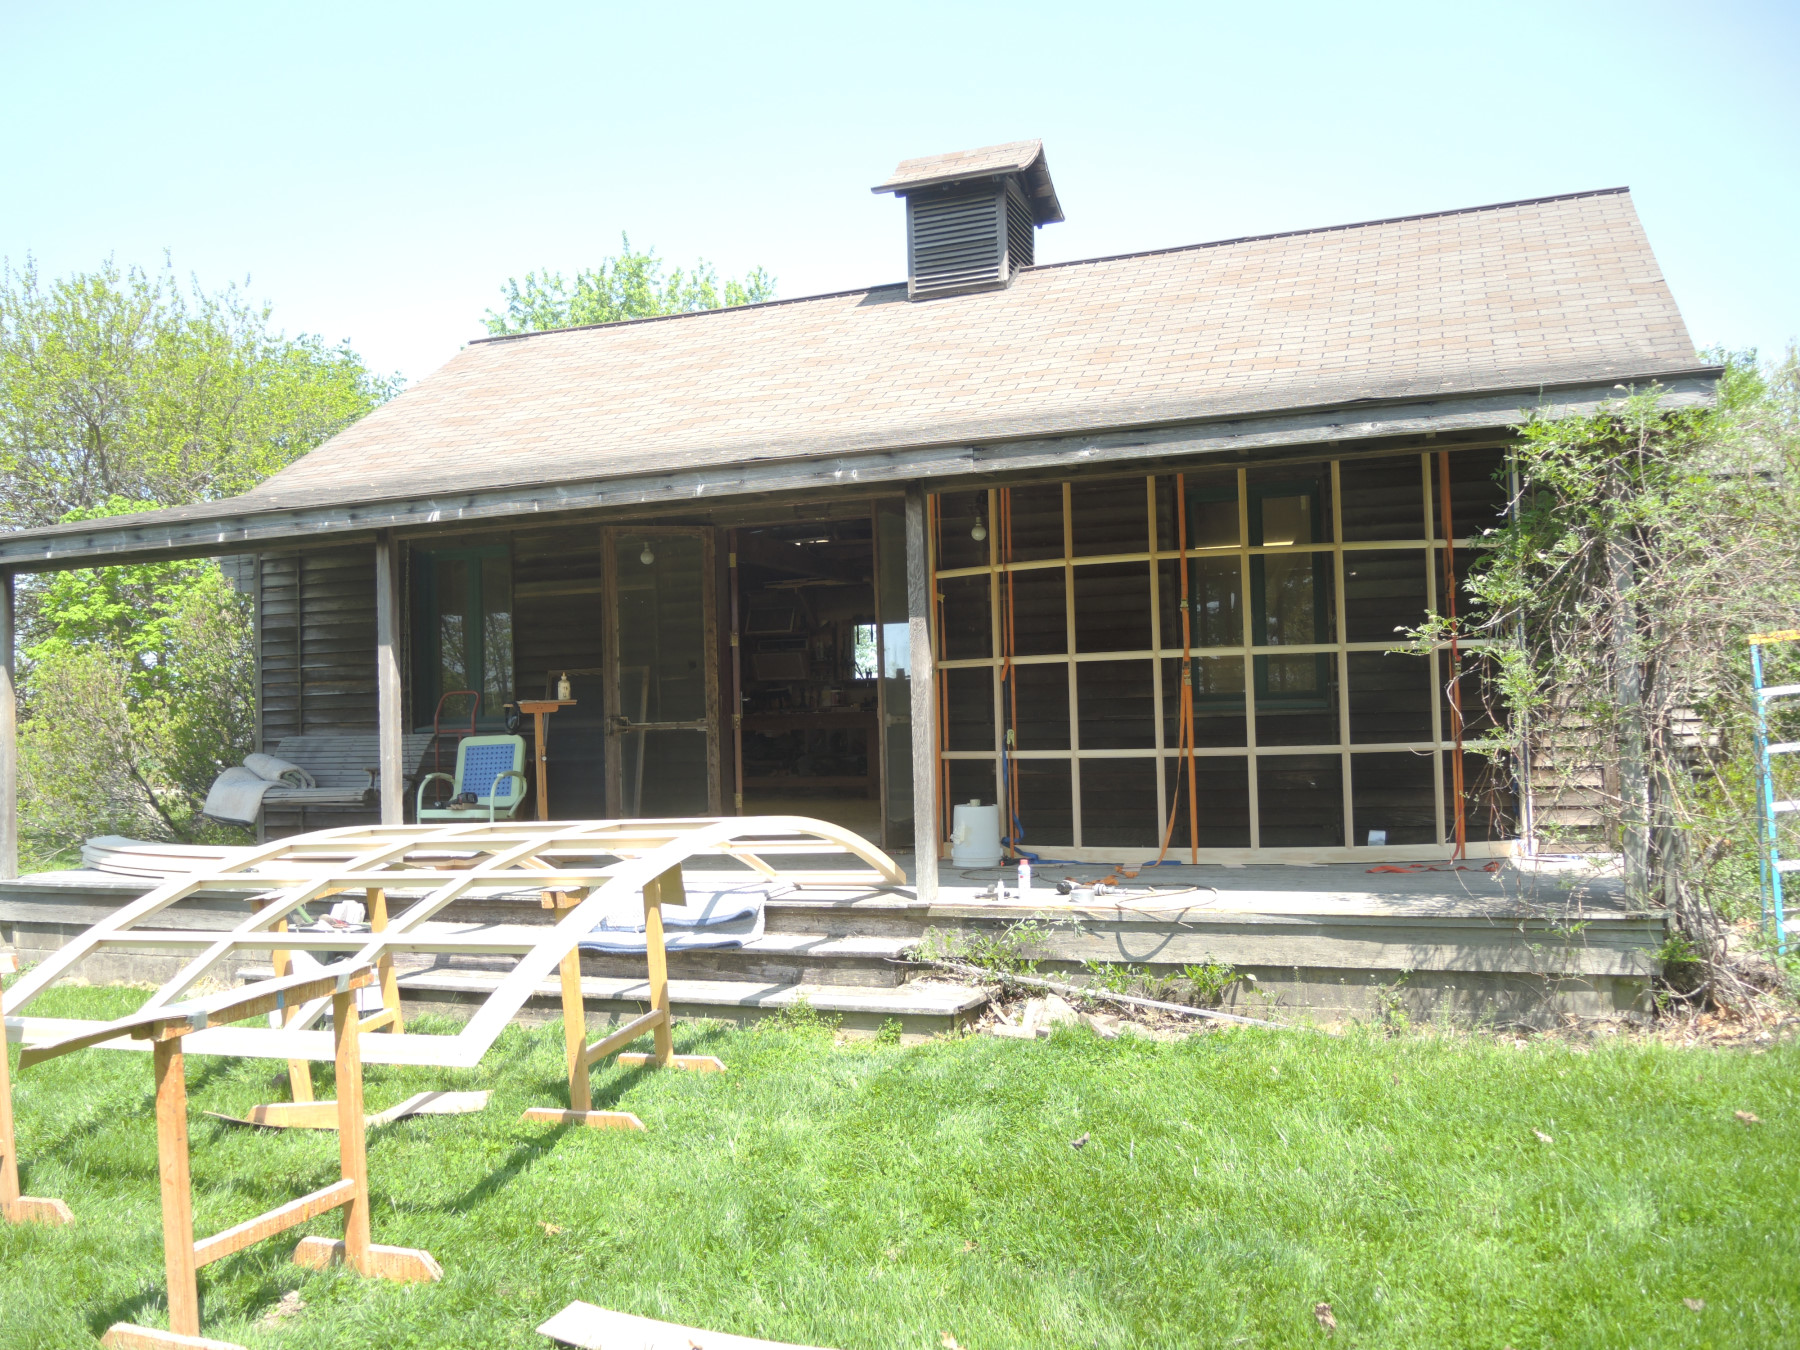
View higher quality, full size image (1800 X 1350)
9/8/17 #11: True Divided 60 Lite Sash ...
I know I'm late to the table on this but if Dave is still opinion searching, I would offer this.
As David Sochar has stated, a tight cope with no tenon has served me well on several odd sash that I have made. There was a machine that was specifically designed for that purpose in the early part of the 20th century.
I also strongly recommend epoxy glue or at least using an epoxy sealer on all copes, tenons and indeed the entire fabrication. Paint fails where water gets in an that is always at the cut ends or copes. I wouldn't build anything of this nature without the epoxy sealer. Vertical full length munts is the proper approach.
9/9/17 #12: True Divided 60 Lite Sash ...
Steve- thanks for the advice. I'm in process of doing a dry fit of the mutts this weekend- this isn't my day job.
I did take both David's and Harold's advice (thanks you ) and ran the full length muntins vertical. The stiles and rails are haunched mortise and tenon and the verticals were full tenons. I had a buddy help me glue up the rails and verticals with TB3.
I do plan on epoxying in the mutts. Had a bit more trouble machining these 6.5" parts than I anticipated but finally got it. I think having the longer tenons on these part would have made it easier.
As far as epoxy sealing entire unit would you go with Smith's or West Systems?
Will try to post pics at some point.
9/9/17 #13: True Divided 60 Lite Sash ...
I use both Smith and West system. Smith's is deeper penetrating, I believe. Of course it depends on the wood you are using. If you have a very light profile then the Smiths will not build up and crowd the detail.
|