Message Thread:
Q-lon Kerf In Radius Stop
5/6/22

I would be interested in learning how other shops put a kerf in radius stop for Q-lon weather stripping ?
5/7/22 #2: Q-lon Kerf In Radius Stop ...
 Website: http://acornwoodworks.com
If we are making a frame for Q-Lon, it is an exterior unit, and we make a “rabbeted” jamb of sorts. Most rabbeted jambs are made subtractively - wood is removed to make the rabbet.
But for curves we make the jamb additively - by adding pieces and parts. We bricklay short curved parts to form the curved head, and make two parts: the fat of the jamb, usually 1-1/4” th. And the rabbet, at 3/4” thick.
Once the fat jamb is cleaned up, we fence a trim router to make a route 1/2” from the edge, with a 1/8” spiral bit. Take it in 2 or 3 passes so you don’t break the bit.
Drawings and photos can be found in my book on making doors, available thru the website.
5/7/22 #3: Q-lon Kerf In Radius Stop ...

If I’m laminating veneers I skip the glue at the depth of the door stop then once the glue cures pull them apart and machine the weatherstrip kerf/rabbet on the back. If I’m doing solid wood I add an 1/8” strip of hardwood to the template for the head jamb of the door to match the inside radius of the door jamb. The shorter answer is I do it in two pieces.
5/7/22 #4: Q-lon Kerf In Radius Stop ...

Thank you Mack,
I do my jambs the exact same way but what I am curious about is how you mill the 1/8" X 3/8" groove in the radius stop ?
5/8/22 #5: Q-lon Kerf In Radius Stop ...

Doing laminated I would do 2 piece as Mack describes and put the rebate in for the gasket running the piece vertical on the shaper before gluing the 2 together. I’ve gotten away from laminated because I don’t like dealing with the spring back. I’ve done brick laid for the base part then laminated for the part that gets the gasket. Using the brick laid part for the form to laminate to. Lately though I discovered I can use my Euro door segmented finger joint construction to do a North American type jamb totally solid and prefer this method.
5/8/22 #7: Q-lon Kerf In Radius Stop ...

Gary- like joe described, although sometimes on a one off I’ll do it with a 1/8” rabbeting bit on a handheld router
Joe- we’d all love to see pictures
5/8/22 #8: Q-lon Kerf In Radius Stop ...

Thanks to all your input the light bulb finally went on. I just ordered a 3/4"dia flush trim router bit but I will replace the 3/4"dia bearing with a 1/2"dia bearing so I can run the stop on edge at the router table. So simple and dead accurate.
Thank you very much for inspiring that.
PS David: I have your book that I purchased through a small book store and the wisdom you have put into it is very much appreciated ! I love how you represent Acorn as a collective of craftsman and not just " your show".
Thanks for writing it ! Joe; It's your turn to write one !
Gary Gilbert
Fine Woodwork By Gary Gilbert
Custom Doors & Windows
Carlsbad, Calif.
5/9/22 #9: Q-lon Kerf In Radius Stop ...

Mack,
I’ve been enjoying your curved window and door posts on Instagram!
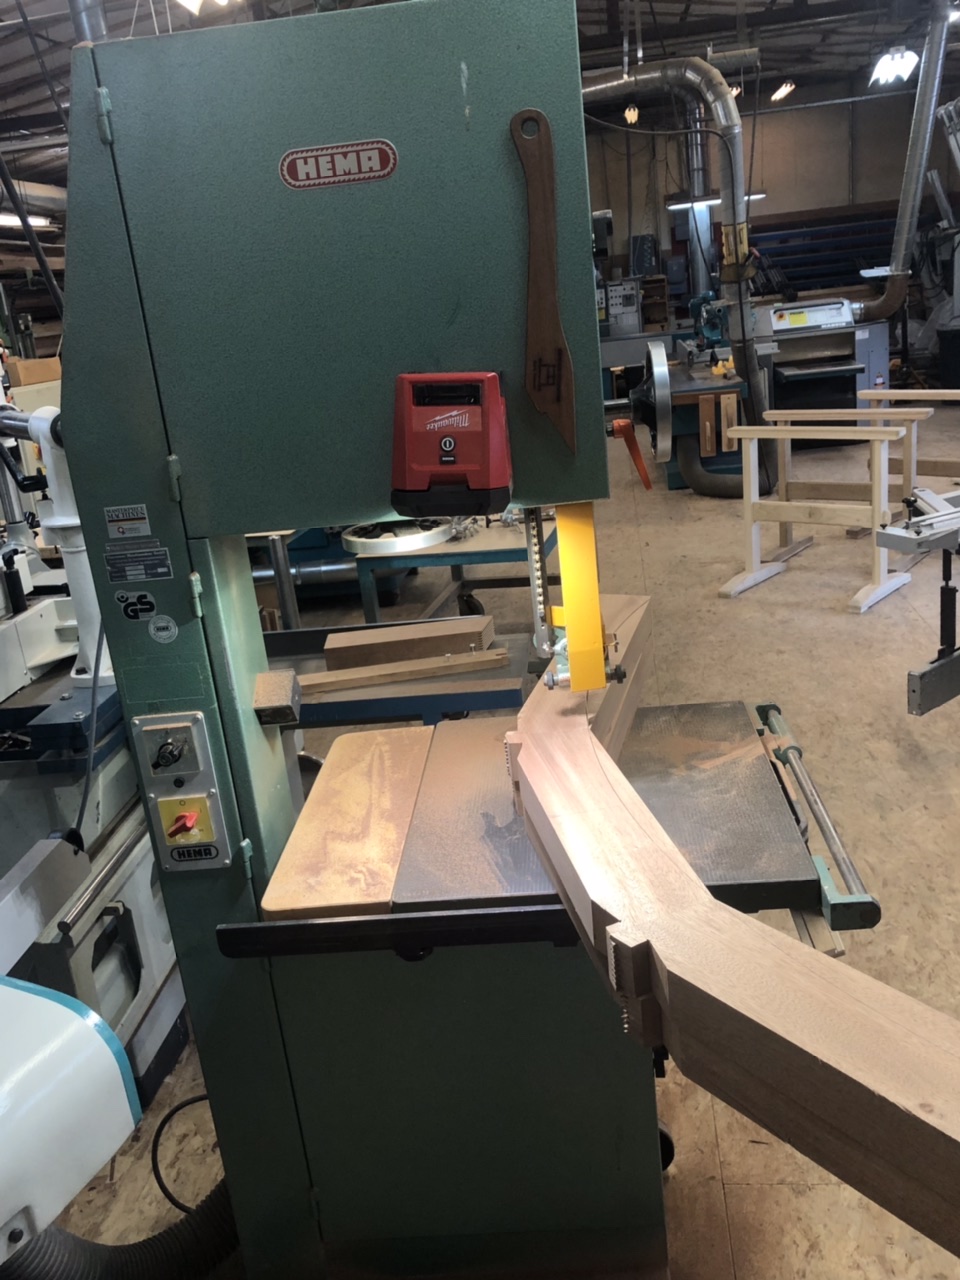
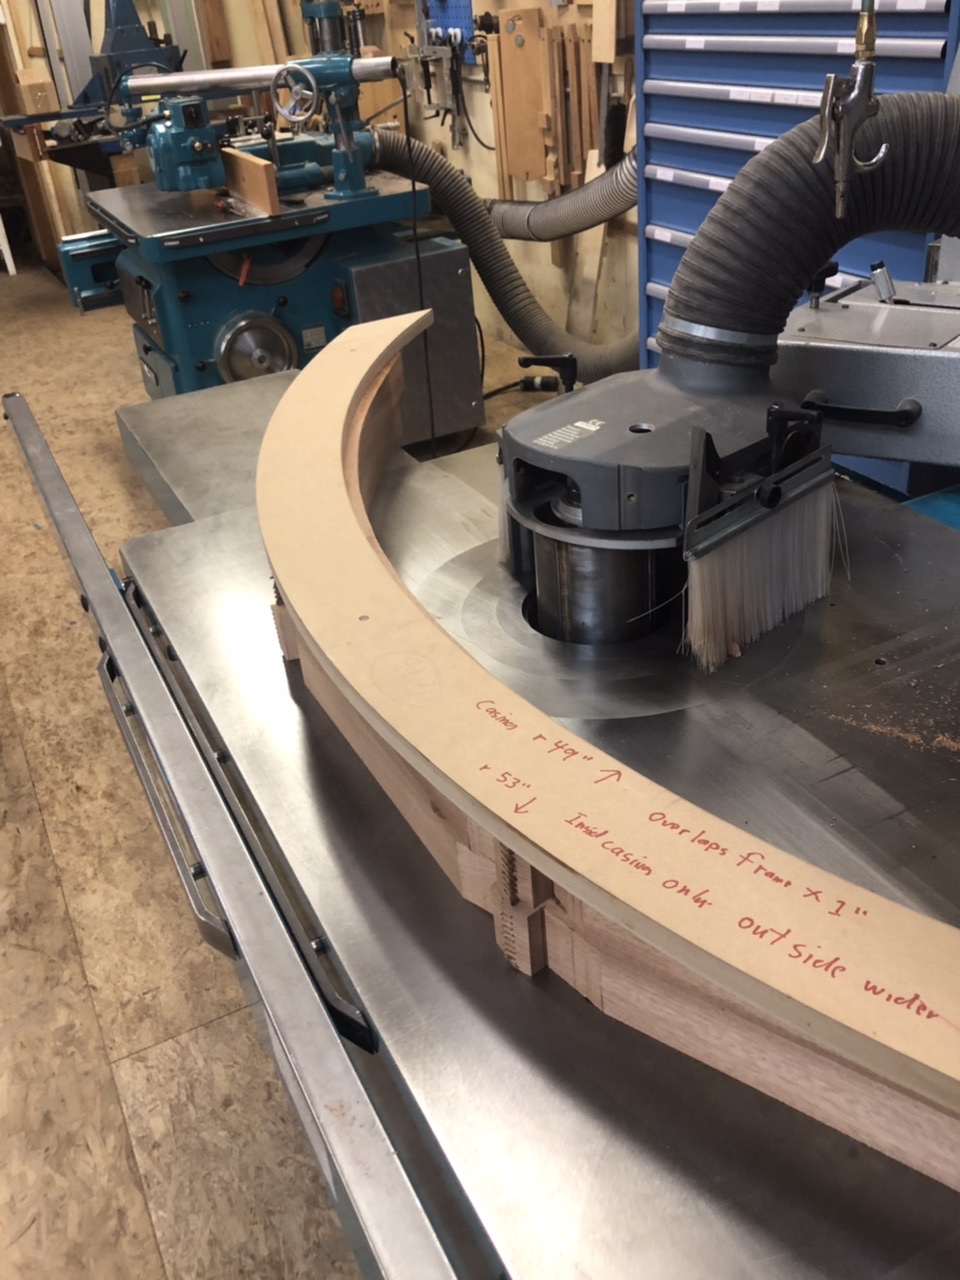
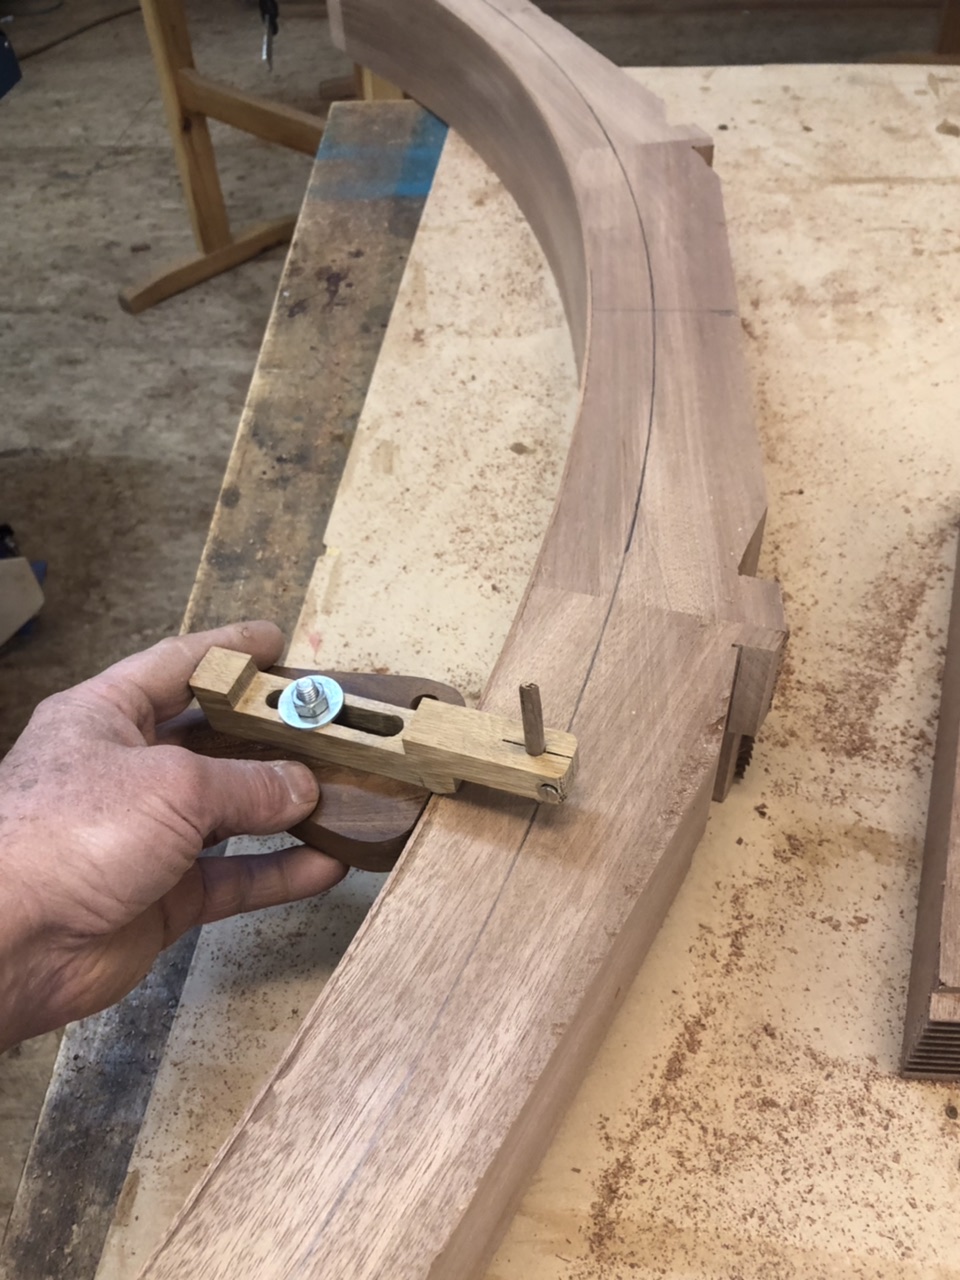
Here are some pictures of the fingerjointed solid arch I’m doing on a euro door unit in progress at the shop. I’m liking this better than brick-laid arches. I can end grain finger joint material almost 4” thick. This is a 6” wide jamb extension so I stacked 2 arch segments together.
Rough bandsaw cut on inside, shaping inside with a 5” tall Tersa head. I then applied 3mm thick veneer to the inside. Actually the finger joints showing on the inside did not look objectionable and probably could have went with that.
Then marking for the outside bandsaw cut.
View higher quality, full size image (960 X 1280)
View higher quality, full size image (960 X 1280)
View higher quality, full size image (960 X 1280)
5/9/22 #10: Q-lon Kerf In Radius Stop ...

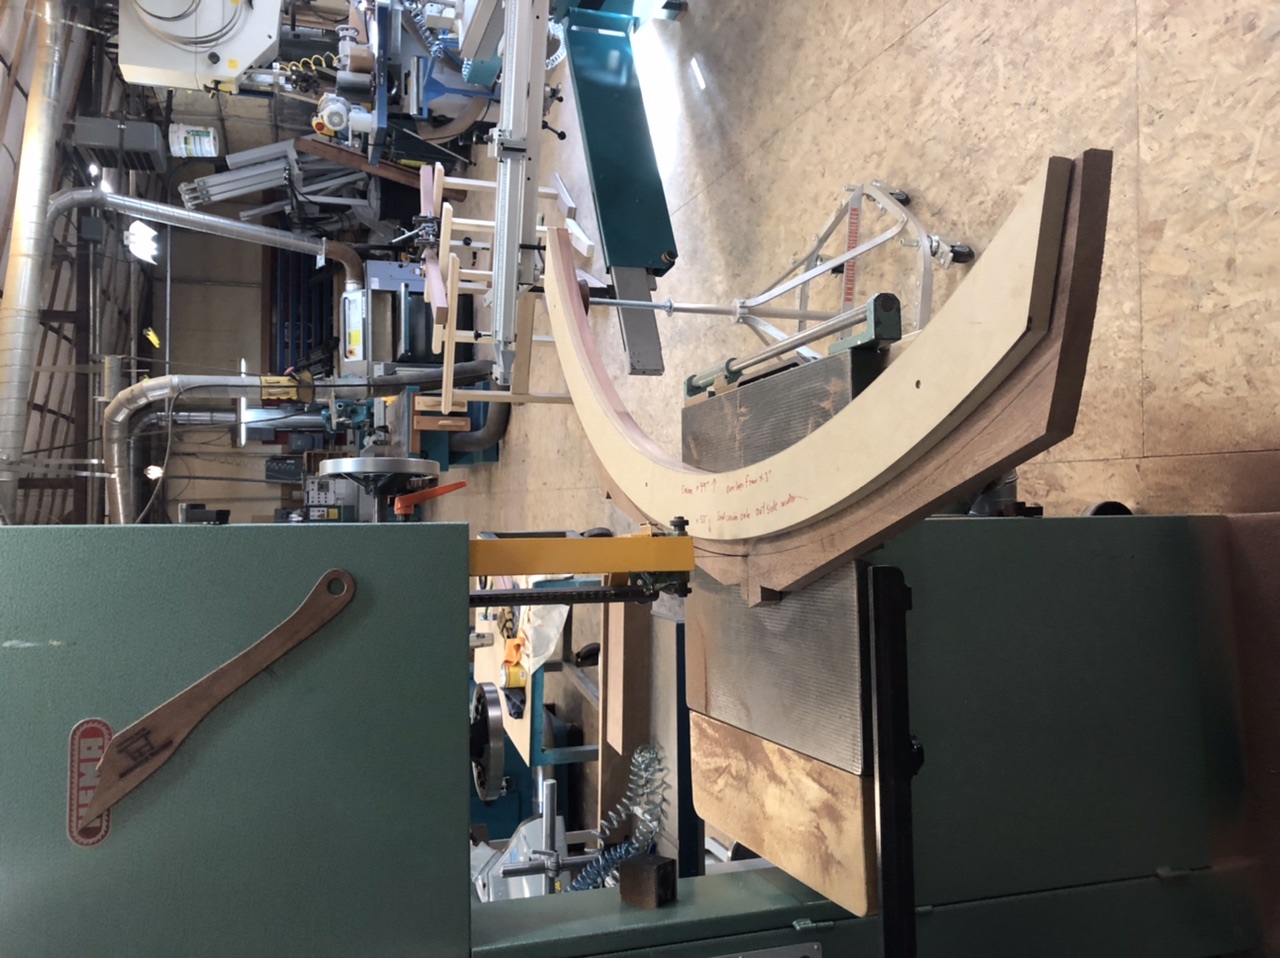
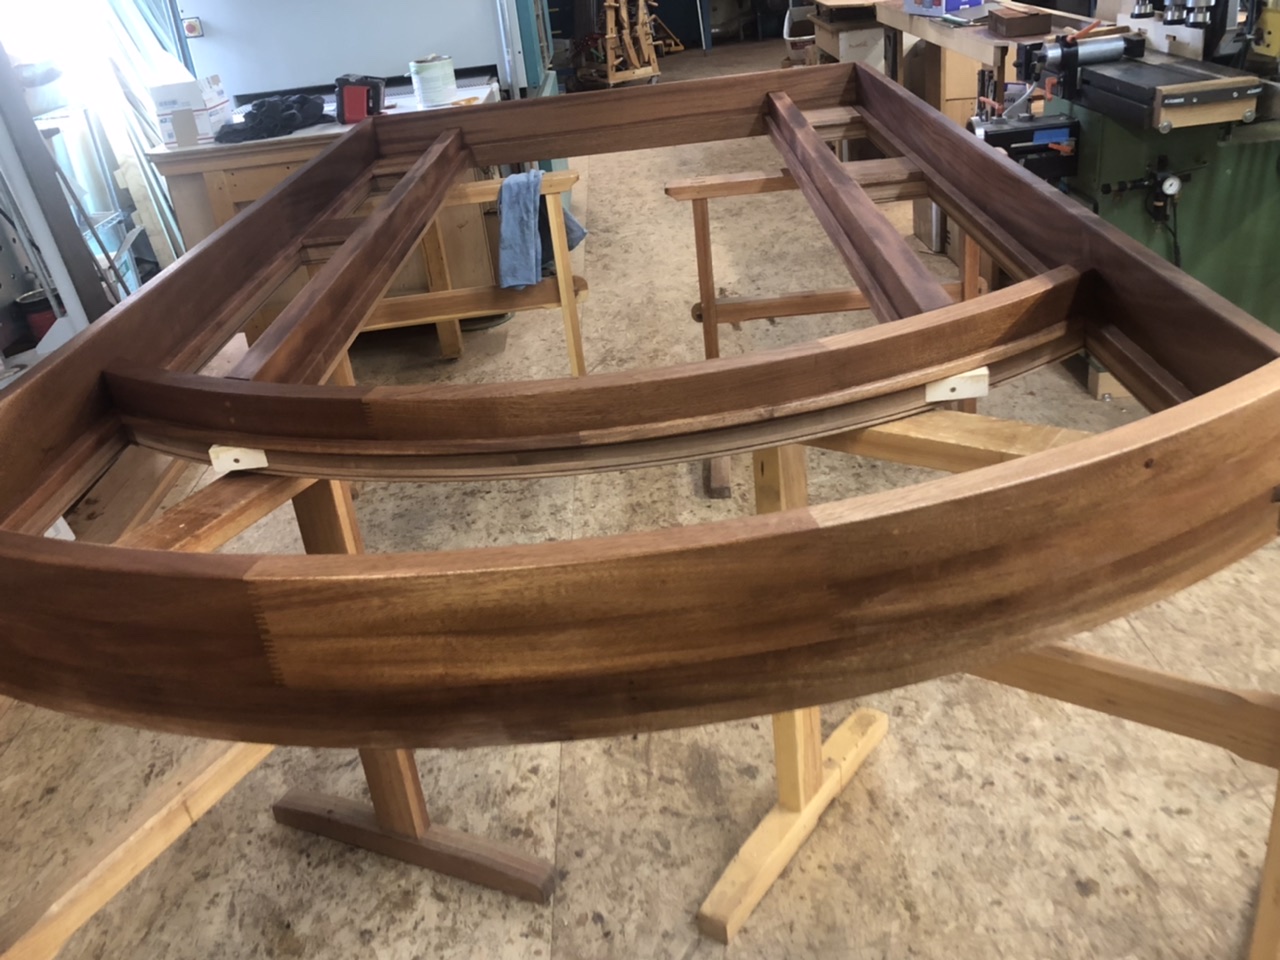
Next the outside radius was cut. In this case I just cut on the bandsaw and sanded to the line on the edge sander since this gets covered by trim and doesn’t need to be precise.
View higher quality, full size image (1280 X 958)
View higher quality, full size image (1280 X 960)
5/9/22 #11: Q-lon Kerf In Radius Stop ...

Oops that was the wrong picture cutting the outside. That was the casing.
5/10/22 #12: Q-lon Kerf In Radius Stop ...
 Website: http://www.acornwoodworks.com
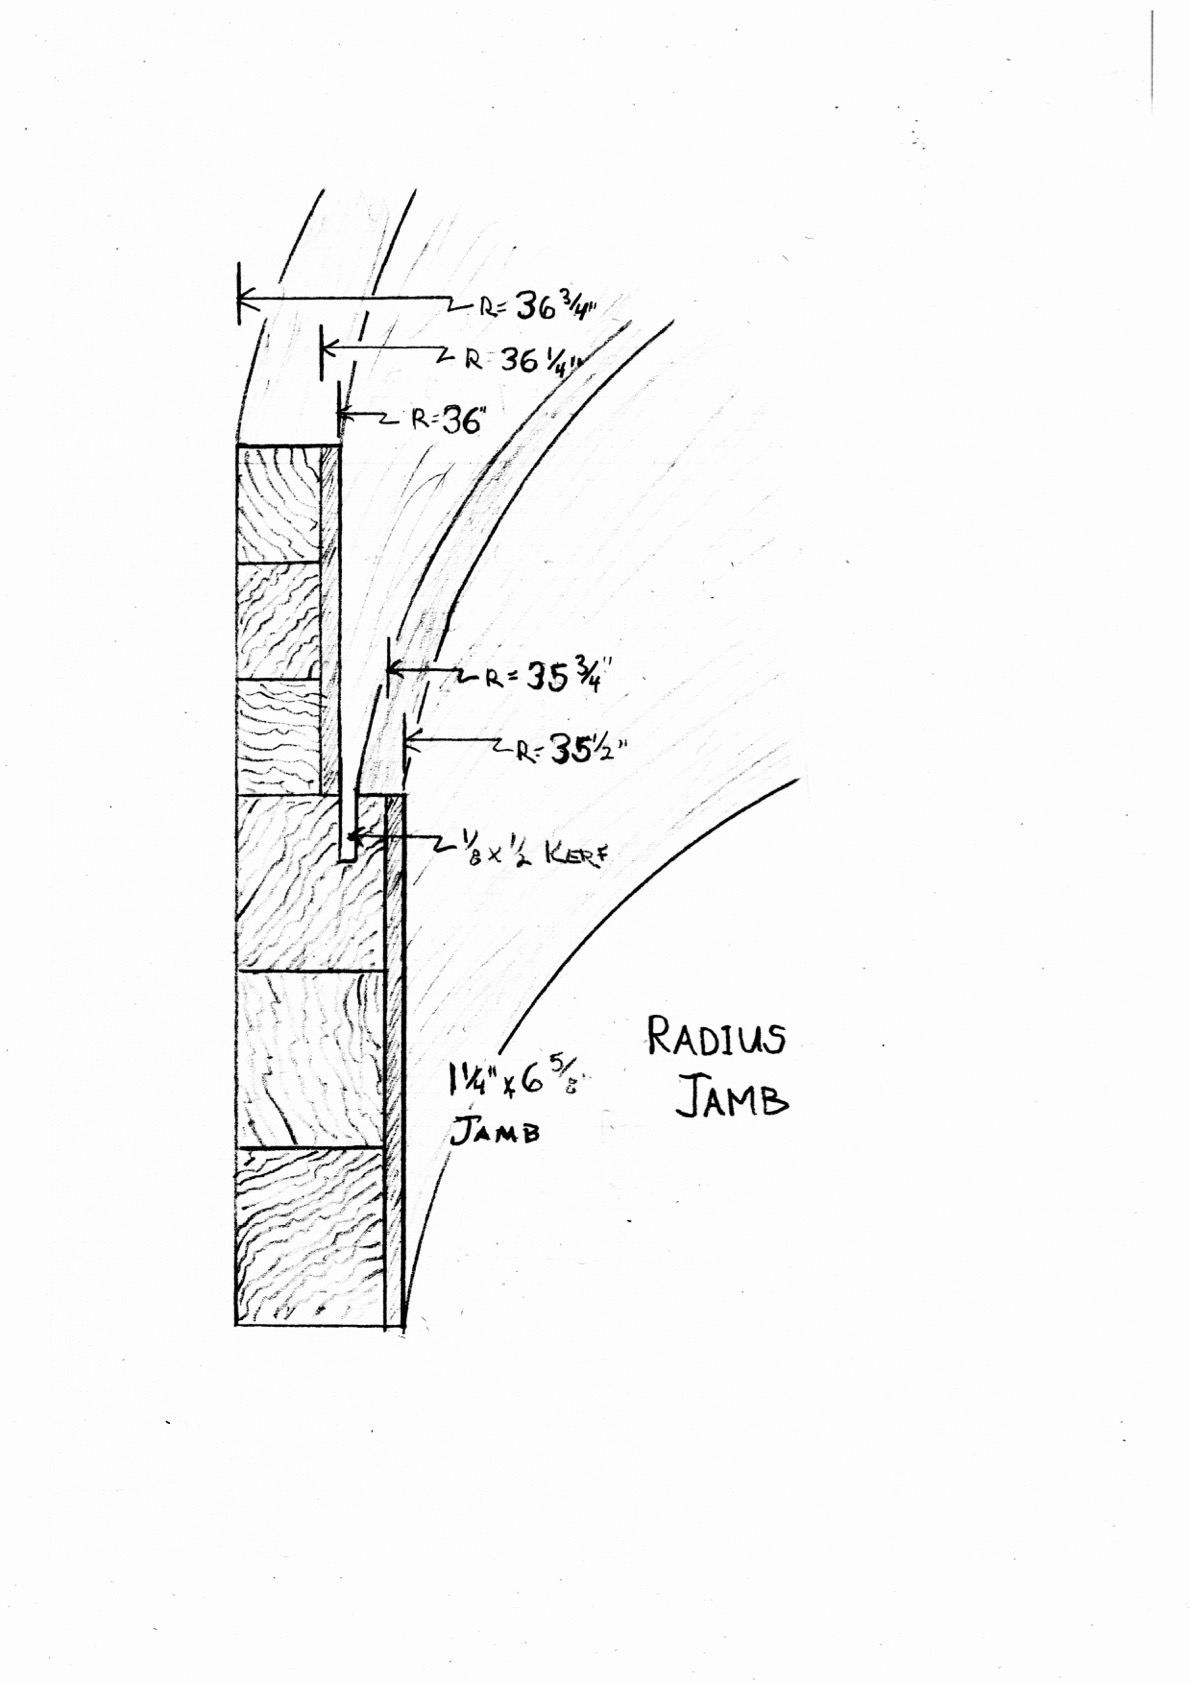
Here is a drawing illustrating the kerf and the brick-laid jamb sections. We gave up on laminated jambs 30 years ago since the outcome was too hard to predict with any accuracy.
The dimensions are based upon a 36" radius opening. Make the jamb in two pieces, and remember to route in the kerf before assembling the two halves to each other.
View higher quality, full size image (1190 X 1683)
5/10/22 #13: Q-lon Kerf In Radius Stop ...

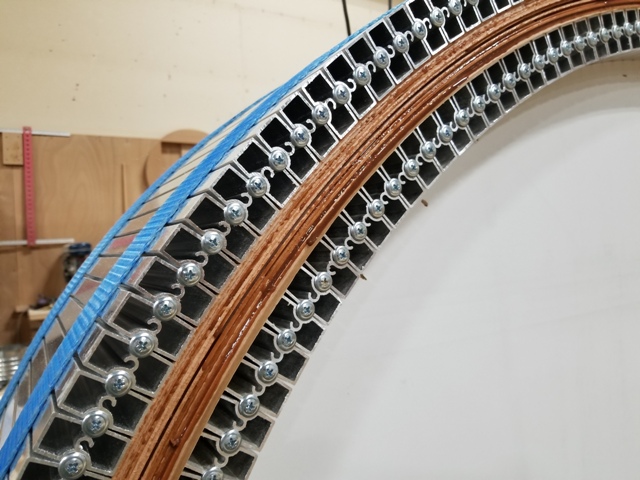
We had done both and settled on strip lams for us. Depending on radius we also use a laminated method over caul with a combination of strap clamping and disposable vacuum bag (not pictured), works well to distribute clamping pressure. We of course do get some spring back but usually negligible. As for kerf, same deal, leave joint dry at stop line, kerf and back on the form.
View higher quality, full size image (640 X 480)
5/10/22 #14: Q-lon Kerf In Radius Stop ...
 Many methods here and depending on the tools you have to work with and budget will drive your choice.
5/10/22 #15: Q-lon Kerf In Radius Stop ...

Strip laminating is the most cost effective method especially with the right gear as aa shows in his post above. On single door units spring-back can be dealt with easily. What drove me to brick-laid construction and now fingerjoint segments is building large door-window units. The curves on these never end. Transom inside and outside curves, curved glass beads, door frame top inside radius, door top radius, brickmould and casings etc.
All this calls for very consistent radius’s.
5/14/22 #16: Q-lon Kerf In Radius Stop ...

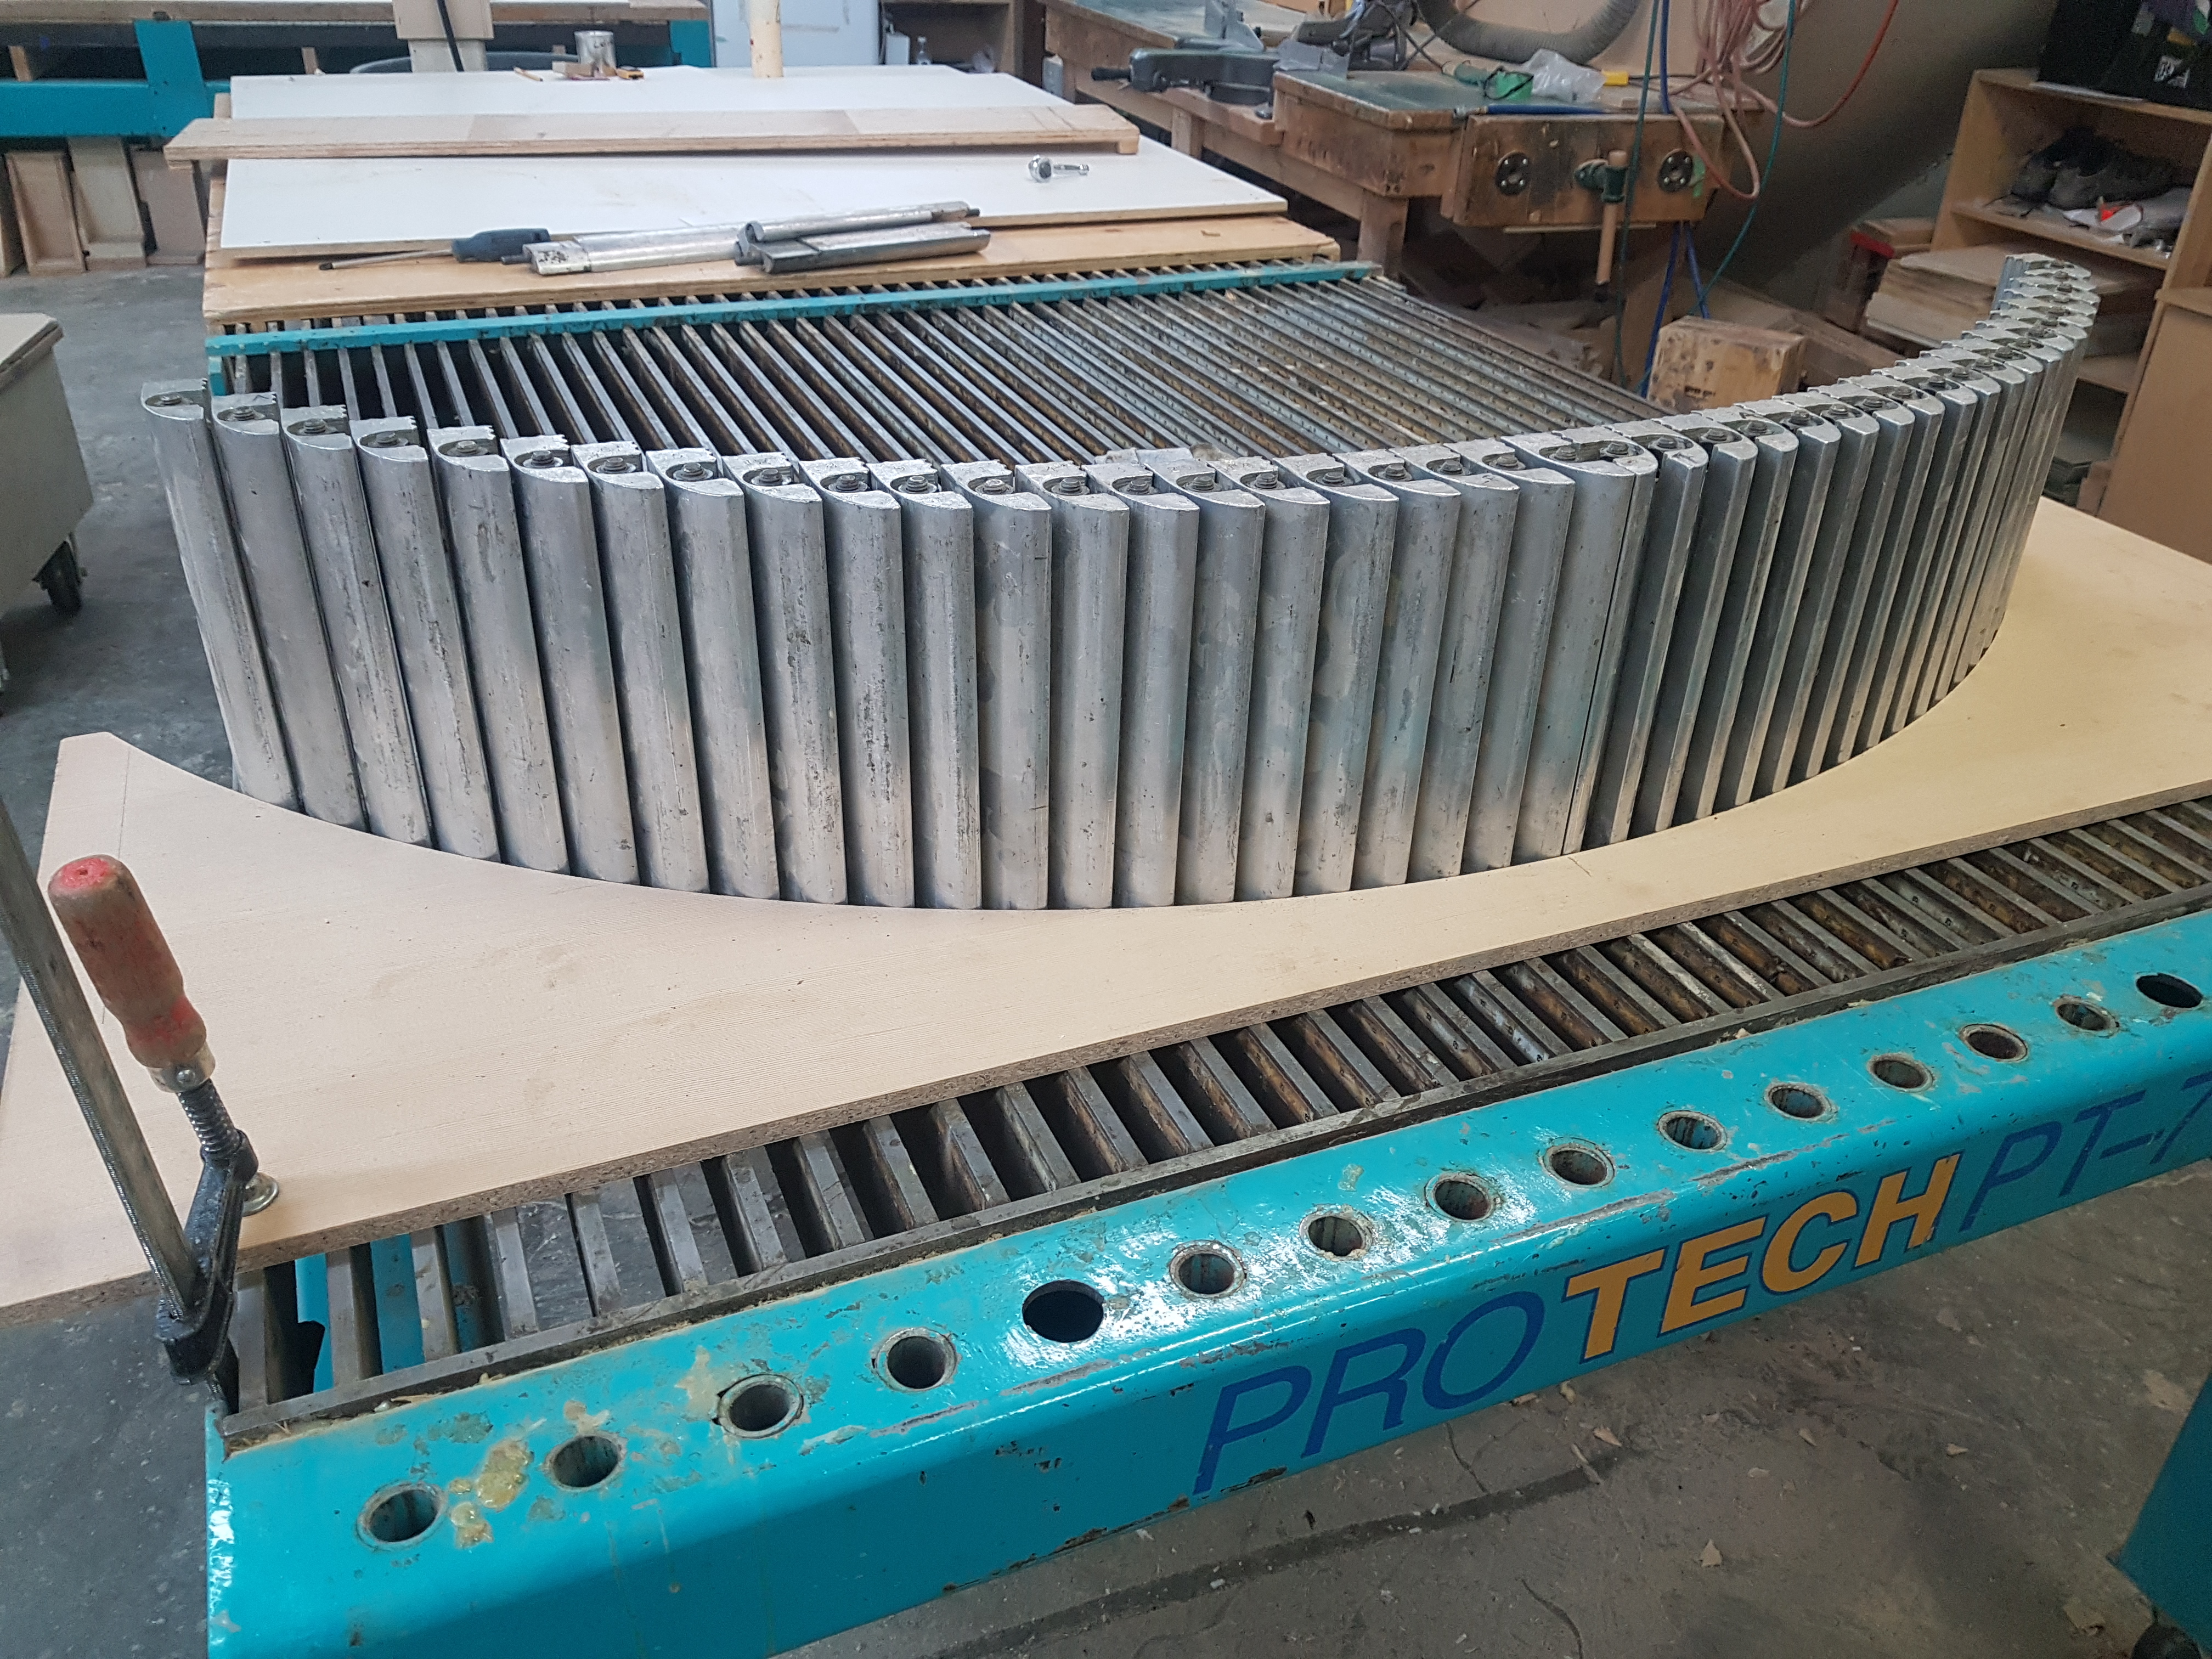
We are using lamination. Depending on the radius we change the thickness of the laminations. In the past we have used Titebond and had complications we spring back. We actually came up with a formula that calculated our spring back and it worked well. We also used a powdered waterproof resin glue by Dural that's no longer available. Laminations dune with it had essentially next to no spring back. Now we use a waterproof PUR glue by Loctite it is messy to work with but has almost no spring back.
I would be interested to find out what aa uses for glue and what the aluminum glue form is. We mostly use an older laminating table that was made by Pro Teck we got used. It has a soft ware for setup and spring back calculation. The soft ware never worked for us and we use the table for other setups than the way it was made to be used. Our jambs are 2 part units regardless if they are strait or arched. We rabbet out the back of the thicker part to attach the thinner jamb. The rabbet has a smaller secondary rabbet for the weather stripping. One of our problems is if the radius is to small the weather-stripping we have certification for and are tested with, does not bend nice and clean. I be interested how others deal with that problem.
View higher quality, full size image (4032 X 3024)
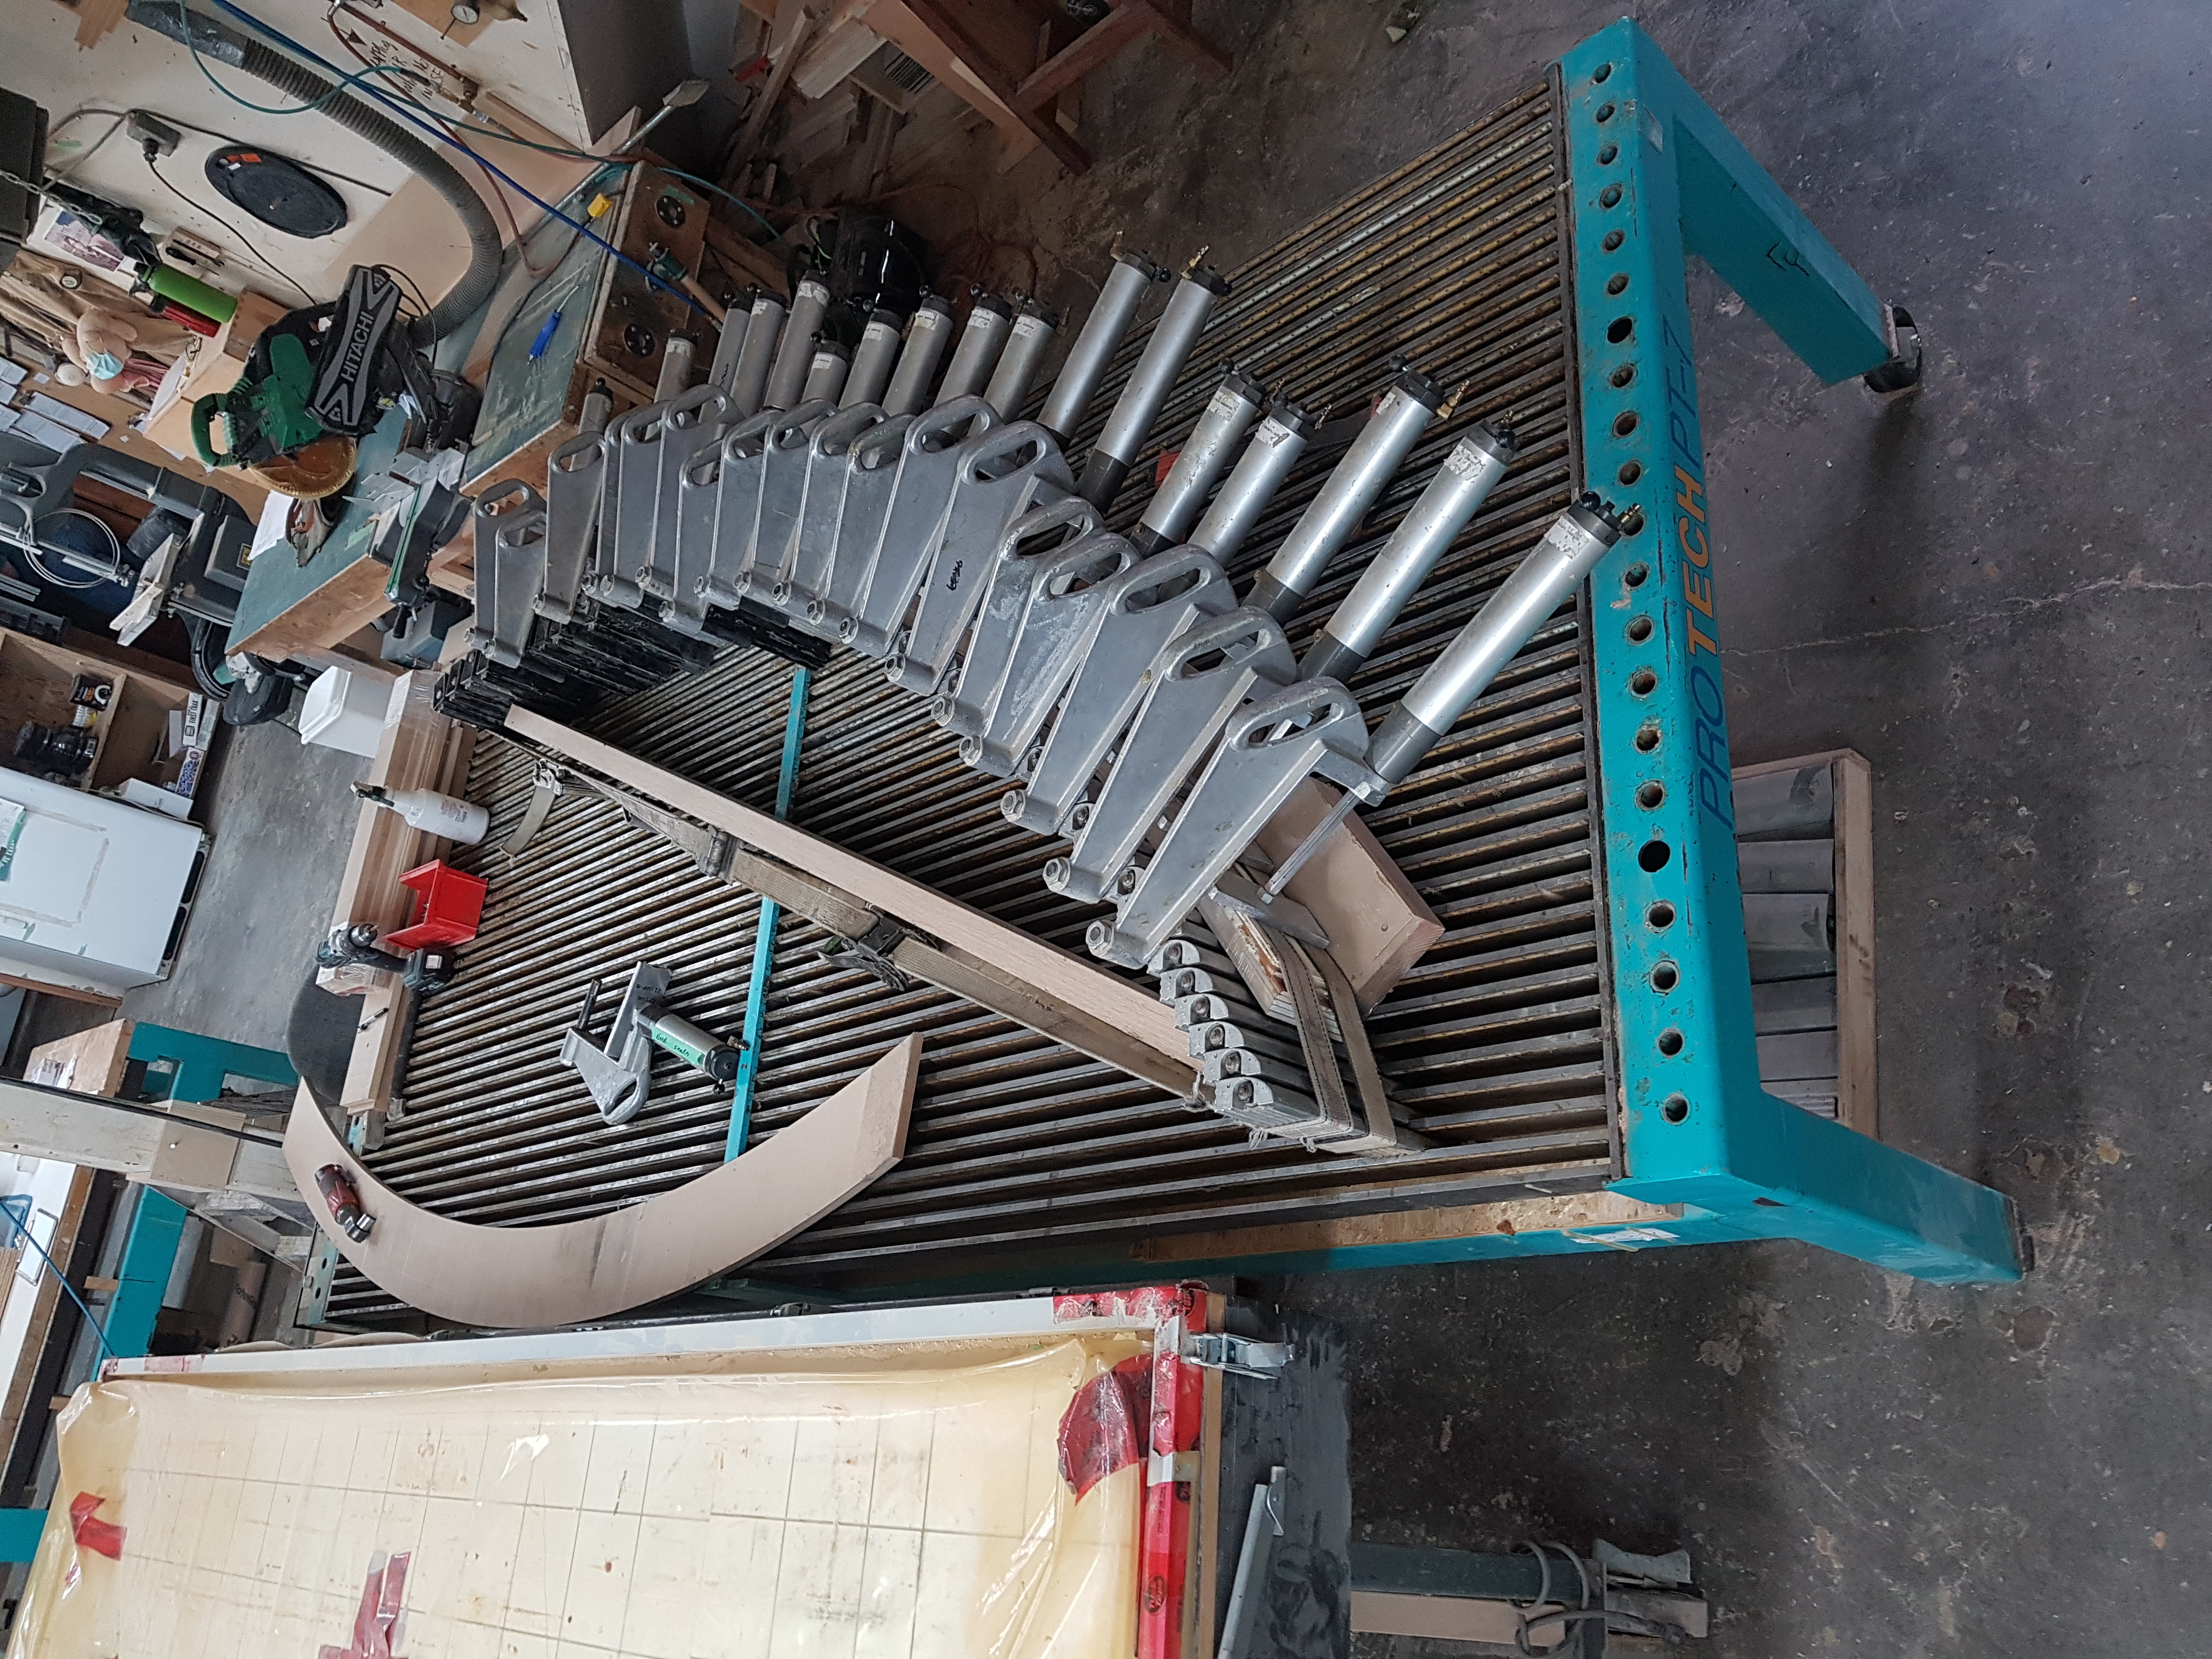
View higher quality, full size image (4032 X 3024)
5/14/22 #17: Q-lon Kerf In Radius Stop ...

I always enjoy these radius threads. Depending on experience, volume, and project type we all have different methods, jigs, and tools for coming to the same final structural product. How it looks aesthetically maybe different. The function of the part is the same.
5/15/22 #18: Q-lon Kerf In Radius Stop ...

The metal extrusions are from a company called curve-o-matic. Since we are primarily doors and lineal millwork, no cabinets, I just bought a bunch in 12" lengths. That with a cnc router allows fairly quick setup of the cauls. Exterior jambs for us are glued with a powdered urea resin and anything interior either tite-bond 3 or another catalyzed pva we use.
Edge gluing and thin re-sawing are right in our wheel house so we can utilize rips for the "buried" laminations if it is available especially on larger projects with many arch top doors.
Like most shops I'm sure, I have been through many different iterations of clamping methods and while this is our current process I'm sure it will morph into something else as time goes on!
5/15/22 #19: Q-lon Kerf In Radius Stop ...

We only use TB1 (interior) and epoxy(interior/exterior) in our shop as primary adhesives. All of the other products have some negative attributes, that become a deal breaker.
The epoxy is 99% dependable. Based upon my boat building experience, I can manipulate it to serve many purposes. The actual cost of the epoxy is insignificant compared to it's benefits and the overall costs of all of these expensive things we fabricate.
I have no idea why, but the epoxy does appear to lower spring back, perhaps because it does soak into the fibers. The veneer thickness is the most important variable, which makes perfect sense.
We use both brick lay and laminate depending on the project. Likewise we have an assortment of methods of forming.
|
