Message Thread:
True divided Muntin bars in CNC
10/24/16

Has anyone done this with success ? I am starting to put my head into this but wondering if it's worth it ? How would I go about it to make it practical ?
Would love some feedback on this
10/25/16 #2: True divided Muntin bars in CNC ...

I do not use CNC, but for the last 20 years, I have attended Atlanta shows and others with my single coped, stub tenoned profiled munition bar and asked every one I could how to make it.
Without exception, they handed it back to me and said to continue making it however I do it now.
Primary problem is the cope. When the cutter exits, there will be a bit of tearout. This can be cleaned up by a full width profile cut on both sides. Or, it requires tooling to rotate both directions - One cutter comes in, and cuts just past center, and the other counterrotates and comes in from the other side and cuts to just past center. And does it make a full height cut- forming a stub tenon also?
Then the real stickler - how do you hold it?
This is why divided lights are rarely seen except in the finer work. By the way, "true divided light" is a marketing term applied to what was always just "divided lights". It is either divided lights or grilles.
View higher quality, full size image (2592 X 1944)
View higher quality, full size image (2592 X 1944)
10/25/16 #3: True divided Muntin bars in CNC ...

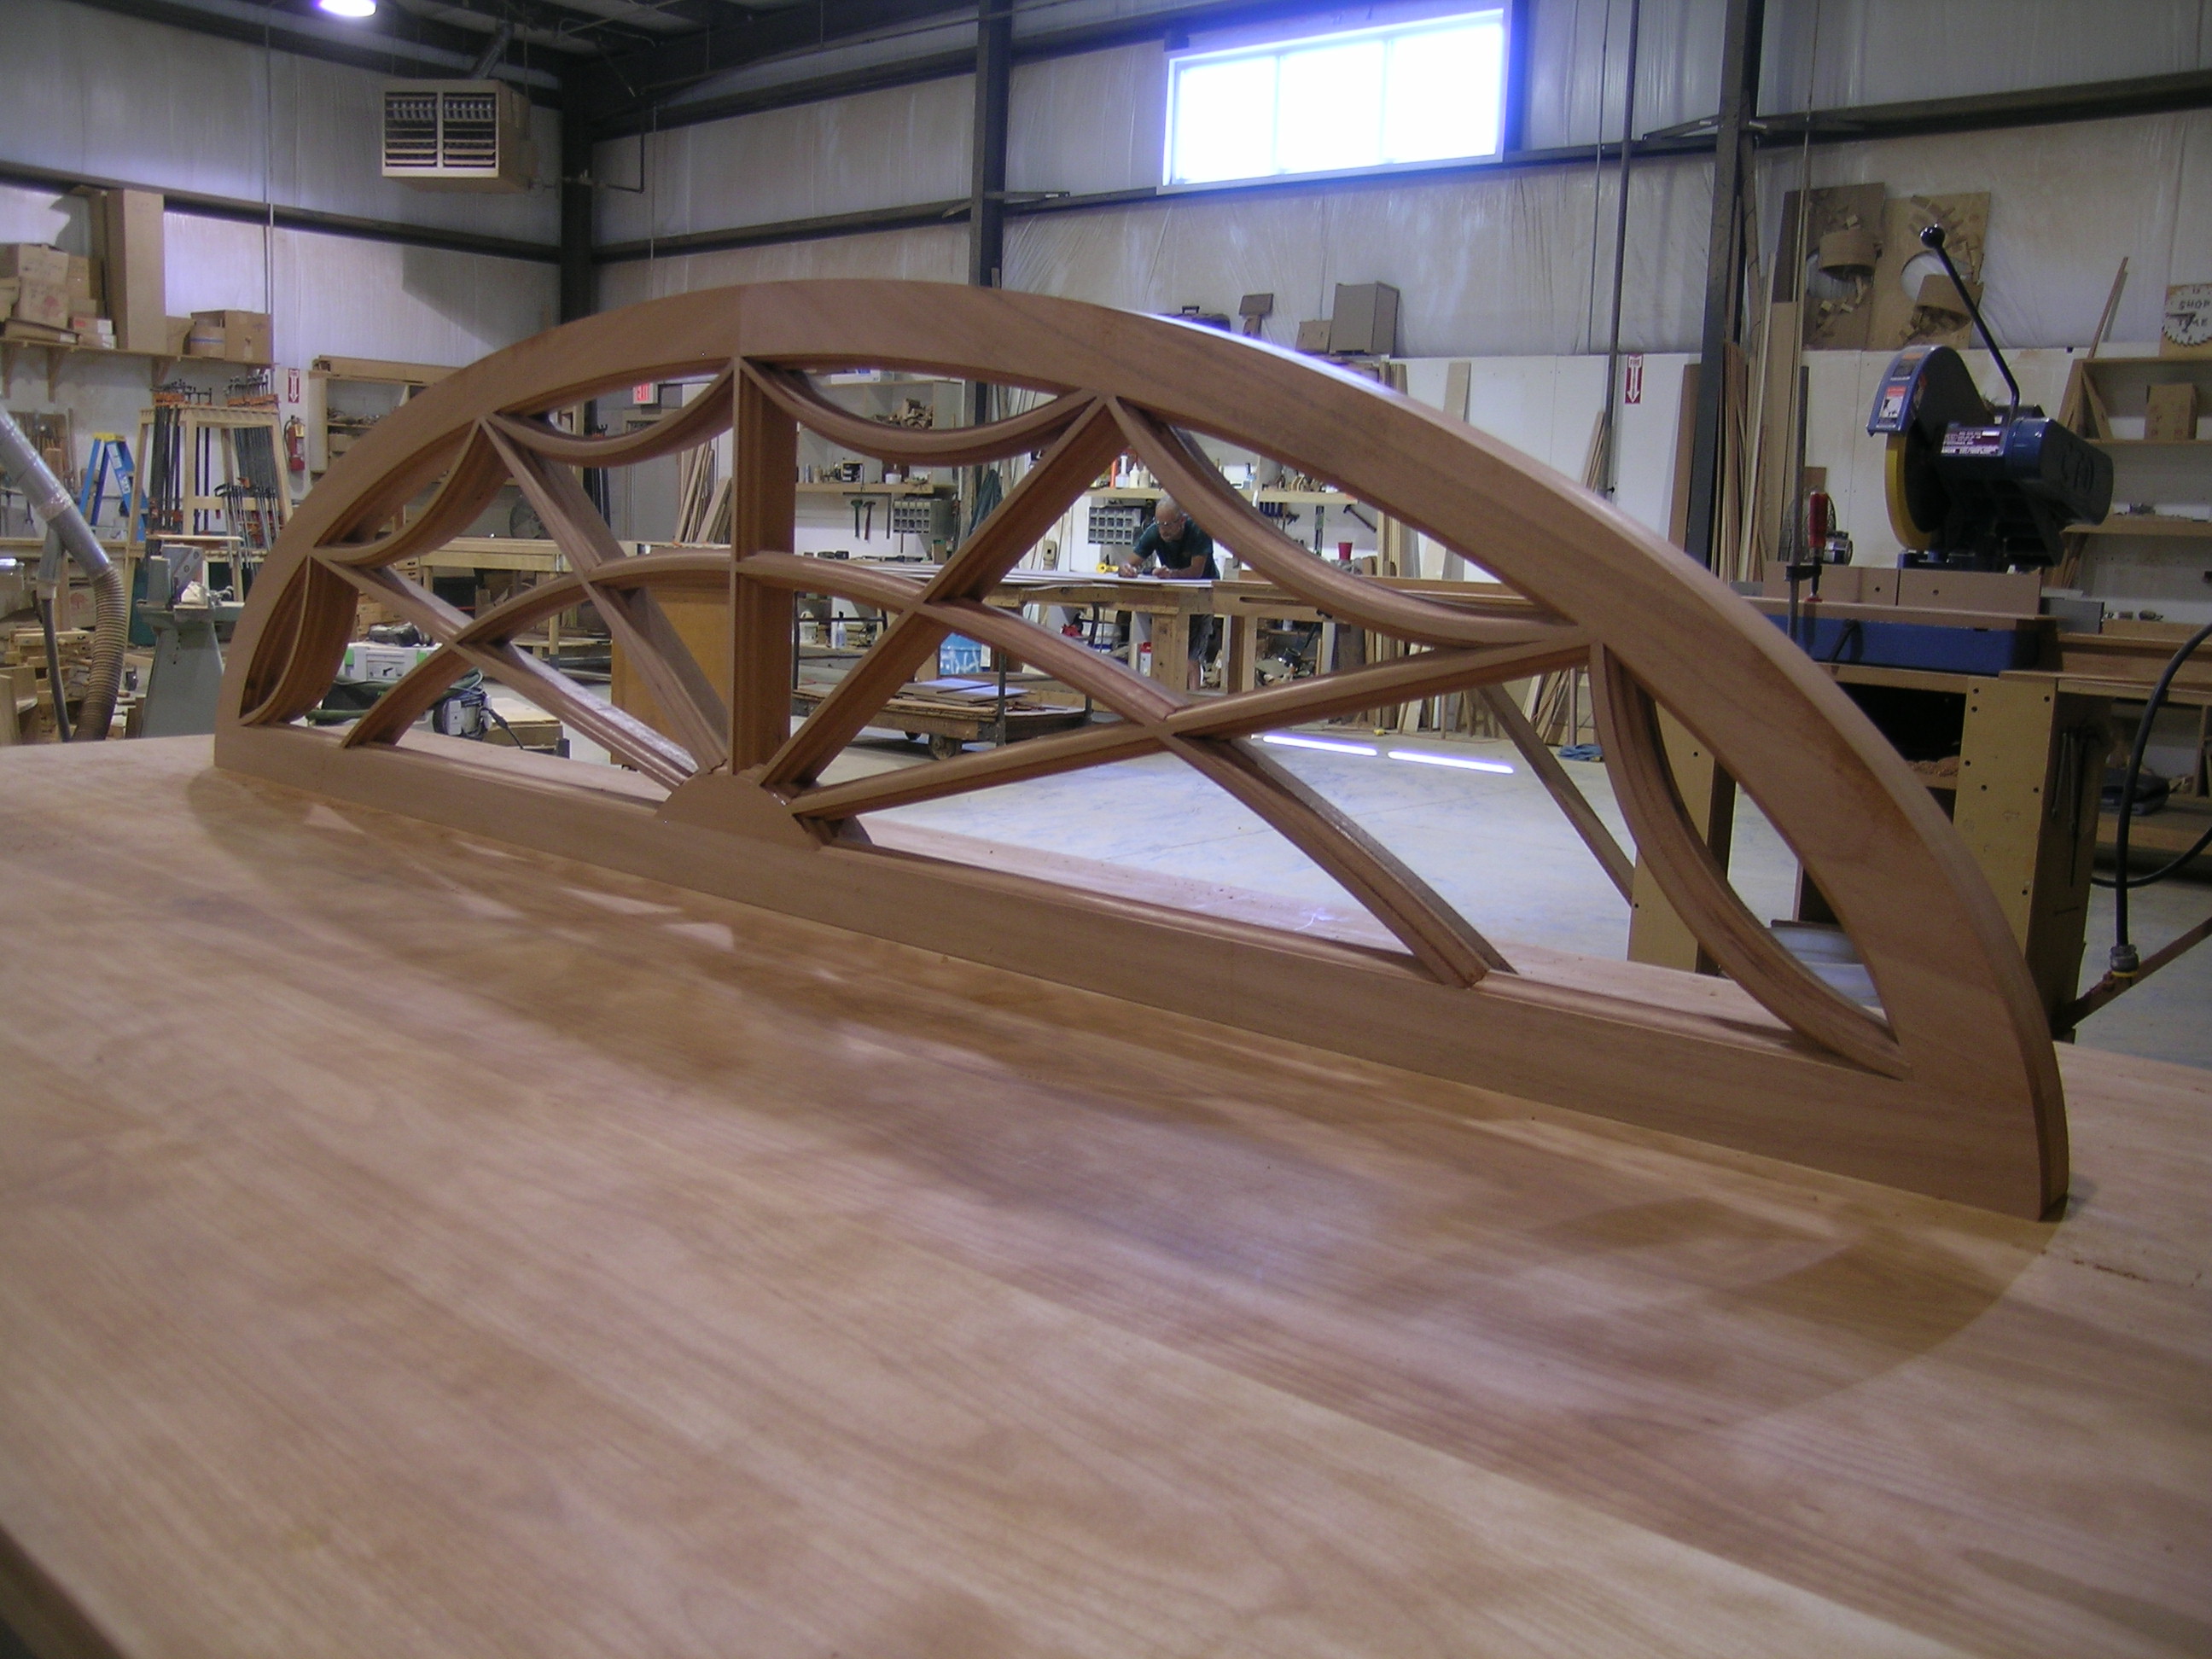
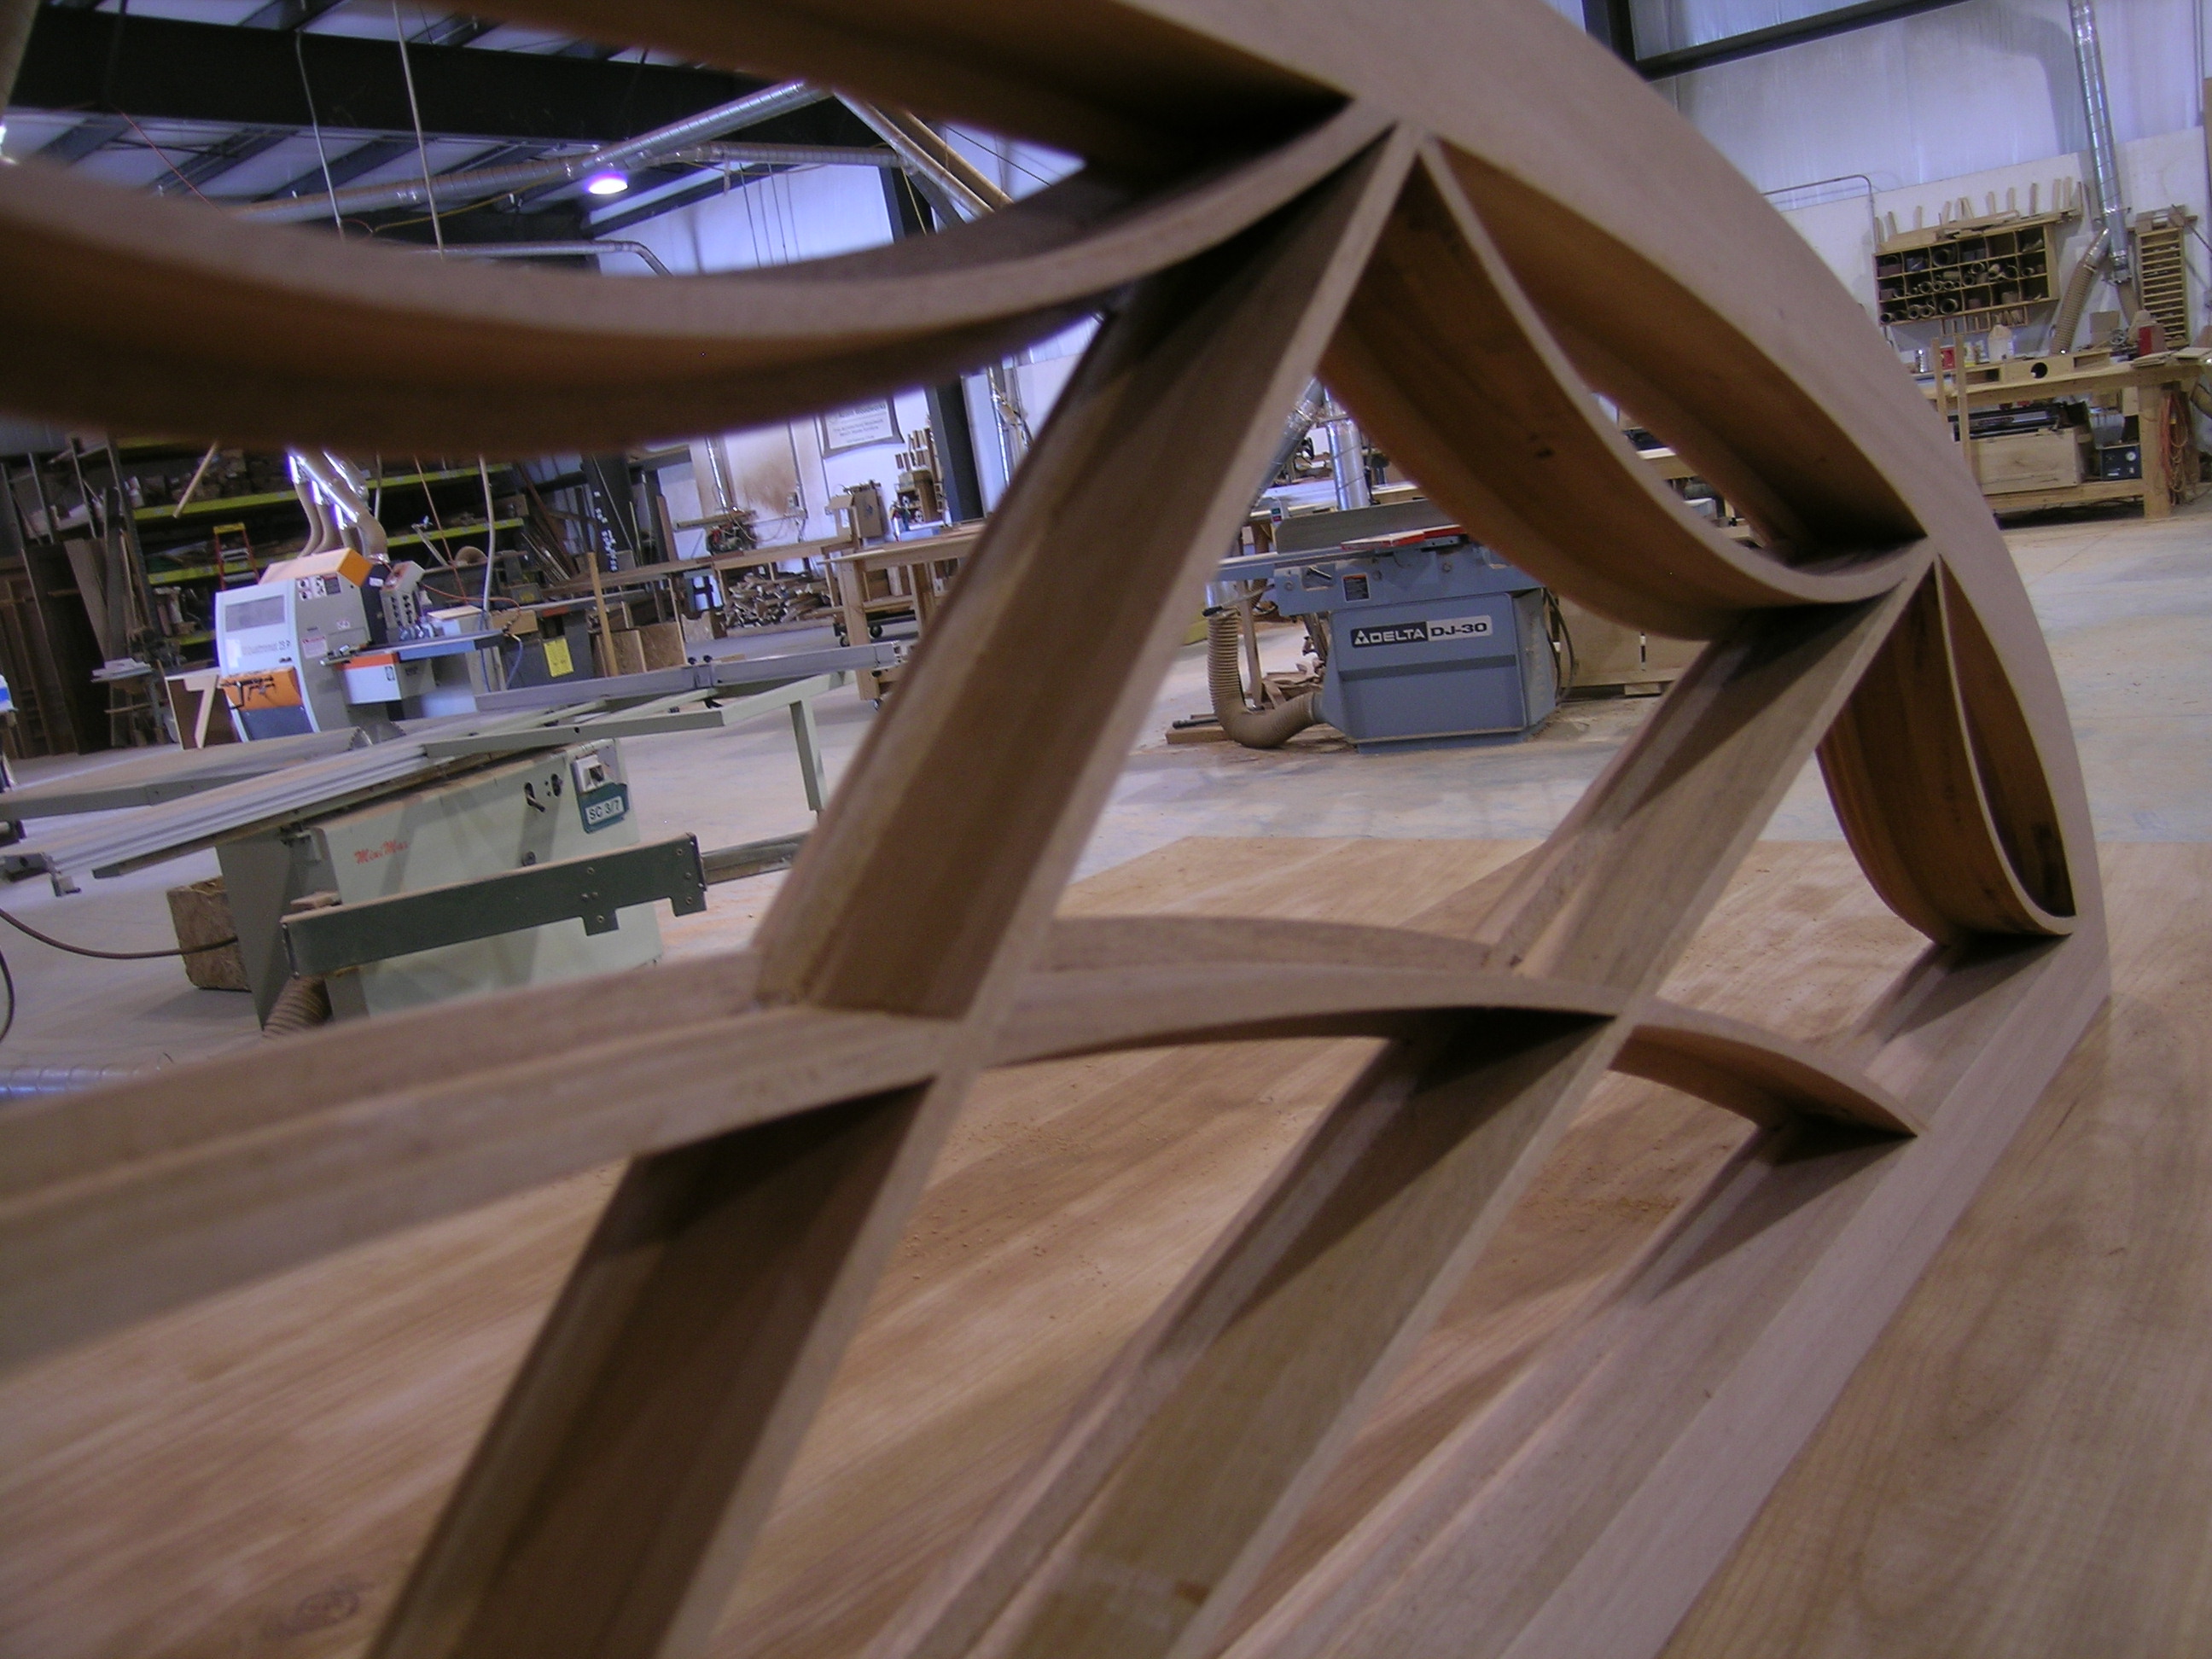
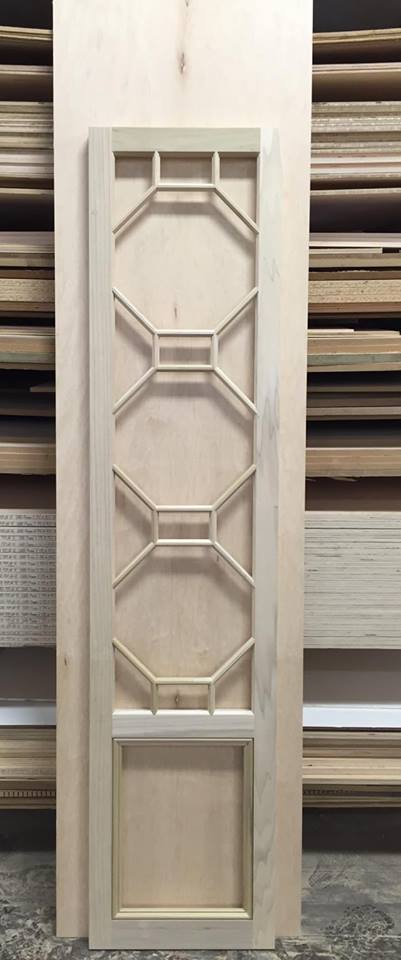
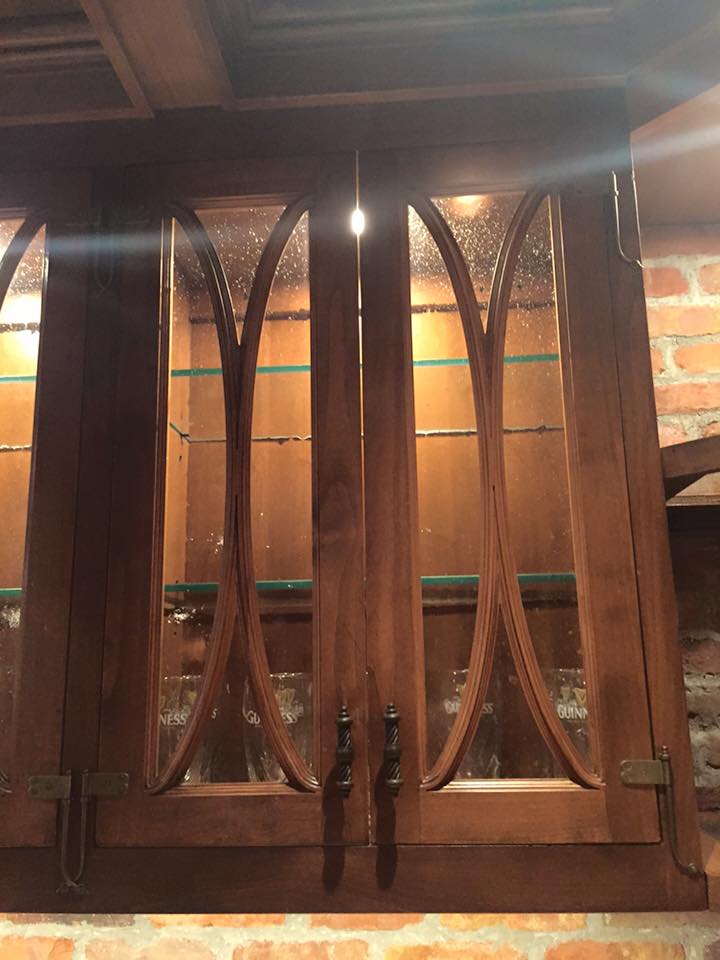
The first two pictures are done with traditional cope and stick ....and the 3rd was done on my cnc
David, you are correct. How the heck will I fixture a small muntin bar so it doesn't go flying.
This type of work is always in our shop,and my self and our crew are capable and skilled enough to do it. But our newest recruits don't seem to have the same capabilities. Our trade is a dying art to most millennials.
View higher quality, full size image (401 X 960)
View higher quality, full size image (720 X 960)
10/25/16 #4: True divided Muntin bars in CNC ...

Art for Everyday is doing interesting things on CNC equipment in divided light looks. It can be done. I believe they treat it like an onlay. They glue wood to PC with a layer of newspaper between them.
10/25/16 #5: True divided Muntin bars in CNC ...

Hi Wood Dust,
A little unfair about the millennials. You may have made many of these but they don't come along everyday in the average shop, so you have to give your new recruits the time to gain experience with the new complex products. Not everything is due to generational shifts, some things cube with age and experience.
Anyway that's a bit of topic! Actually as someonene sightly older than a millennial (Just) I am curious if you could share a little more about your CNC process? The picture is not that clear. Are these actually coped on the CNC? How do you fixture these parts? Do you have any photos of the parts in progress?
Nice work though from you and David!
Always keen to learn!
Thanks
Richard
10/26/16 #6: True divided Muntin bars in CNC ...

See if this video exemplifies the process in question. He doesn't do the end copes, but it would certainly be possible to do so - high-frequency spindles are reversible, so one could run RH and LH tooling if needed, though running the copes first, as one would do on the shaper, should make that unnecessary (as Mr. Sochar notes).
I've had success doing this on my flat table router by gluing the blank to wider sacrificial board and then screwing that down to the spoilboard.
https://youtu.be/WCnn6MgByFQ
10/27/16 #7: True divided Muntin bars in CNC ...

SG
Thank you for sharing that video , I had searched for one like that with almost the same keywords but never saw that .
That is really what I am tying to do . The video made me realize the serious amount of tooling required. Along with the extra amount of material needed in order to hold it down . I suppose I thought I could get away with just a cutter for the sticking and one for the cope (like we would do traditionally on a shaper). And maybe use backer blocks , but really had no idea how to hold them . The video you shared is perfectly clear to me .
SG can you say wether or not you found it as a time saver or worth doing this way ? The tooling is expensive , and after watching the video I have my doubts on its efficiency.
Richard , the doors I do now are done more like a carving . A wood panel is laminated and placed in the door during glue up . The whole door sits on the CNC for this process .if I chose , I can flip the door over and route out the back so the lights are divided .
10/27/16 #8: True divided Muntin bars in CNC ...

My programming is simpler, just using the cope/stick heads I run on my shaper (they were made by Royce/Ayr to run on both CNC/shaper, with aluminum heads, 4" dia., custom arbors/spacers). They were fairly expensive (but a good deal for what they are - they were the most competitive by a good bit), but the versatility of being able to run them on both machines has proven to be worth it. I end up having to make the stops separately, but that's easy enough. Don't know how large/heavy your shaper tooling is, but if it isn't too huge, you might be able to put it on one of the HSK arbors Tecniks makes and use it on the router. Having a set that will do both makes it an easy process, and using something cheap, like poplar, as a backing material, doesn't add much to the cost. Doing simple radii and such on the shaper isn't so hard, though of course is much more precarious, but the beauty of the router is the unlimited nature of the possibilities, as well as the ability to run the tooling with the grain consistently (by dividing up the tool-path and running with the radius on all quadrants).
10/27/16 #9: True divided Muntin bars in CNC ...

The video shows a great way to make muntins, and the coping would not be difficult in that case. Not very fast, but about as safe as can be. All the skills move to the CAD draftsman, and I would think they are as knowledgeable in cope/stick munition work as millennial. As in, not much.
Glueing to particle board with paper is promising. That is an old turner's trick to make half turnings. Once complete, insert a chisel on the edge of the paper and split the part in two.
As with anything in CNC, it is in the programming. Disregarding the running times on the CNC, how long would it take to draw and program the elliptical arch window in the above photos?
10/27/16 #10: True divided Muntin bars in CNC ...

One need not be a specialist to do CAD/CAM work. I don't know how familiar you are with the process, but simple lines representing the geometry is all that's required. A good tutor could show you most of what you need to know to program 80% of what you'll ever want to run in two days (as I've done for a couple of other shops in my area). It does require astute and careful work, but once you get over the first hump of the curve, it becomes a quick and logical progression. I think what's confusing on the face of it is that the software companies want to show you everything their product can do down to organizing your sock drawer, while the reality is that almost everything you'll ever run will be represented by a few lines, easily generated by using an arc, circle, ellipse (or just straight) line commands. It's from these you'll determine cutting heights, direction, feed/speed, etc. There is a great deal to learn about running CNC over conventional equipment, to be sure, but that's part of the fun. Having a deep understanding of how things are best machined goes a long way toward getting the most out of CNC, esp. when cutting solid wood.
My 2D CAD skills are good, but nothing extraordinary - I would think 30 mins. to draw and an hour to program. As mentioned previously, I like to divide radius work into halves or quadrants and run with the grain at all times. Of course you're still fighting the rotation, but the result is better than if it's ignored and run in one direction only. If you were running something that was difficult and needed to be perfect, you could even flip the head over (in the case of bore-type tooling) and reverse the spindle. I've not done this, but it's totally feasible.
10/28/16 #11: True divided Muntin bars in CNC ...

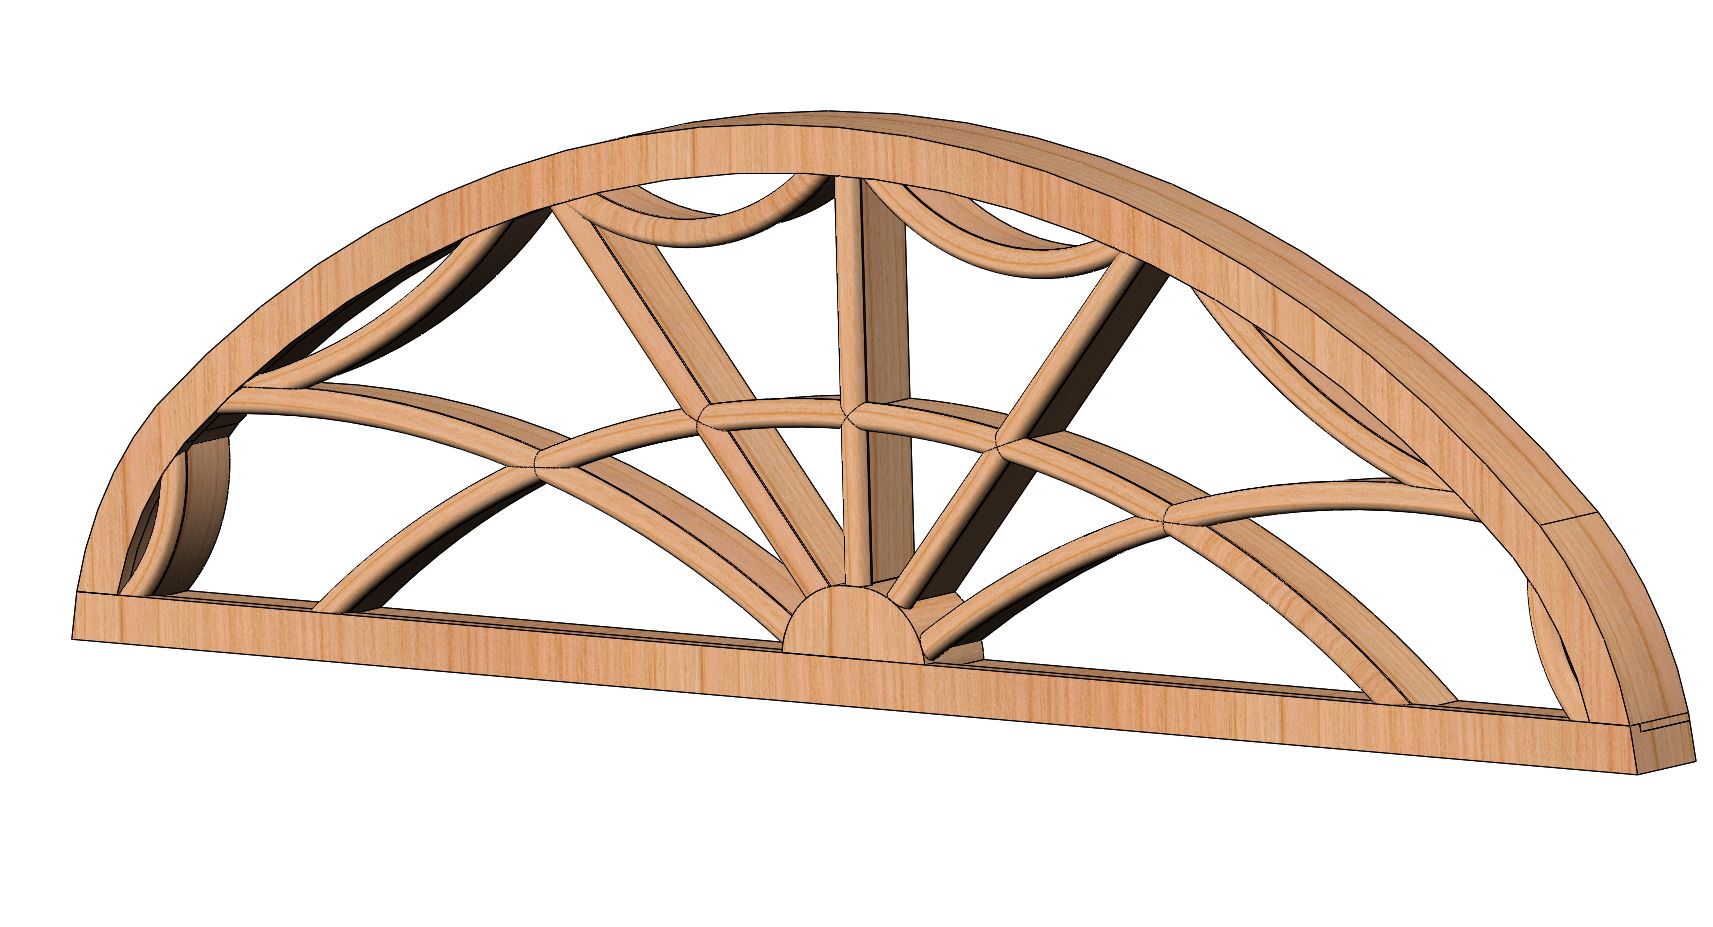
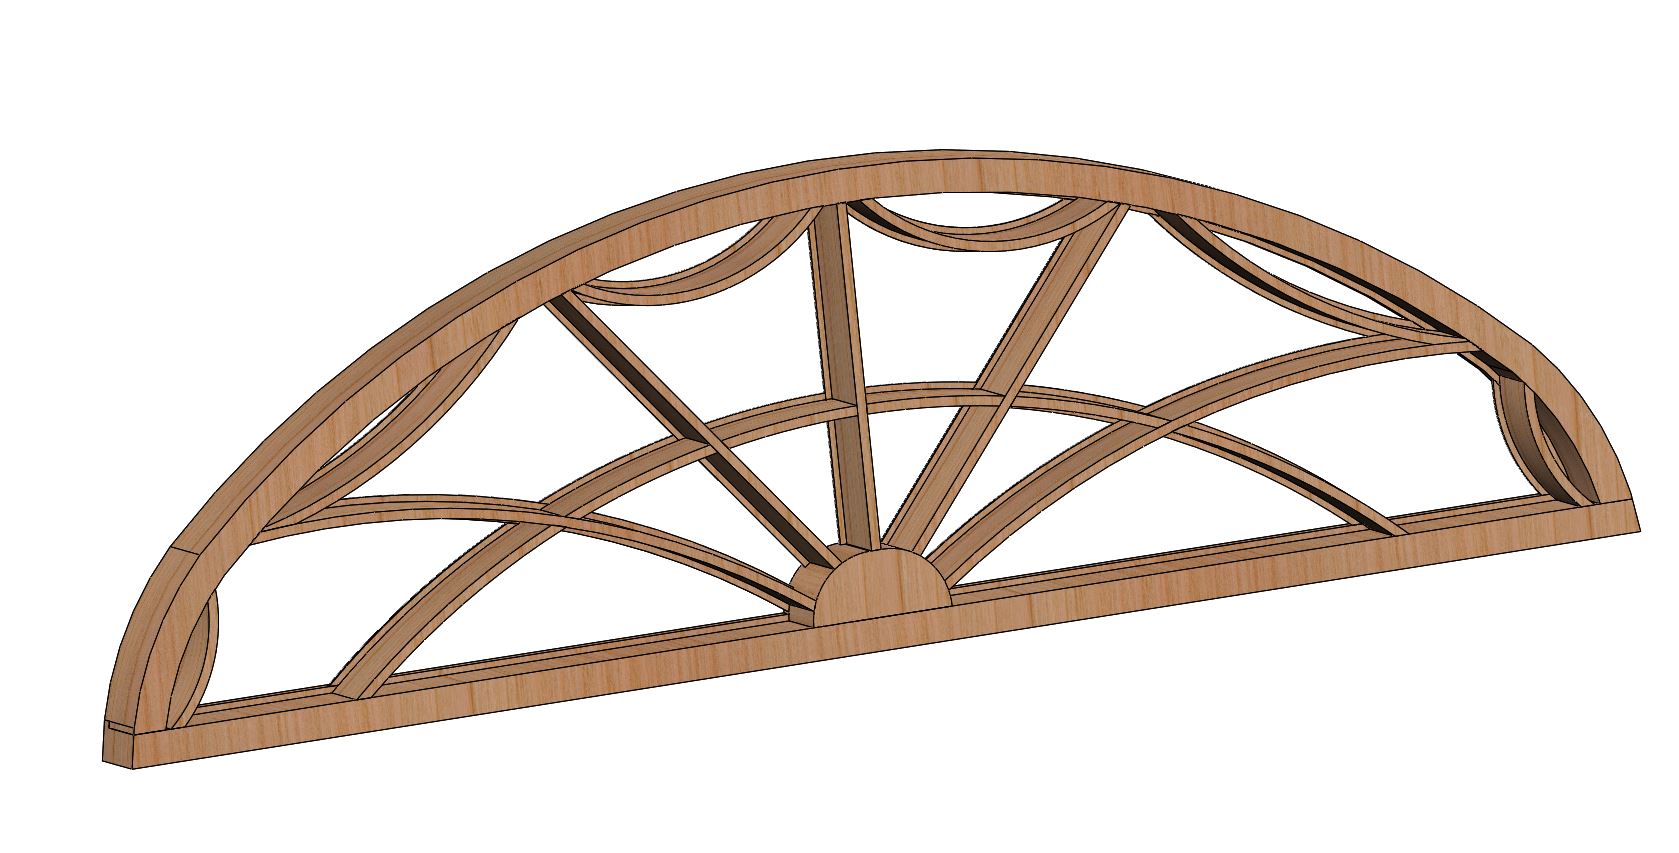
If you do want a model this does not take as long as you would think if you have the correct software. I find it helpful to see the parts, but some do not need that. I was curious how long it would take to model David's window, so I gave it a try. In about 45min I am well on my way. It is not perfect, but with a proper set of drawings showing some key dimensions it would be. I am far from being a millennial, but I do have experience 3D modeling.
I think trying to figure out how to cut David's parts would be a fun challenge. The first time would be a hair puller, but after that I bet you could copy a lot of the strategies to other projects. I suspect 4 - 6hr would make a good dent into creating the tool paths since many are mirror images, but I forsee some time making fixtures that could add some time and headache.
Interesting discussion.
View higher quality, full size image (1713 X 927)
View higher quality, full size image (1679 X 853)
10/29/16 #12: True divided Muntin bars in CNC ...

I think it's important to underscore for those that don't have CAD/CAM experience that a 3D model is a nice visual aid, but is irrelevant to the process.
They are also not difficult to generate if one wants to have the reference, and I often do so if I have any doubt as to the part intersections or the like.
Mr. Sochar's example has only three radius parts (Brad has complicated it a bit my making one of the radial muntins radiused, which in addition changes the length of one the short decorative muntins) - the outer frame is one, the individual decorative muntins between radial muntins is two, and the continuous (though manufactured in parts) elliptical muntin that is a simple offset of the outer frame is three. I'm assuming the straight parts would be manufactured on the shaper. Which is not to say this is a quick and easy job, but there is a lot of symmetry which would make the programming faster than one might think. Actual manufacture, including fixturing, would take some time, but I think I could draw, program and cut the parts, excluding assembly, in a 10 hour day.
10/31/16 #13: True divided Muntin bars in CNC ...

Leitz has a video showing muntins machined on the CNC. I like how they cut the part loose at the end using the saw tool. I am not sure I would machine multiple parts out of one blank like they show just because of the extra tooling required.
Leitz Muntins: https://www.youtube.com/w
|